Mystery Monotype Diecase Combs

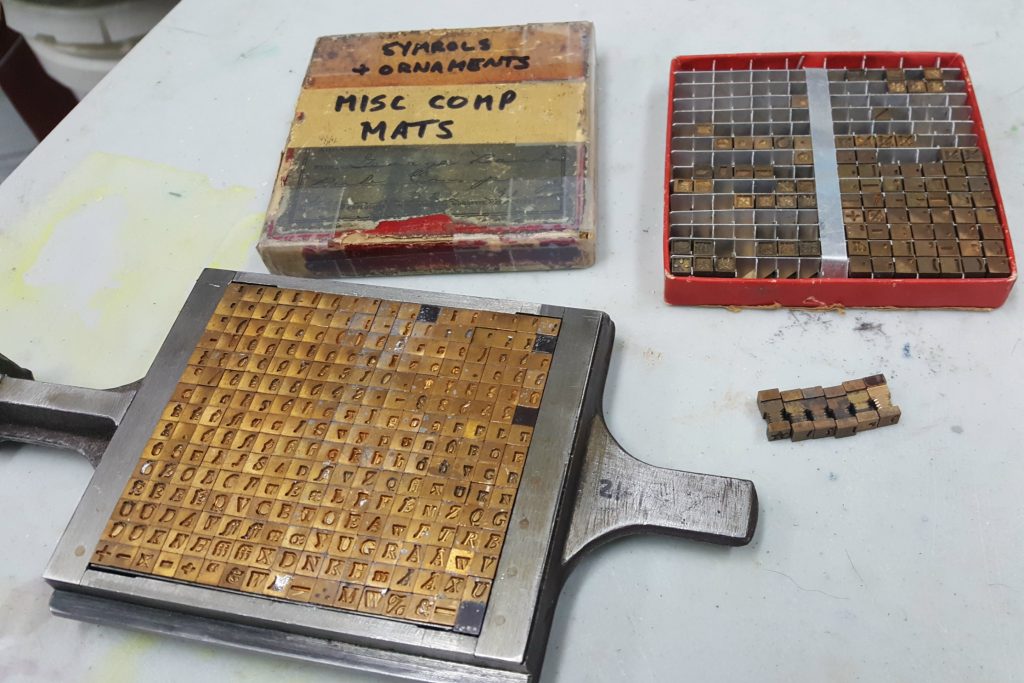
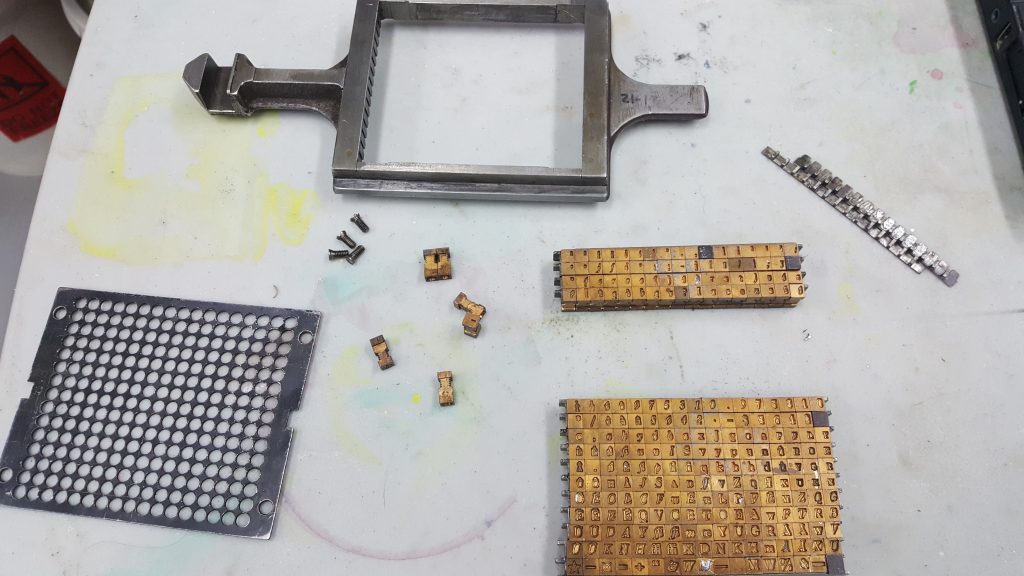
When running a Monotype Composition Caster to cast from cellular matrices, the matrices are usually contained in a diecase, which holds a 225, 255, or 272 matrices in a grid arrangement. The caster positions this diecase to select the appropriate matrix over the opening of the mould where the type is cast.

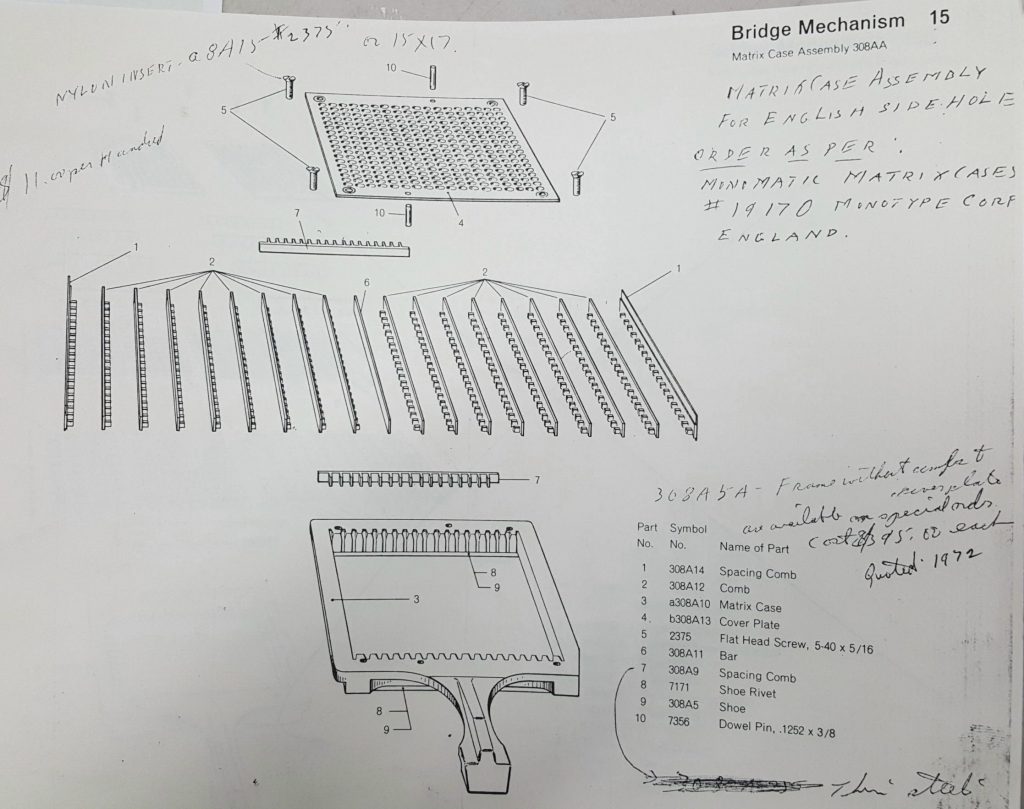
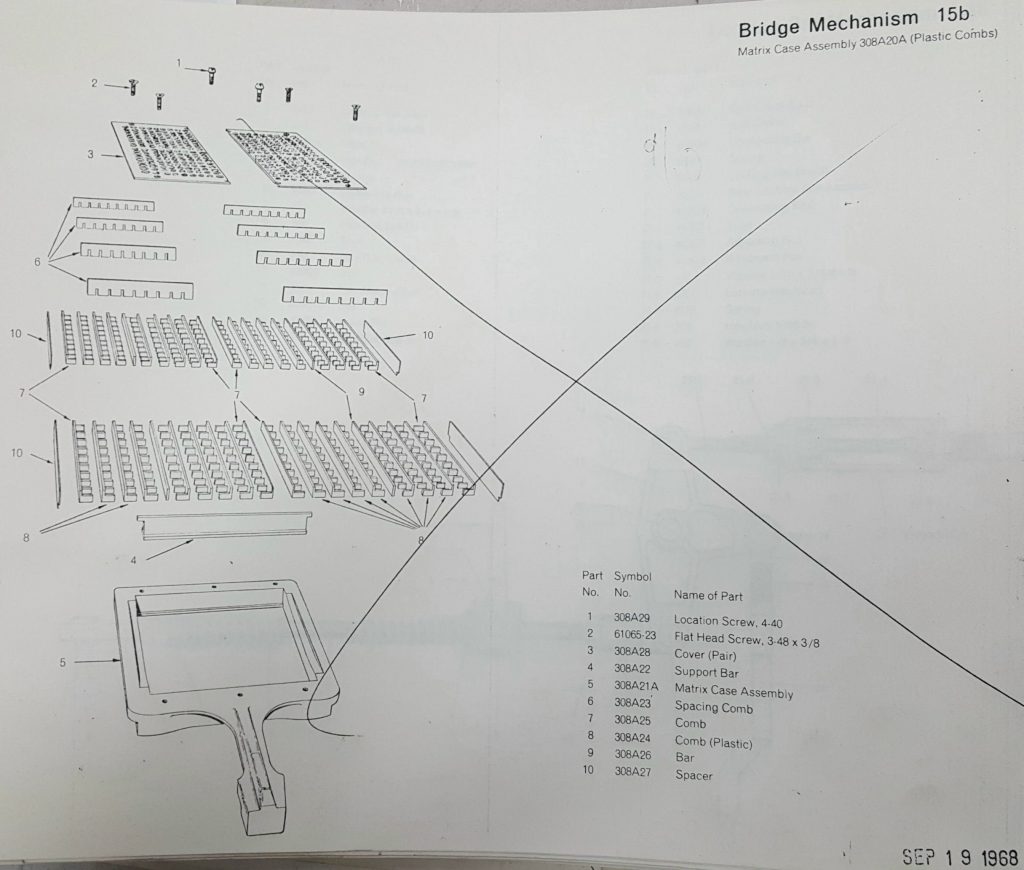
These diecases use one of two styles of parts to allow the individual matrices a bit of vertical movement relative to each other, while still preventing the matrices from all falling out of the diecase altogether. In the diecases made in the USA by Lanston Monotype, the matrices are held by combs which wrap around three sides of a wasp-waist in each matrix. The combs either have 15 or 17 positions for matrices.

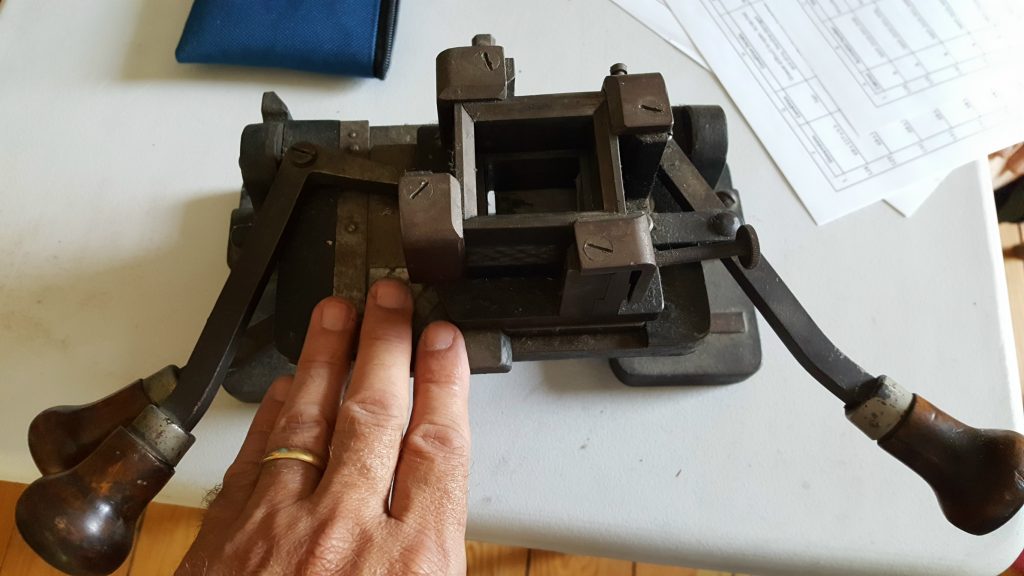
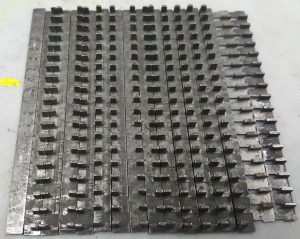
I was rummaging through my collection of Monotype diecase combs and found this mysterious set of combs:

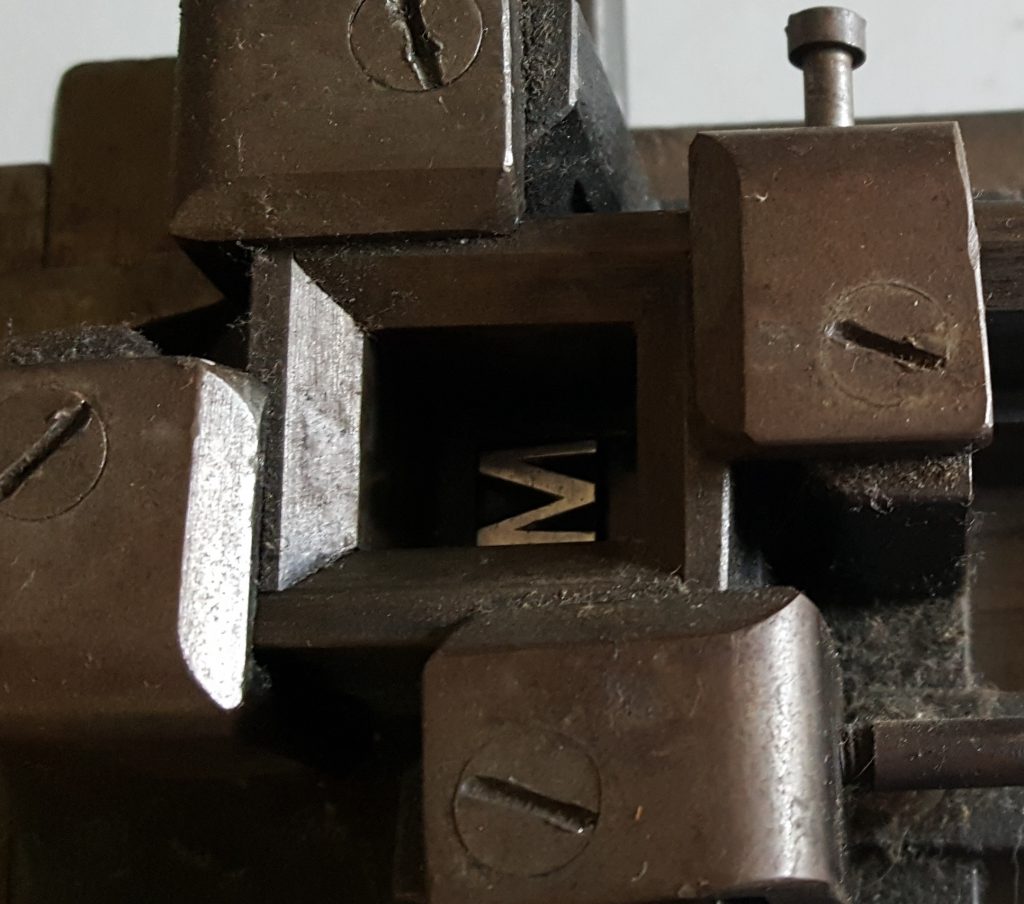
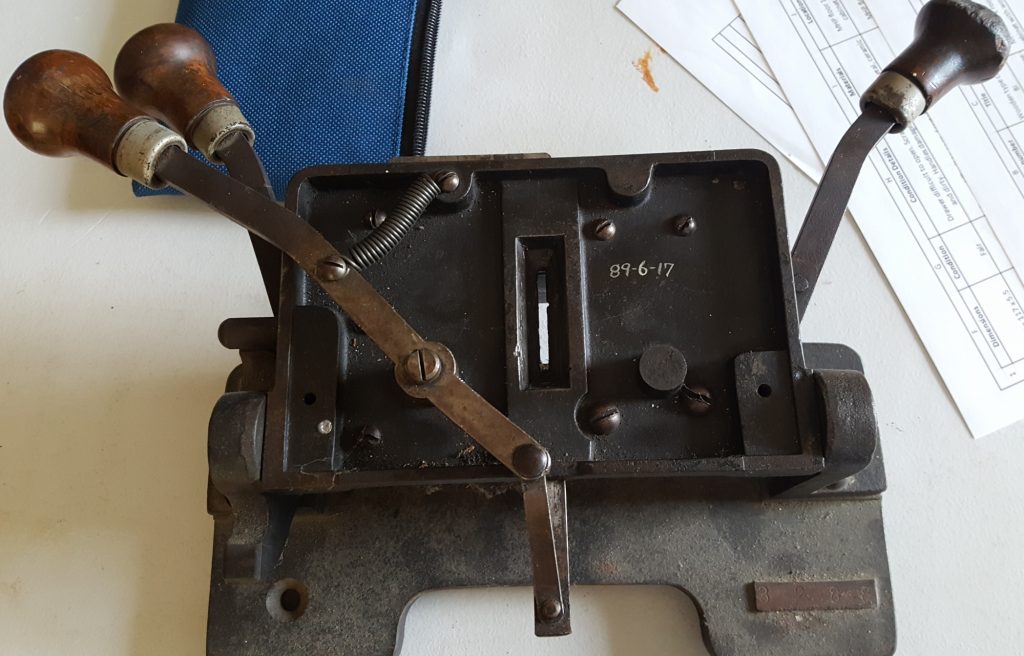
This seems to be a near-complete set of combs for a diecase, including one blank bar (on the left), the two special combs that fit to the outside edges of the grid of matrices, and 13 regular combs that fit between rows of matrices. But the strange part is that these combs have positions for 18 matrices, and I am not aware of any diecase configuration that contains 18 columns of cellular matrices.

I don’t know if I also have an empty diecase around that would use these, and I wonder if these are leftovers from a now-disused experimental diecase design, just like the other odd diecase I have. Used as part of a 15×18 diecase layout, this would have made 270 matrices available for casting, but it would have required a new design for the rear airpin block, possibly using airpin combination F+N as another column selection (just as N+L and N+I combinations select columns “NI” and “NL” in the current incarnation of the caster). This larger diecase would have been made obsolete by the Unit Shift feature, which provided 272 matrices in the diecase and allowed more flexibility in character width selection (without Unit Shift, all 15, 17, (or 18?) matrices in each row must cast to the same width).

I should note that although the later Monomatic caster used an 18×18 diecase, this was divided into four 9×9 quadrants, each with its own set of 9-position combs, so these are not for the Monomatic.

Postscript: Mystery solved—as described in a newer post, the Monomatic had two diecase styles: the divided ones that I’m more familiar with, and undivided ones that would use exactly these combs.

Looking for Papermaking Tutoring near Québec city

One of our customers near Québec city would like someone with papermaking experience to visit them to help them improve their papermaking techniques. Although my contact there speaks English I expect that it would be greatly preferable to have someone fluent in French to do this.

If you think you could help them out, please get in touch with us and we’ll hook you up with them.

Video: First run of Monotype Compostion Caster Computer Control

I just posted a video on YouTube of the first run of my Monotype Composition Caster under control of my laptop computer.

I have been working on the hardware and software for this interface on and off over several years, and this is the first time it has had all the features required to properly operate the caster. The last thing to be added was the cycle sensor, which detects the time when the caster would normally have been reading the punched paper ribbon that this interface supersedes.

The interface operated flawlessly, though in subsequent runs (including on a live Zoom demo for the virtual American Typecasting Fellowship conference) it has had some electrical problems. It turns out that when the air compressor kicks in, some electrical noise often causes the communications to the interface to freeze, and the computer can no longer read the status from the interface. On reviewing the software on the laptop I see that reading the status from the interface is done with no timeout. Oops, my bad!

You can also see clearly in the video that the casting part is not tuned properly, as the type is being produced with fins instead of sharp corners, some type has no face on it, and the line length is drifting a lot so the type gets jumbled. This is in addition to the fact that I don’t have the matrix case to match the file I’m reading on the laptop, so the output, had it been fit to print, would still have been a sort of substitution cipher of the correct text.

I have also been adding some features to the software on the laptop to make it easier to skip from one casting line to the next or previous, or back to the start of the file, or to make it loop on a single line of type or loop the entire file. By the way, the application on the laptop is written in Java.

Papermaking Workshop is back!

After about 17 months delay, we’re pleased to announce that we will be holding one of our Introductory Papermaking workshops, on Saturday August 21st, from 9am to 4pm.

Because the COVID pandemic has not entirely cleared up, our workshop format will be a bit different from usual. The main change is that the workshop will be held outdoors, either in the open, under canopies, or on our open covered porch, depending on the weather that day. We will also be modifying how some of the equipment is used to minimize sharing, and of course hand sanitizer will be available as required.

This workshop had originally been scheduled for March 28th, 2020, but had to be cancelled because of the rising number of COVID-19 cases. You can check the original announcement for a bit more detail on the course.

Return of workshops?

We’re still under various restrictions due to the COVID-19 pandemic, but they are slowly easing up a bit. Unfortunately, our local region has been identified as a hot spot for the disease so we are staying under stricter restrictions that the rest of Ontario for at least an extra couple of weeks.

We don’t feel it is practical to hold a workshop with everyone wearing masks, so we would like to wait until we are allowed to have small unmasked indoor gatherings of strangers, and that might be a while yet.

We could perhaps hold an outdoor workshop, but that is dependent on the weather, making these hard to plan. A sudden downpour and everyone has to scatter for cover, so everyone has to mask up to enter the building… Though it might be interesting to see the result of a mould left out in the rain with the wet paper still on it! Maybe we have enough awnings and tents to keep everyone dry during light rain; I’ll have to see what we have.

Replacing a defective light switch

A few years ago I installed improved lighting in my basement workshop. Recently I’d been noticing that the light switch sometimes made a “pop” or slight sparking noises when I switched it on or off. This seemed to be getting worse, so it was time to replace the switch. The original switch was just a household-duty 15 amp light switch, so I thought I should perhaps upgrade it to something more robust. The local Home Depot didn’t seem to stock commercial-duty switches, but I found a switch that has 20 amp capacity and also has a more definitive “click” action.

After replacing the switch I dismantled the old one for an autopsy. Here is what the contacts looked like:

The contacts had clearly been suffering from arcing. There was a sooty deposit inside the switch in the area of the contacts as well.

So what I am wondering is: why did this happen? The switch is rated for 15 amps, and it is switching 8 fluorescent fixtures each drawing a maximum of 1 amp, for a total of 8 amps. Each fixture holds two 32-watt tubes, so if the actual current draw of the fixture is probably closer to 0.6 amps each (2×32 watts for the tubes + guessing 10 watts for the ballast losses divided by 120 volts) for a total of 4.8 amps overall. Either way the switch contacts should have had plenty of capacity.

My only guess is that although the electronic ballasts in the lamps normally draw at most 1 amp, they may have a much higher peak current on startup as they charge up an internal power supply. Thus each time the lights were turned on the switch would encounter much higher current for a few milliseconds. If the switch contacts bounced much as they closed this would cause a bit or arcing, each time eroding the contacts a bit and making the contacts worse for next time.

Hopefully the new switch has a more definitive snap-closing for the contacts (reducing bounce) and more capacity to dissipate the heat generated by arcing so it will last more than the 8 years the first one did. I actually accidentally bought a double-pole switch, so even if these terminals fail again I can move the circuit over to the other as-yet-unused pole of the switch.

Updated Catalogue, New Prices

I’ve just updated our catalogue to (finally) list some new products (kenaf and hemp/cotton pulp, powder retention agent) and remove some discontinued ones (liquid coagulant).

Unfortunately we’ve also raised our prices on several products, notably our moulds and deckles.

You can download a fresh copy from this page in our Products section.

Wayzgoose 2021 Anthology

Although the COVID-19 pandemic has reduced this year’s Grimsby Wayzgoose to a virtual event, an Anthology is still being produced.

We made a 1-sheet/4-page submission for this on some paper handmade from recycled discards from a local artist. The pulp turned out to be very hard to use. It was slow-draining, muddy-feeling due to a high filler content, but so runny that it would leak around the tiniest gap at the edge of the deckle and seep under the divider of a divided deckle. Audrey ended up having to make this one slow sheet at a time because the two-up divided deckle left the sheets joined by the seepage under the divider. She was not a happy camper!

The paper ended up with very wild deckle edges, which I mostly had to trim off to get any sane register when printing.

We have more of this paper to recycle and from now on we’ll have to blend it with some longer fibres that can plug up the leaks around the deckle.

The content was inspired by a collection of large manicules we picked up last summer from a local hobby printer who was closing up. What irks me is that I was sure that we had an even larger pair of these but though you would expect it to be difficult to mislay something that large, I was darned if I could find them.

Most of the small manicules in the body of the text were cast on my Monotype caster. I was originally going to use a different one for each instance but I did not have enough different ones and it was either all different or all the same.

Only after the printing was all done did I notice that the two manicules are in the classic “this big” pose, which was not my intent; I just wanted to show them in a manner that was somewhat symmetric and would not instill discomfort thinking about how one would arrange one’s arms to get the pose. Fortunately the distance between the fingertips is pretty close to the actual length of each manicule, at least within fishing tale standards.

The colophon was set in Binny Old Style 12pt, by the way. Does the colophon need its own colophon? Would this go on forever if each has a new face?

A collection of Monotype pumps

Someone recently asked me about spare parts for the pump for a Monotype caster so I went through what I have.

This is a standard English pump, installed on my composition caster.


A Lanston strip-casting pump and piston, recently used for strip-casting experiments


An English display-casting pump piston. The short head and lowered lever groove provide a longer stroke and thus more pump volume.

All my other pumps and pistons, see main text for details.

In that last photo, top-to-bottom:

  • A pair of wear shoes for Lanston pump bodies
  • An English standard pump body, apparently new
  • An English large-diameter (1⅛″) pump, apparently new
  • A Lanston standard pump
  • A Lanston large-diameter (1⅛″) pump piston
  • Two English standard pump pistons
  • (across all the pistons) A pump stem to use an English-style piston head in a Lanston pump body, head and handle missing, apparently new

Since I want to keep both Lanston and English pumps for my caster, the only parts here that I can spare are the 1⅛″ English pump and Lanston piston, one of the standard English pistons, and that strange piston stem for using an English head on a Lanston pump. So if you’re interested in any of those parts, make me an offer.


Giving up on Strip Casting (for now)

After several unsuccessful attempts at casting strip material on my Monotype Composition Caster, I’m giving up for a while.

The problems I’ve been fighting with include:

  • Unfused strip material, which easily breaks up into pieces
  • Blowback through the nozzle seat
  • Mould jams (strip material doesn’t advance)
  • Difficulty adjusting the mould clamp
  • Incomplete filling when using wider (6pt) moulds
  • Under-table squirts which foul the nozzle and its seat
  • Temporary misplacement of my collection of rule matrices, reducing the utility of strip casting in general

The first two can be attributed to the temperature of the metal and the mould. Unfused strip material occurs when there is not enough heat to partially melt the end of the previous cast so it can fuse to the new cast. Blowback occurs if the metal and/or mould are too hot and the metal is still molten when the pump disengages from the mould, allowing the pressurized air bubble in the mould cavity to blow the molten metal back out of the nozzle port. I have also recently made some improvements to the cooling water system on the caster, which should help with temperature control.

I found myself sort of thrashing trying to solve these interacting issues and decided it was time to take a step back and think about the problems more rationally. In the meantime I’ve removed the strip-casting attachment and converted the caster back to type casting.

Since then I’ve already found possible (and even likely) causes for some of the problems:

I had already determined how to deal with poor fusion and/or blowback but it is impossible to find the sweet spot between these extremes unless the rest of the casting is going smoothly.

Close examination of the pump piston has revealed that the ports on it which admit the metal into the pump chamber were pretty much completely plugged up, explaining the poor filling on larger moulds. These have now been cleaned.

I had not noticed that the caster was running with one of the gag plates installed (under the pot bracket). These plates cause the pump to start pumping a little earlier in the cycle. This could potentially lead to leakage around the nozzle if the pump trip latch is not also in use. I had tried casting with the trip latch both on and off and neither position seemed to make much difference given the randomness from all the other problems. It should be noted that although the trip latch delays the onset of pumping until the nozzle is seated (producing a burst of metal flow instead of the slow onset of flow with no plates or latch), it does nothing about the delayed end of the pump return stroke. Thus if the mould cavity is very small, or still contains unejected metal from a previous cast, there can still be pump pressure when the nozzle disengages, leading to the under-table squirt. The mould I had squirting problems with was a 2-point strip mould; with a ½″ mould blade stroke that amounts to about the same volume of metal as an 8- or 9-point em quad. Clearly I should not have any of the plates engaged for this. So this might explain the under-table squirting.

The mould jams and clamp adjustment sort of go hand-in-hand. The manuals seem to imply that the spring on the vertical rod that operates the clamp should compress a tiny bit (1/16″ seems to be the target value) during the casting part of the cycle. I was finding, though, that this was preventing the cast material from advancing out of the mould. I have since realized that there are two things that resist the clamp screw: One is the stiffness of the mould cavity sides, the other is the previously-cast material already in that area of the mould. If the clamp is adjusted with too-thin material preset in the mould, the prescribed amount of clamp pressure will close the clamp too far (as only the flex of the mould side resists the clamp force). More importantly, the clamp will not open far enough to freely admit the next cast piece, since the caster only rotates the clamp screw about a tenth of a turn. Next time I’ll have to experiment with this adjustment more. I’m not entirely sure what the effects are of not closing the clamp enough (or not closing it at all), partly because I don’t know if the mould cavity naturally has some taper to it, which the clamping is supposed to take up. Perhaps fixing the squirt issues will allow me the freedom to do such experiments in an effective manner. The mould jams could also be because my home-made spring box does not contain sufficiently stiff springs. Yet another cause could be some dirt incursion when I serviced the mould, so I’ll have to take it apart and re-assemble it again in a cleaner (and cat-hair-free) environment.

I seem to always have something around the shop that I’ve lost (after having stored it in a “safe”/”obvious” place!) and don’t find until long after I’ve given up, and am searching for the next unfindable object. I had a mat holder in this state of limbo, and recently my collection of rule matrices has been unfindable. In the process of looking for my latest unfindable (some large cuts, still not found), I have located the matrices so I can try them with the 6-point mould next time I’m trying strip casting.

I think I have some things to try for all the problems I’ve encountered so another attempt at strip casting is on the to-do list.

Top