
After my Bad Casting Day, one thing on the to-do list was to tear down the mould because the type being cast had a lot of flash at some of the edges.
The face of the mould, where the matrix seats against it, consists of four parts, which must all match in height within a fraction of a thousandth of an inch (under 25 microns) to prevent type metal from entering a gap between the matrix and mould face and forming flash on the type. The corners of the cavity opening must also be sharp; if they are rounded at all the cast type will have a ridge along the top edge, making for inferior lockup in the chase. The type will either resist planing as these ridges snag on the next type in the line, or will cause the type to bow up when locked up.
If being cast as a font for the typecase, such flash and edge ridges will wear off the type pretty quickly as it is re-set in new formes, but until then it is a nuisance for the type setter. When casting composition, where the type is never handled loose, there is nothing to clean this up.
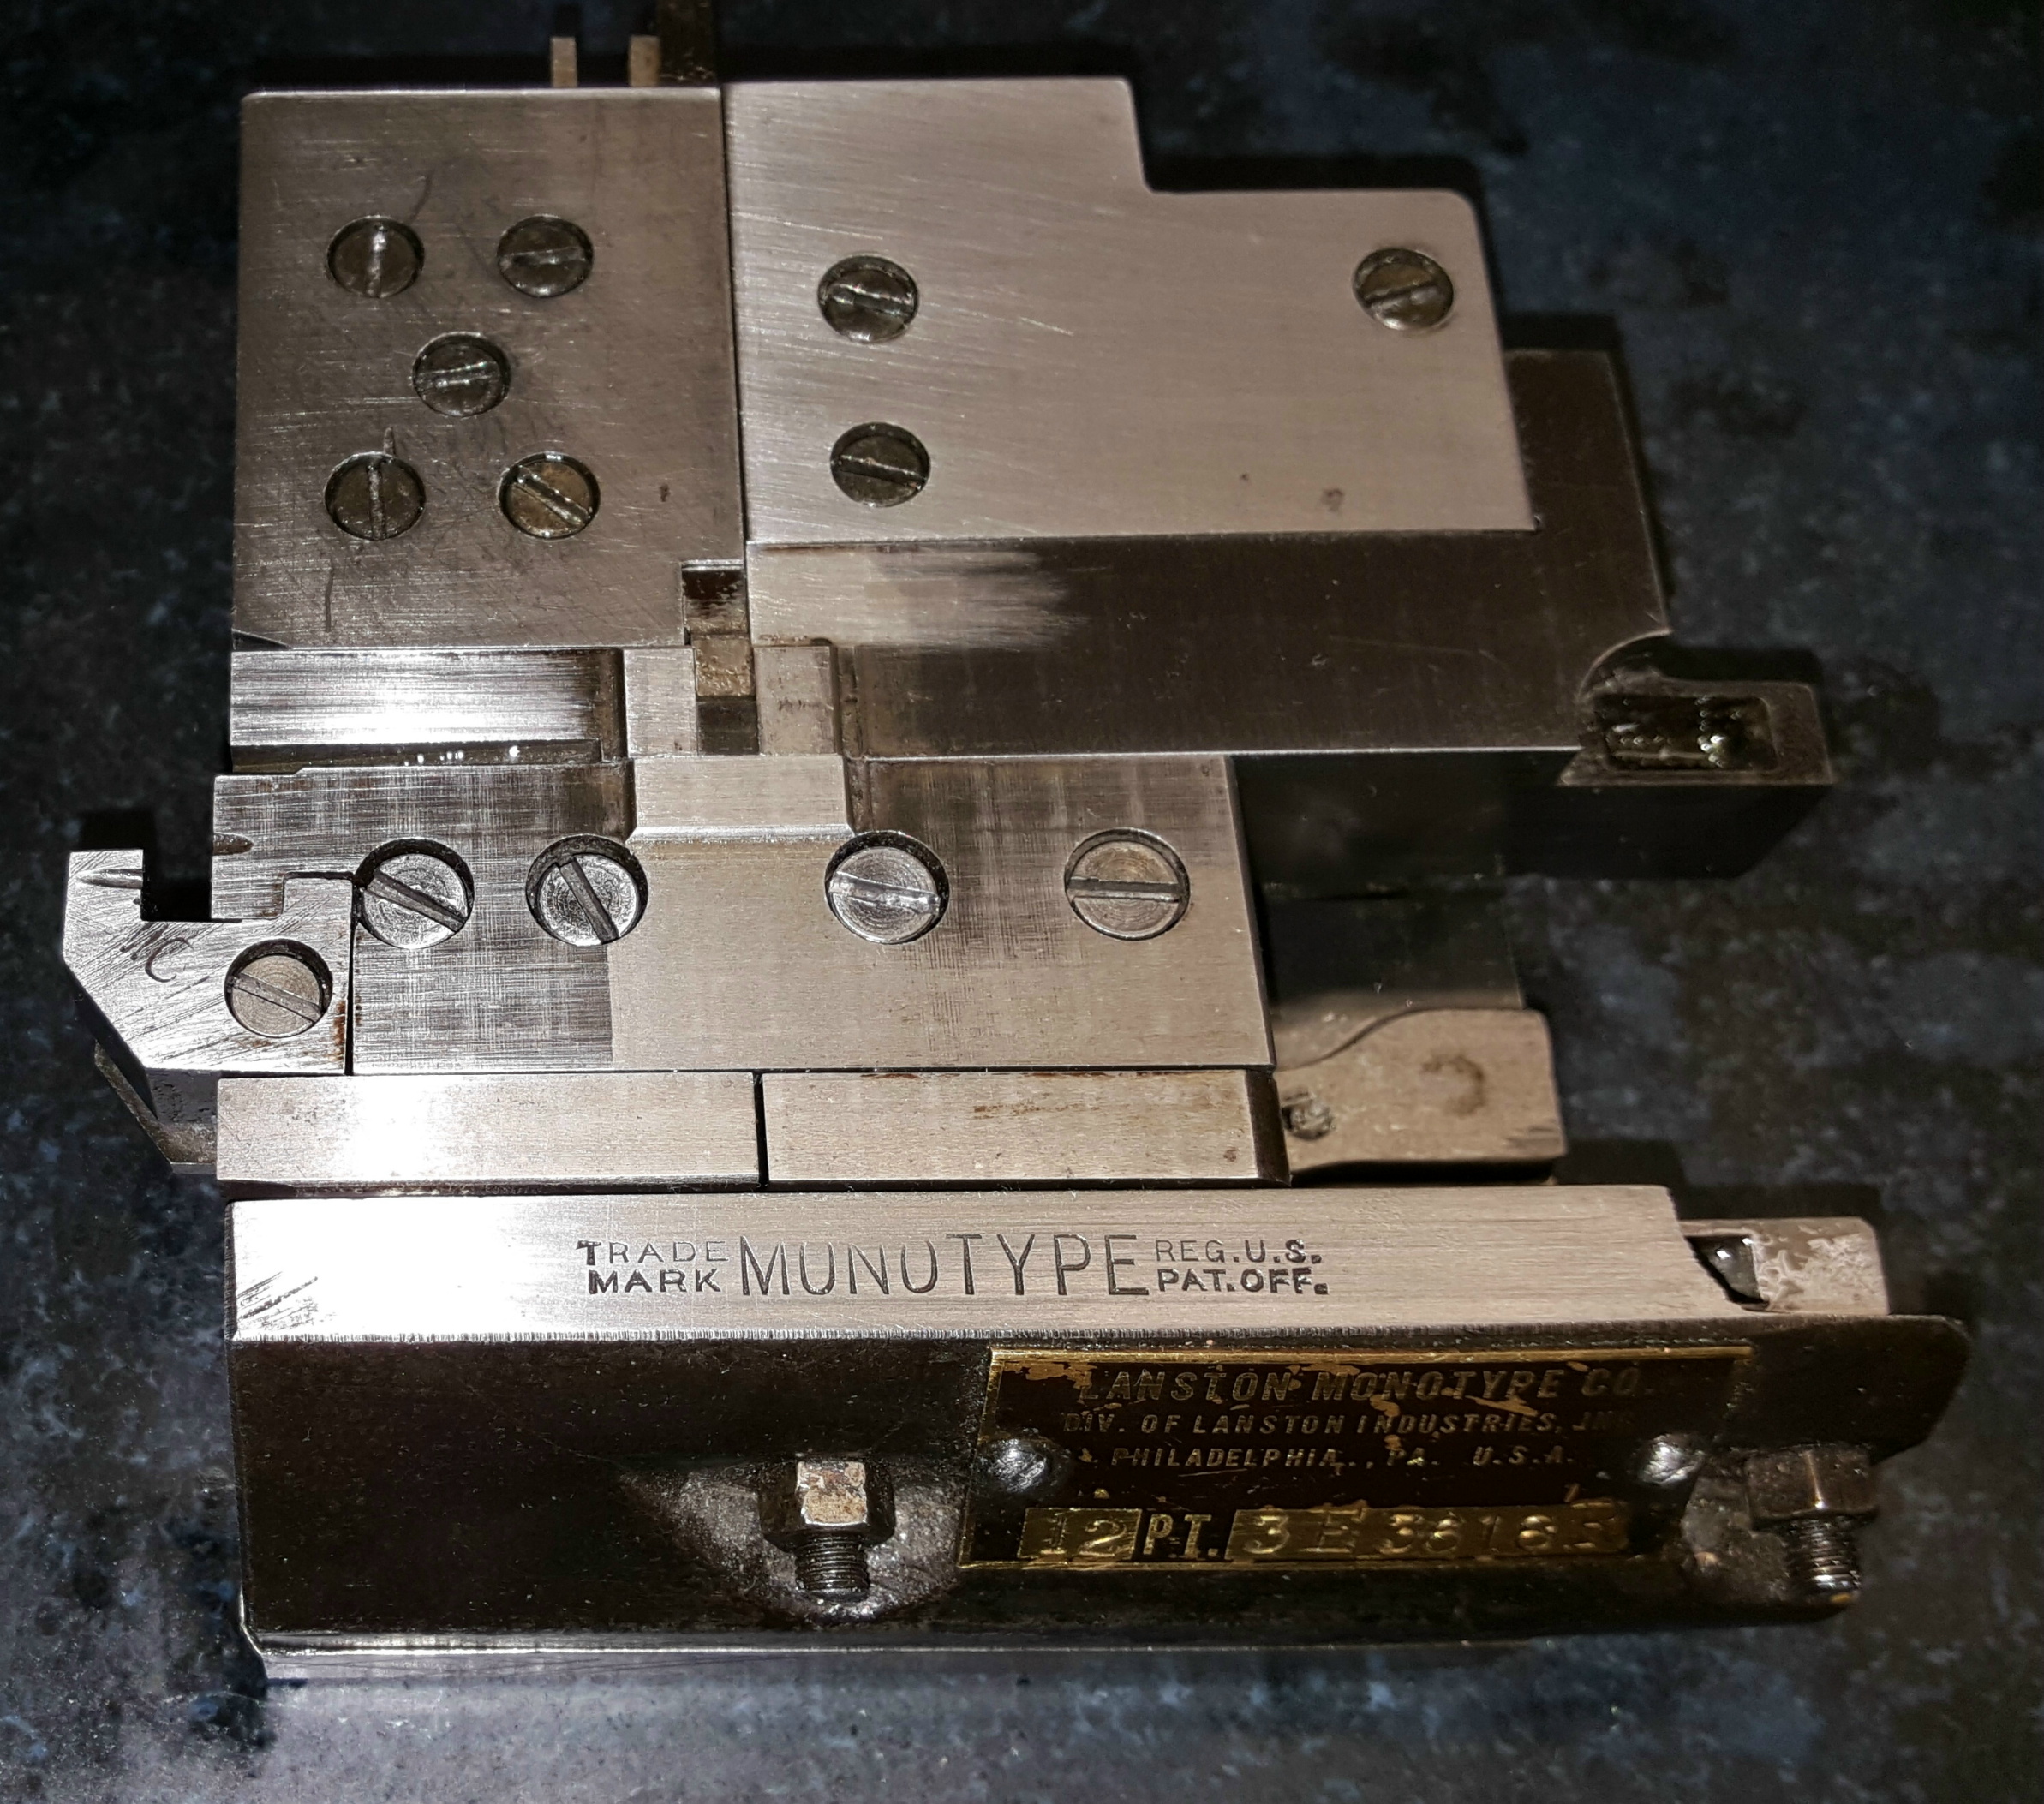
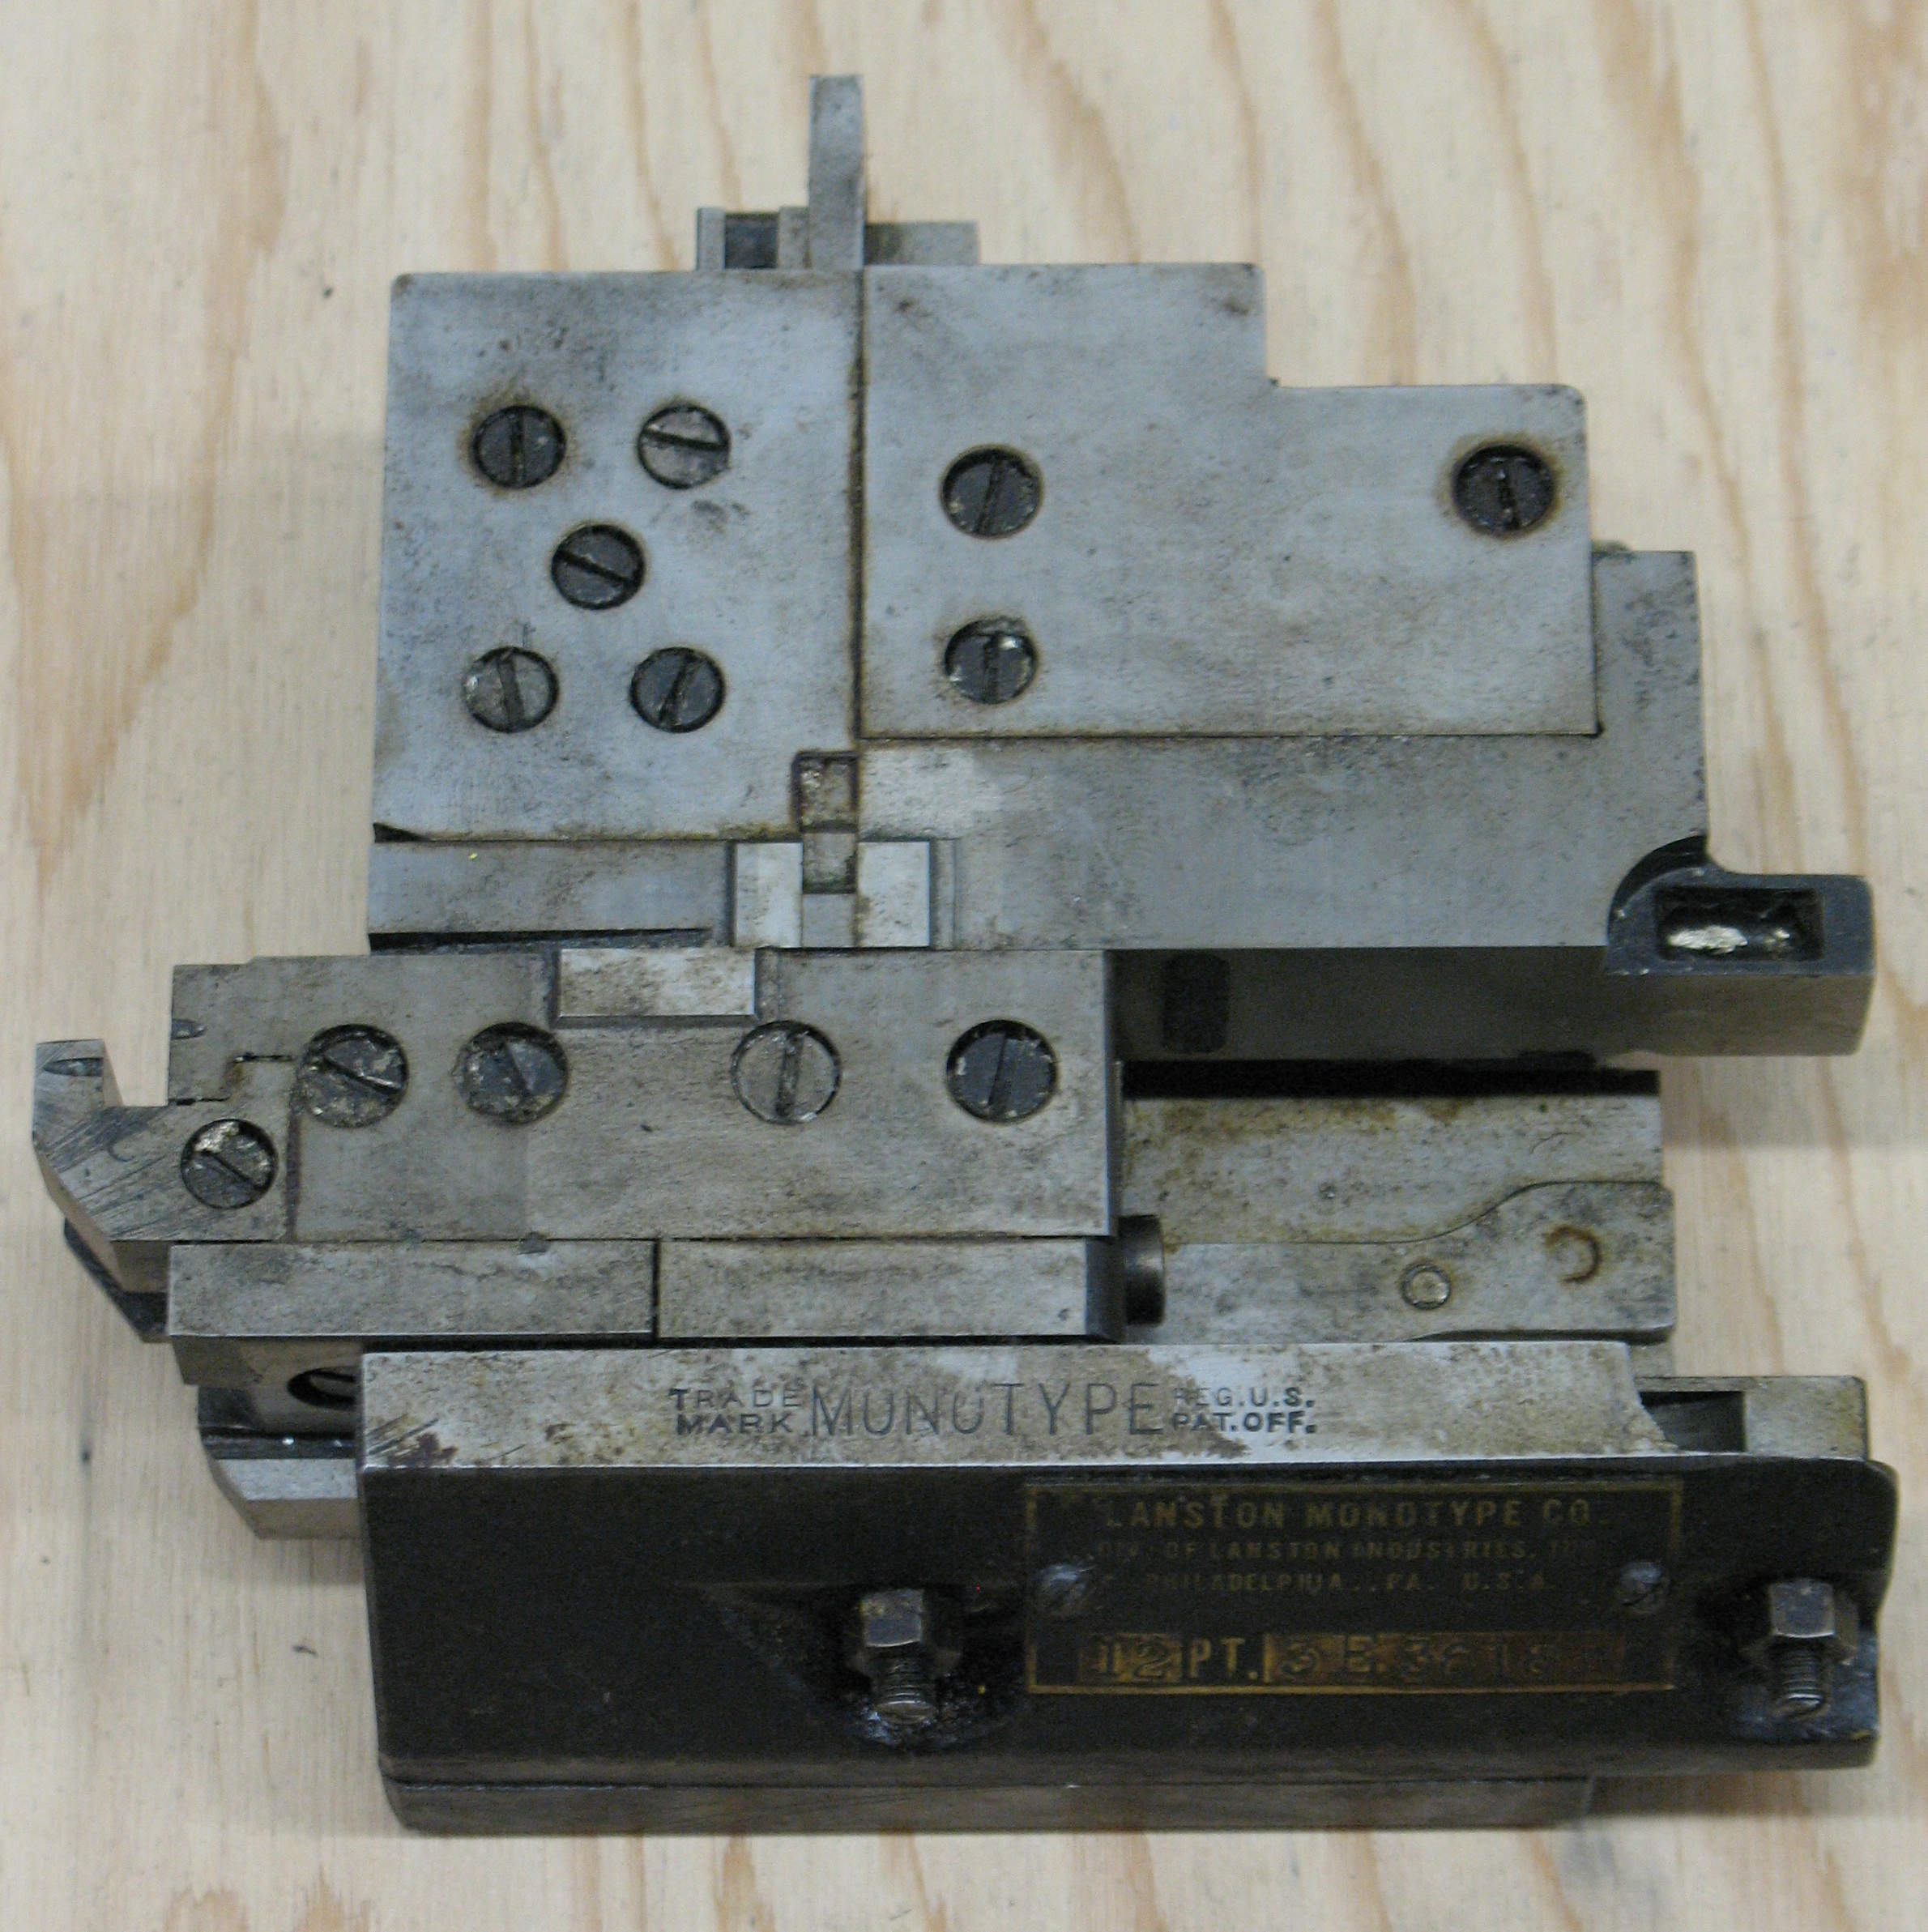 The mould is a Lanston 12-point type 3E mould, serial number 3618R. I suspect the ‘R’ refers to it having been refurbished. This mould has the grooves in the crossblock to allow air to leave the casting cavity, something done by Hartzell Machine on moulds they worked on.
It looked a bit grubby and I don’t think I had ever had it apart. These moulds have only two adjustments (gate ejector and crossblock); all the other clearances and dimensions are set by precision mating surfaces. The key to good alignment is to have these mating surfaces perfectly clean during assembly.
Another source of flash on the type is wear of the mould. The top surface gradually wears from having the matrices pressed against it hundreds of thousands of times, and the sliding surfaces on the mould blade and crossblock can wear as well. A close inspection of this particular mould shows little wear around the top surface, so I suspect it has seen little use and therefore I expect the sliding surfaces to be in good condition as well.
Before tearing it down, I measured the height of the four parts that form the face of the mould: The crossblock, top blade, and left and right type blocks. I attached a “tenths” (0.0001″/2.5 micron per graduation) indicator to my height gauge and placed everything on a machinist’s flat stone. The height gauge does not have as high an accuracy but I left its height locked and compared the readings with some Jo-blocks (precision calibrated reference blocks) to get the absolute height of the mould.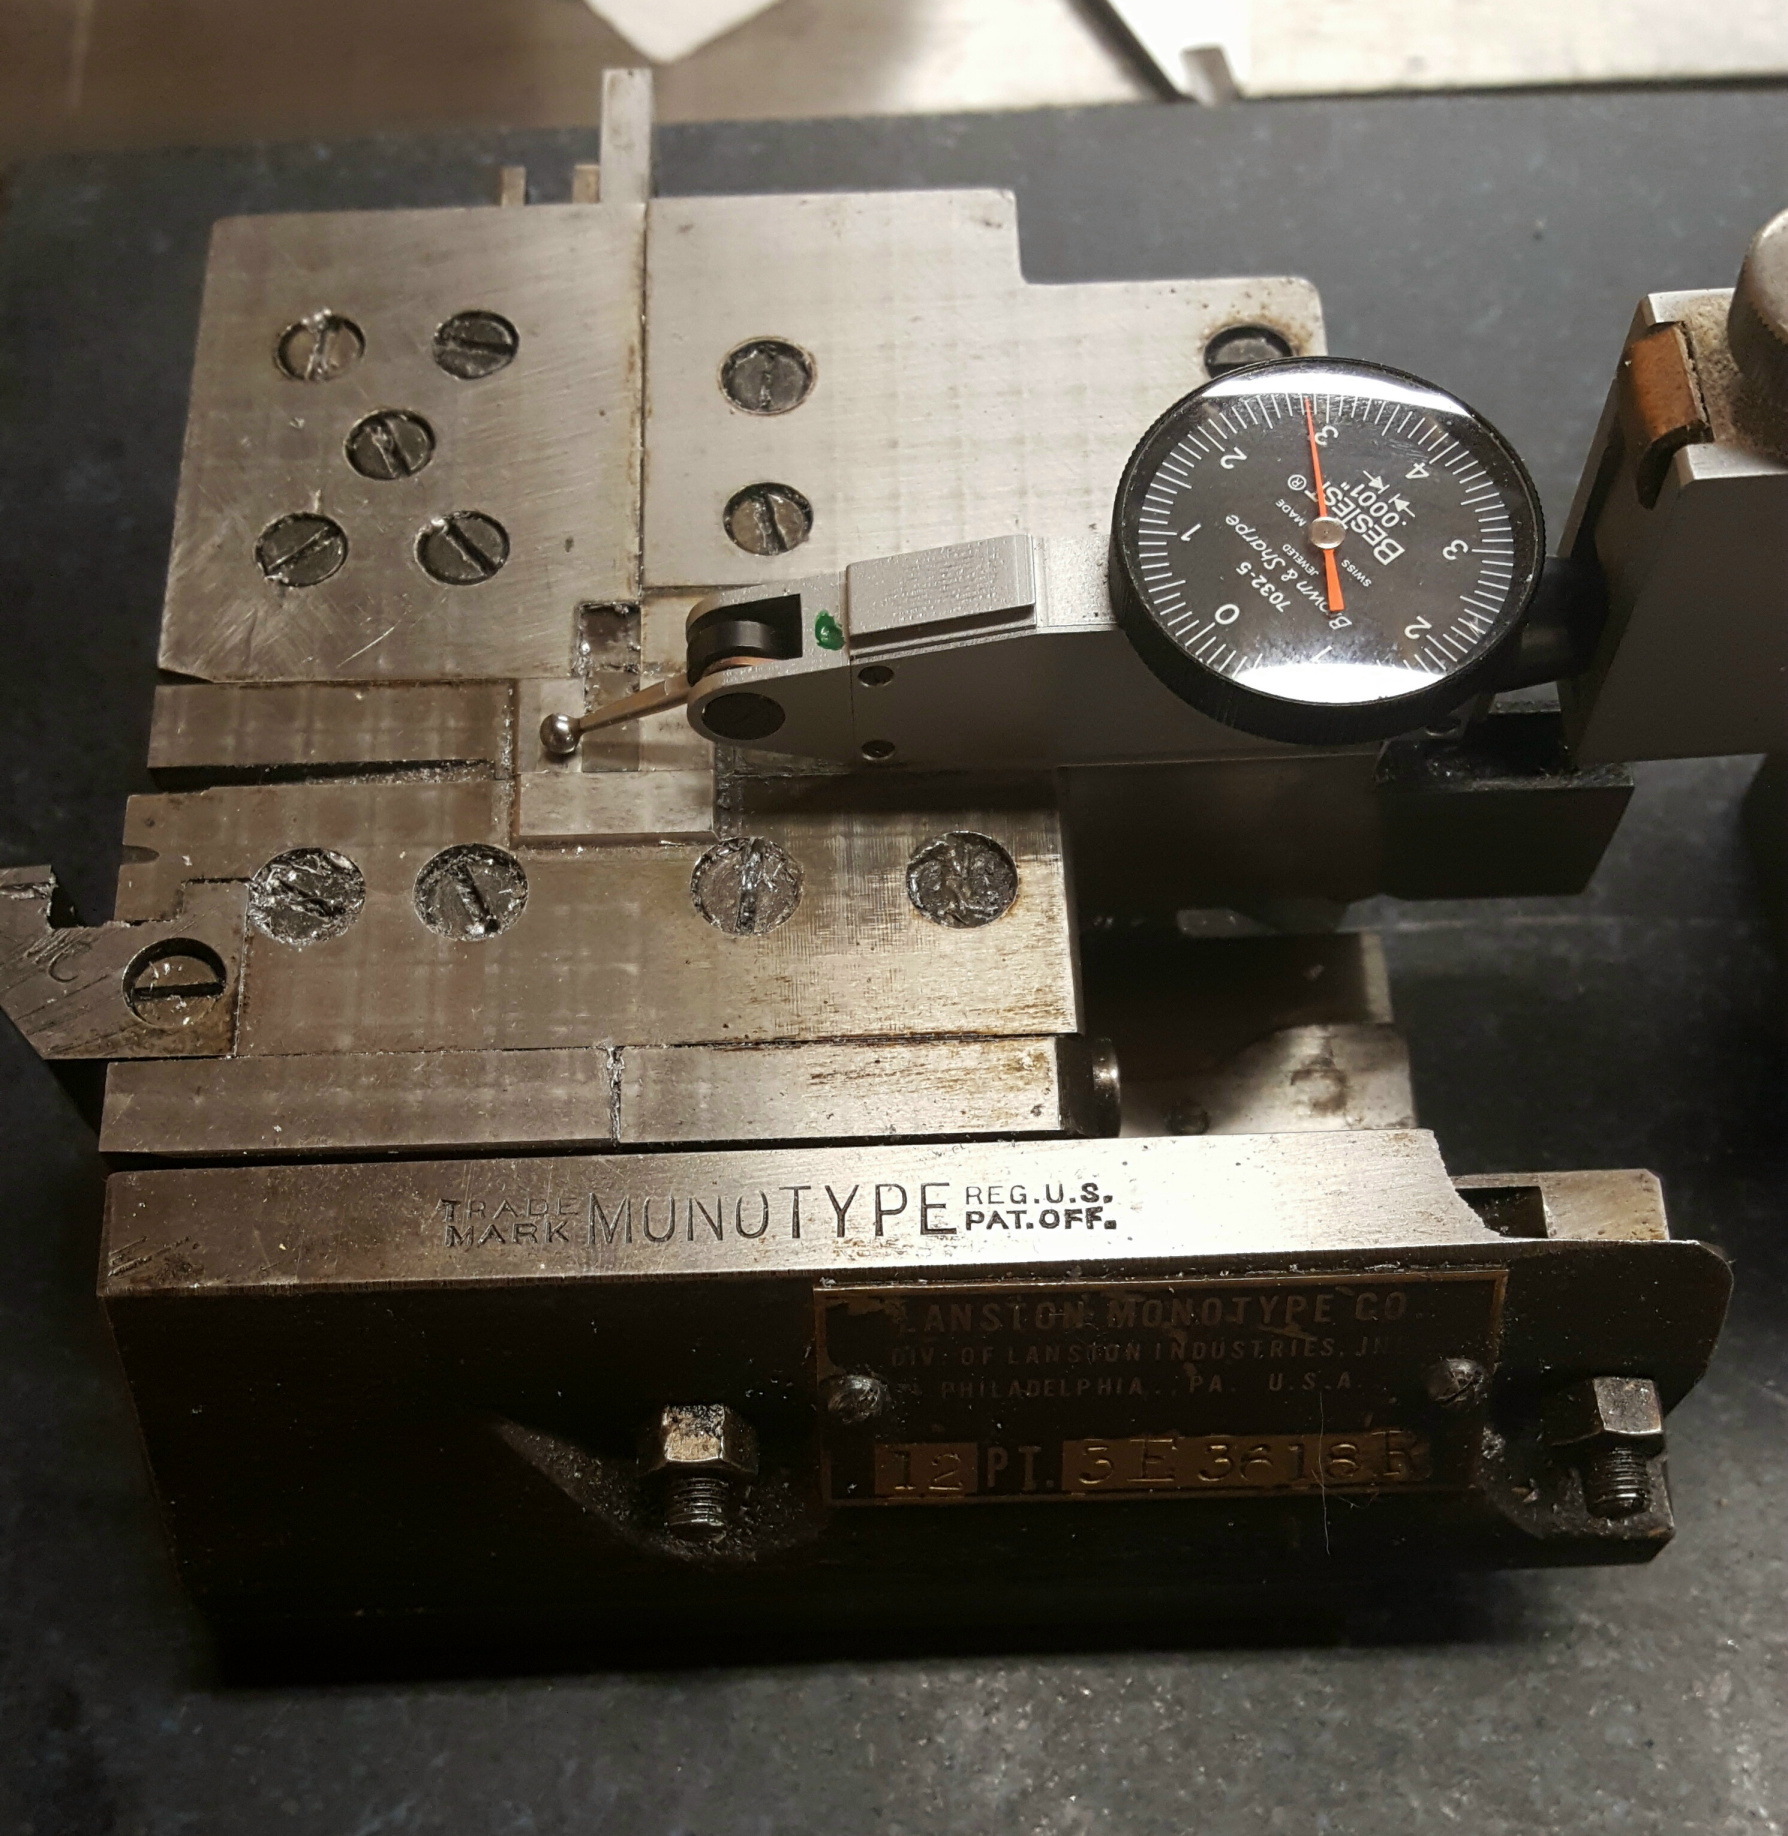 The overall height of the mould was 1.7527″ (44.519mm), but there seemed to be about 0.0005″ (12µm) variation between the various parts of the top of the mould.
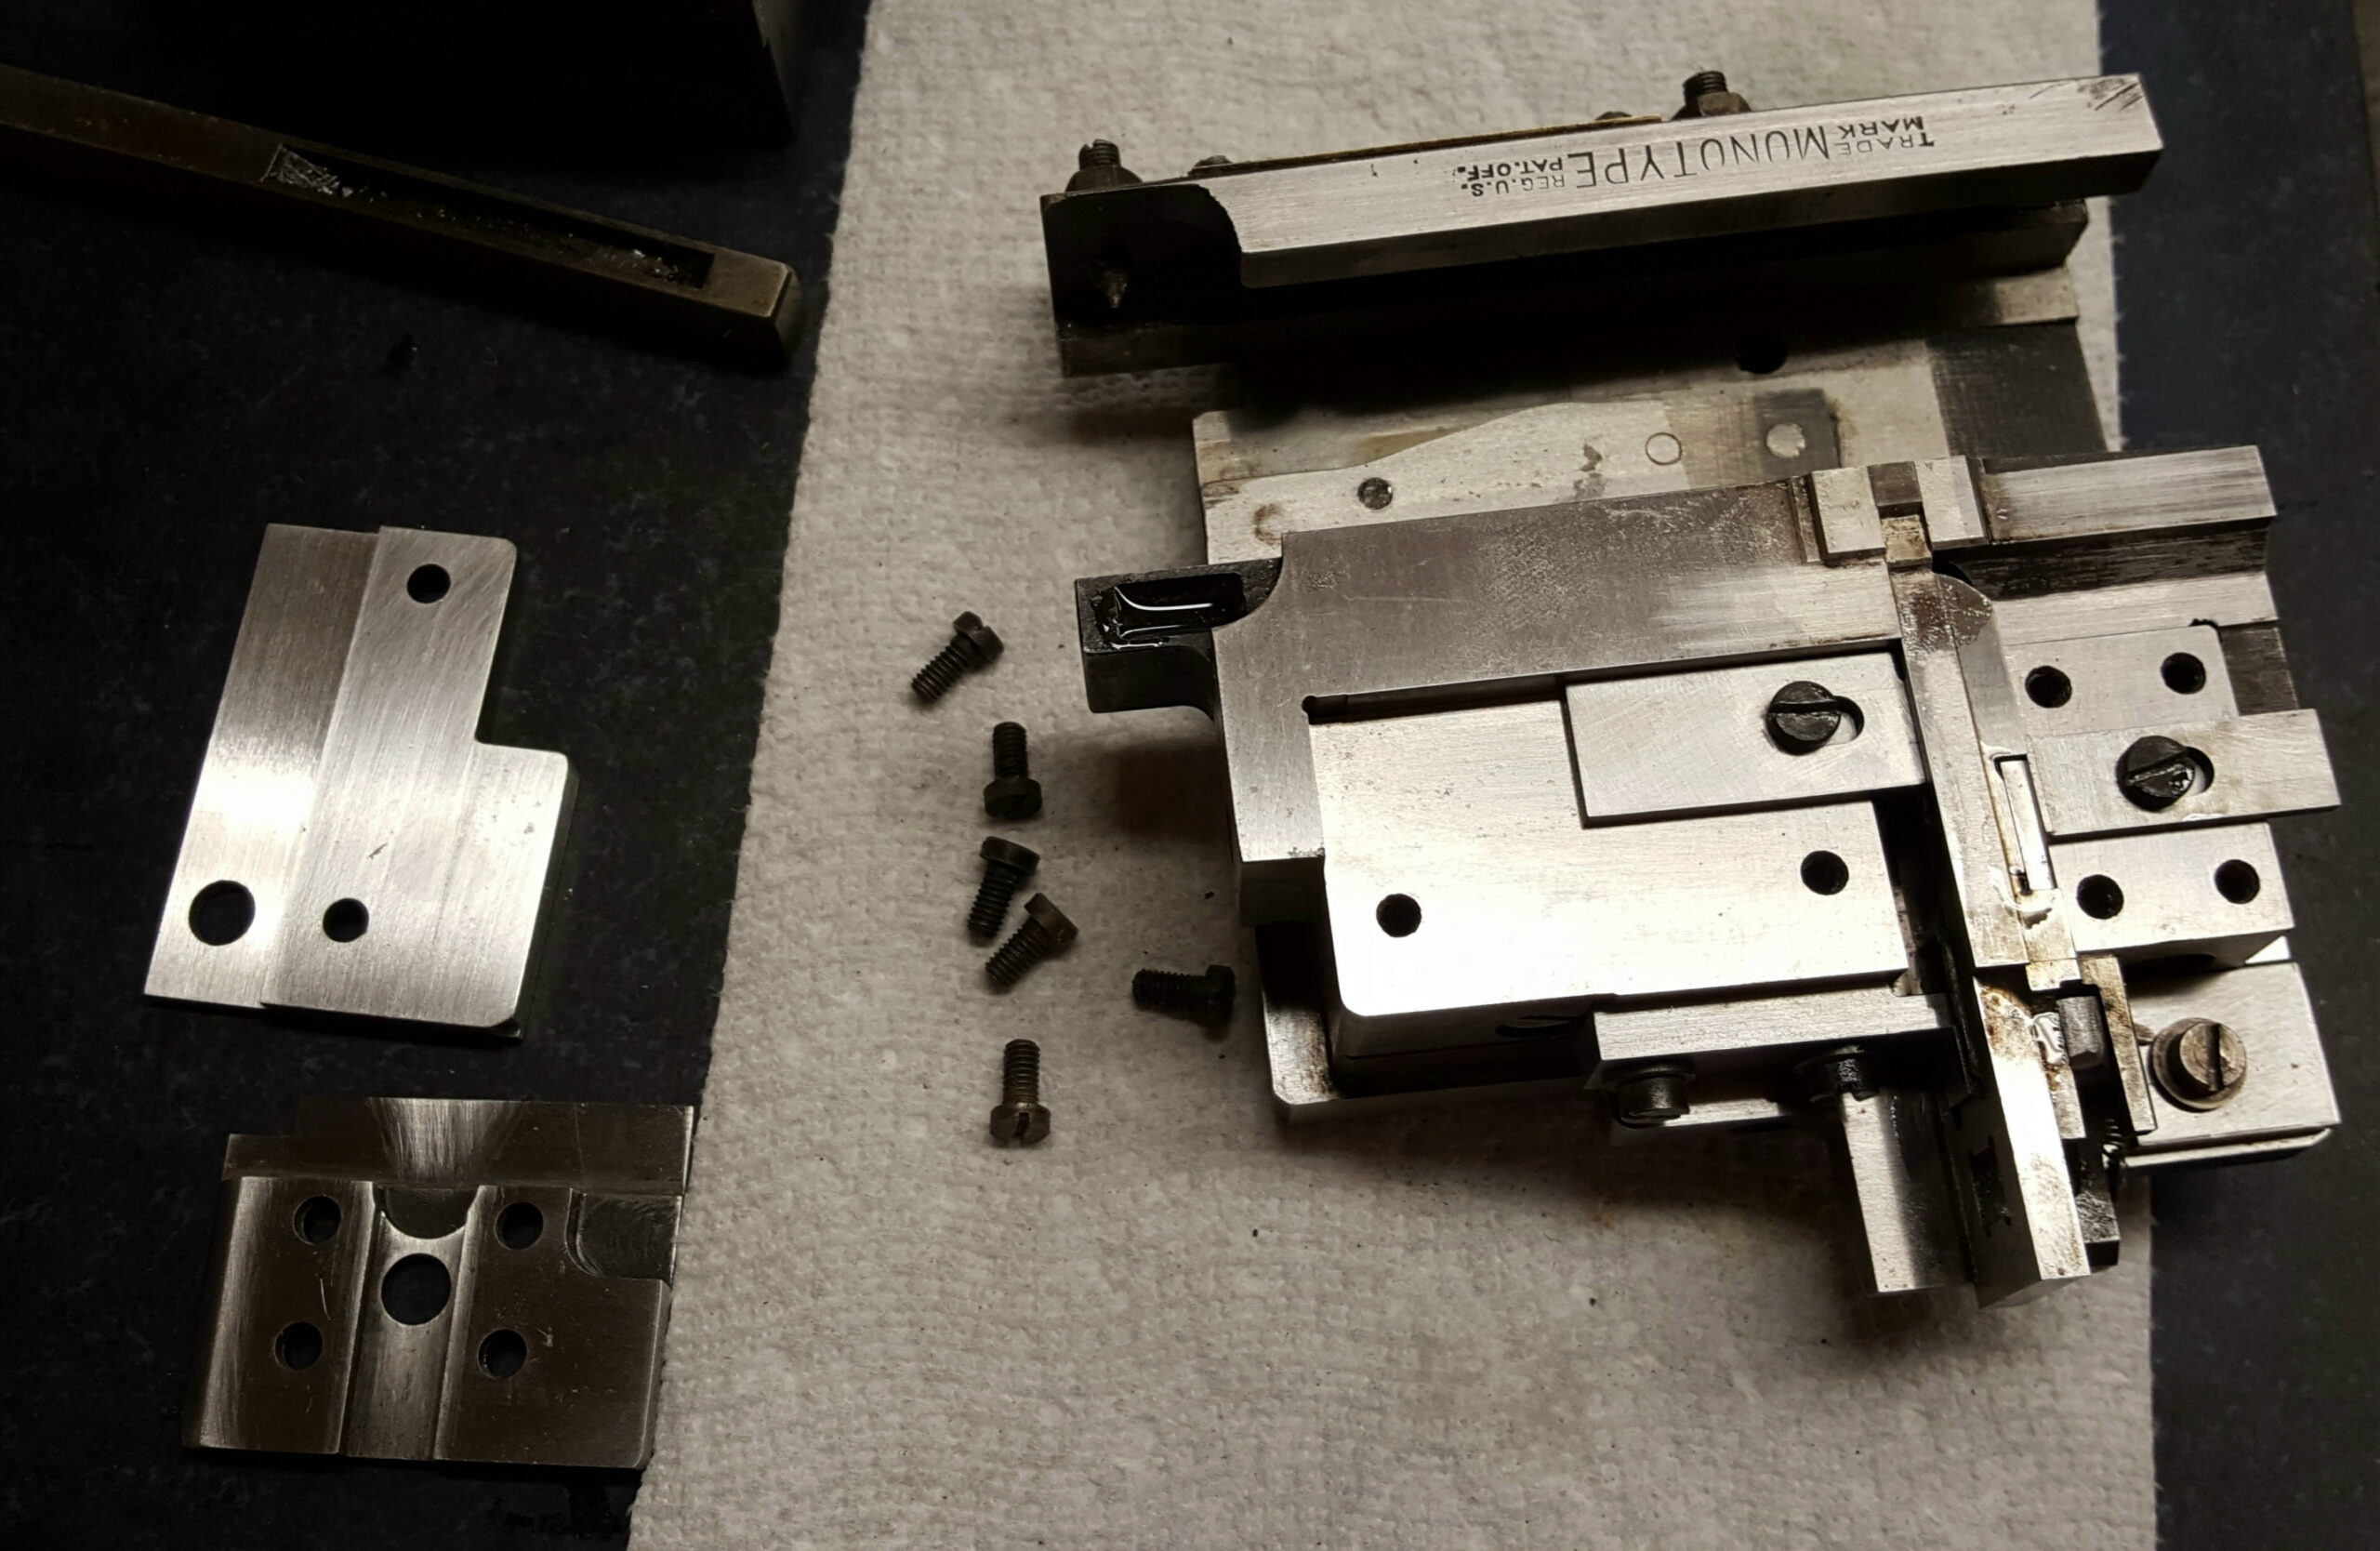
I then disassembled the mould. The only tools normally required are a couple of slot screwdrivers of appropriate size. Often some sort of pick is required to clear the screw head slots of type metal and general gunk. Occasionally an impact driver is required to loosen a stubborn screw but none was needed this time.
I did not remove the sub-base or the front from the mould. Removing the sub-base could cause later alignment problems because it does not have any mating reference surface to the base. Its position will not affect the quality of the type, but may affect how well the caster can deliver very narrow type because it affects the clearance between the mould’s type blocks and the caster’s type carrier.
I also did not disassemble the two-part mould blade, as it seemed to be operating fine. I just gave it a good cleaning with solvent. The cam that operates the gate ejector was also left in place. I had removed the two screws that hold it down, but the there were also two dowel pins to locate it which were tight, and I did not want to damage anything removing them.
As I removed parts I polished them clean using a Scotchbrite pad and light oil. A couple of spots needed a stronger solvent to remove oil residue. This has to be done gently around the top corners of the mould to avoid rounding them at all; these pads are slightly abrasive, and although the metal is hardened excessive polishing can round corners and affect parts clearances. The spongy nature of the pads adds to their tendency to round corners, and some people prefer to use a hard Arkansas stone to polish off dirt when possible. The Arkansas stone also has the advantage of removing any burrs which might exist, though in this case there should be no burrs. The pads do a better job of reaching into some of the nooks and crannies. The pads also shed a bit of abrasive which must be cleaned off thoroughly.
There was also some scale to remove around where the cooling water passages from the sub-base meet those of the type blocks. I used pipe cleaners and wire as best I could to clear out the cooling water passages in all the parts. A final cleaning with solvent was needed to remove any grit that might have come off the polishing pads.

The mould parts all cleaned and ready for re-assembly. The crossblock is not shown.
While the type blocks were off, I measured their heights, and also the height of the blade:
| Part | Inches | mm |
| Left type block | 0.8916 | 22.647 |
| Blade | 0.8913 | 22.639 |
| Right type block | 0.8914 | 22.642 |
Having the blade a tad smaller than the type blocks stands to reason to allow for the oil film that is between the blade and the base of the mould. If you add the matrix depth-of-drive of 0.030″ to these values you get about 0.922″, which is about 0.4% taller than the desired type height of 0.918″ to allow for the shrinkage that occurs after the solidified type cools to room temperature.
I re-installed the type blocks dry (no lubricant at all) after giving them one last careful wipe to remove dust. Any lubricant used at this stage will interfere with the proper seating of the reference surfaces, and is unnecessary anyway because these surfaces do not move against each other in use. I slid the mould blade into its home, again without any oil, and installed all its guides and stops.
Type blocks and blade reinstalled, just the covers to go.
Now is the time to oil the blade. The regular mould oil is a very thick plant-based oil which works well when the mould is at working temperature, but is too thick at room temperature for initial lubrication. Furthermore, being a plant-based oil it does very slowly harden when exposed to the air (just as the linseed oil in oil paints does). Instead I used the same oil I use on my press rails, which is somewhat thick but not excessively so, and has some tack so does not drain off surfaces too quickly. I used this to oil the blade, squirting oil onto it from all angles and working it in and out, and also working the separate top blade, until everything ran smoothly.
I finished by installing the covers, with a bit more oil where they rub on the blade.
The crossblock also comes apart into a few pieces: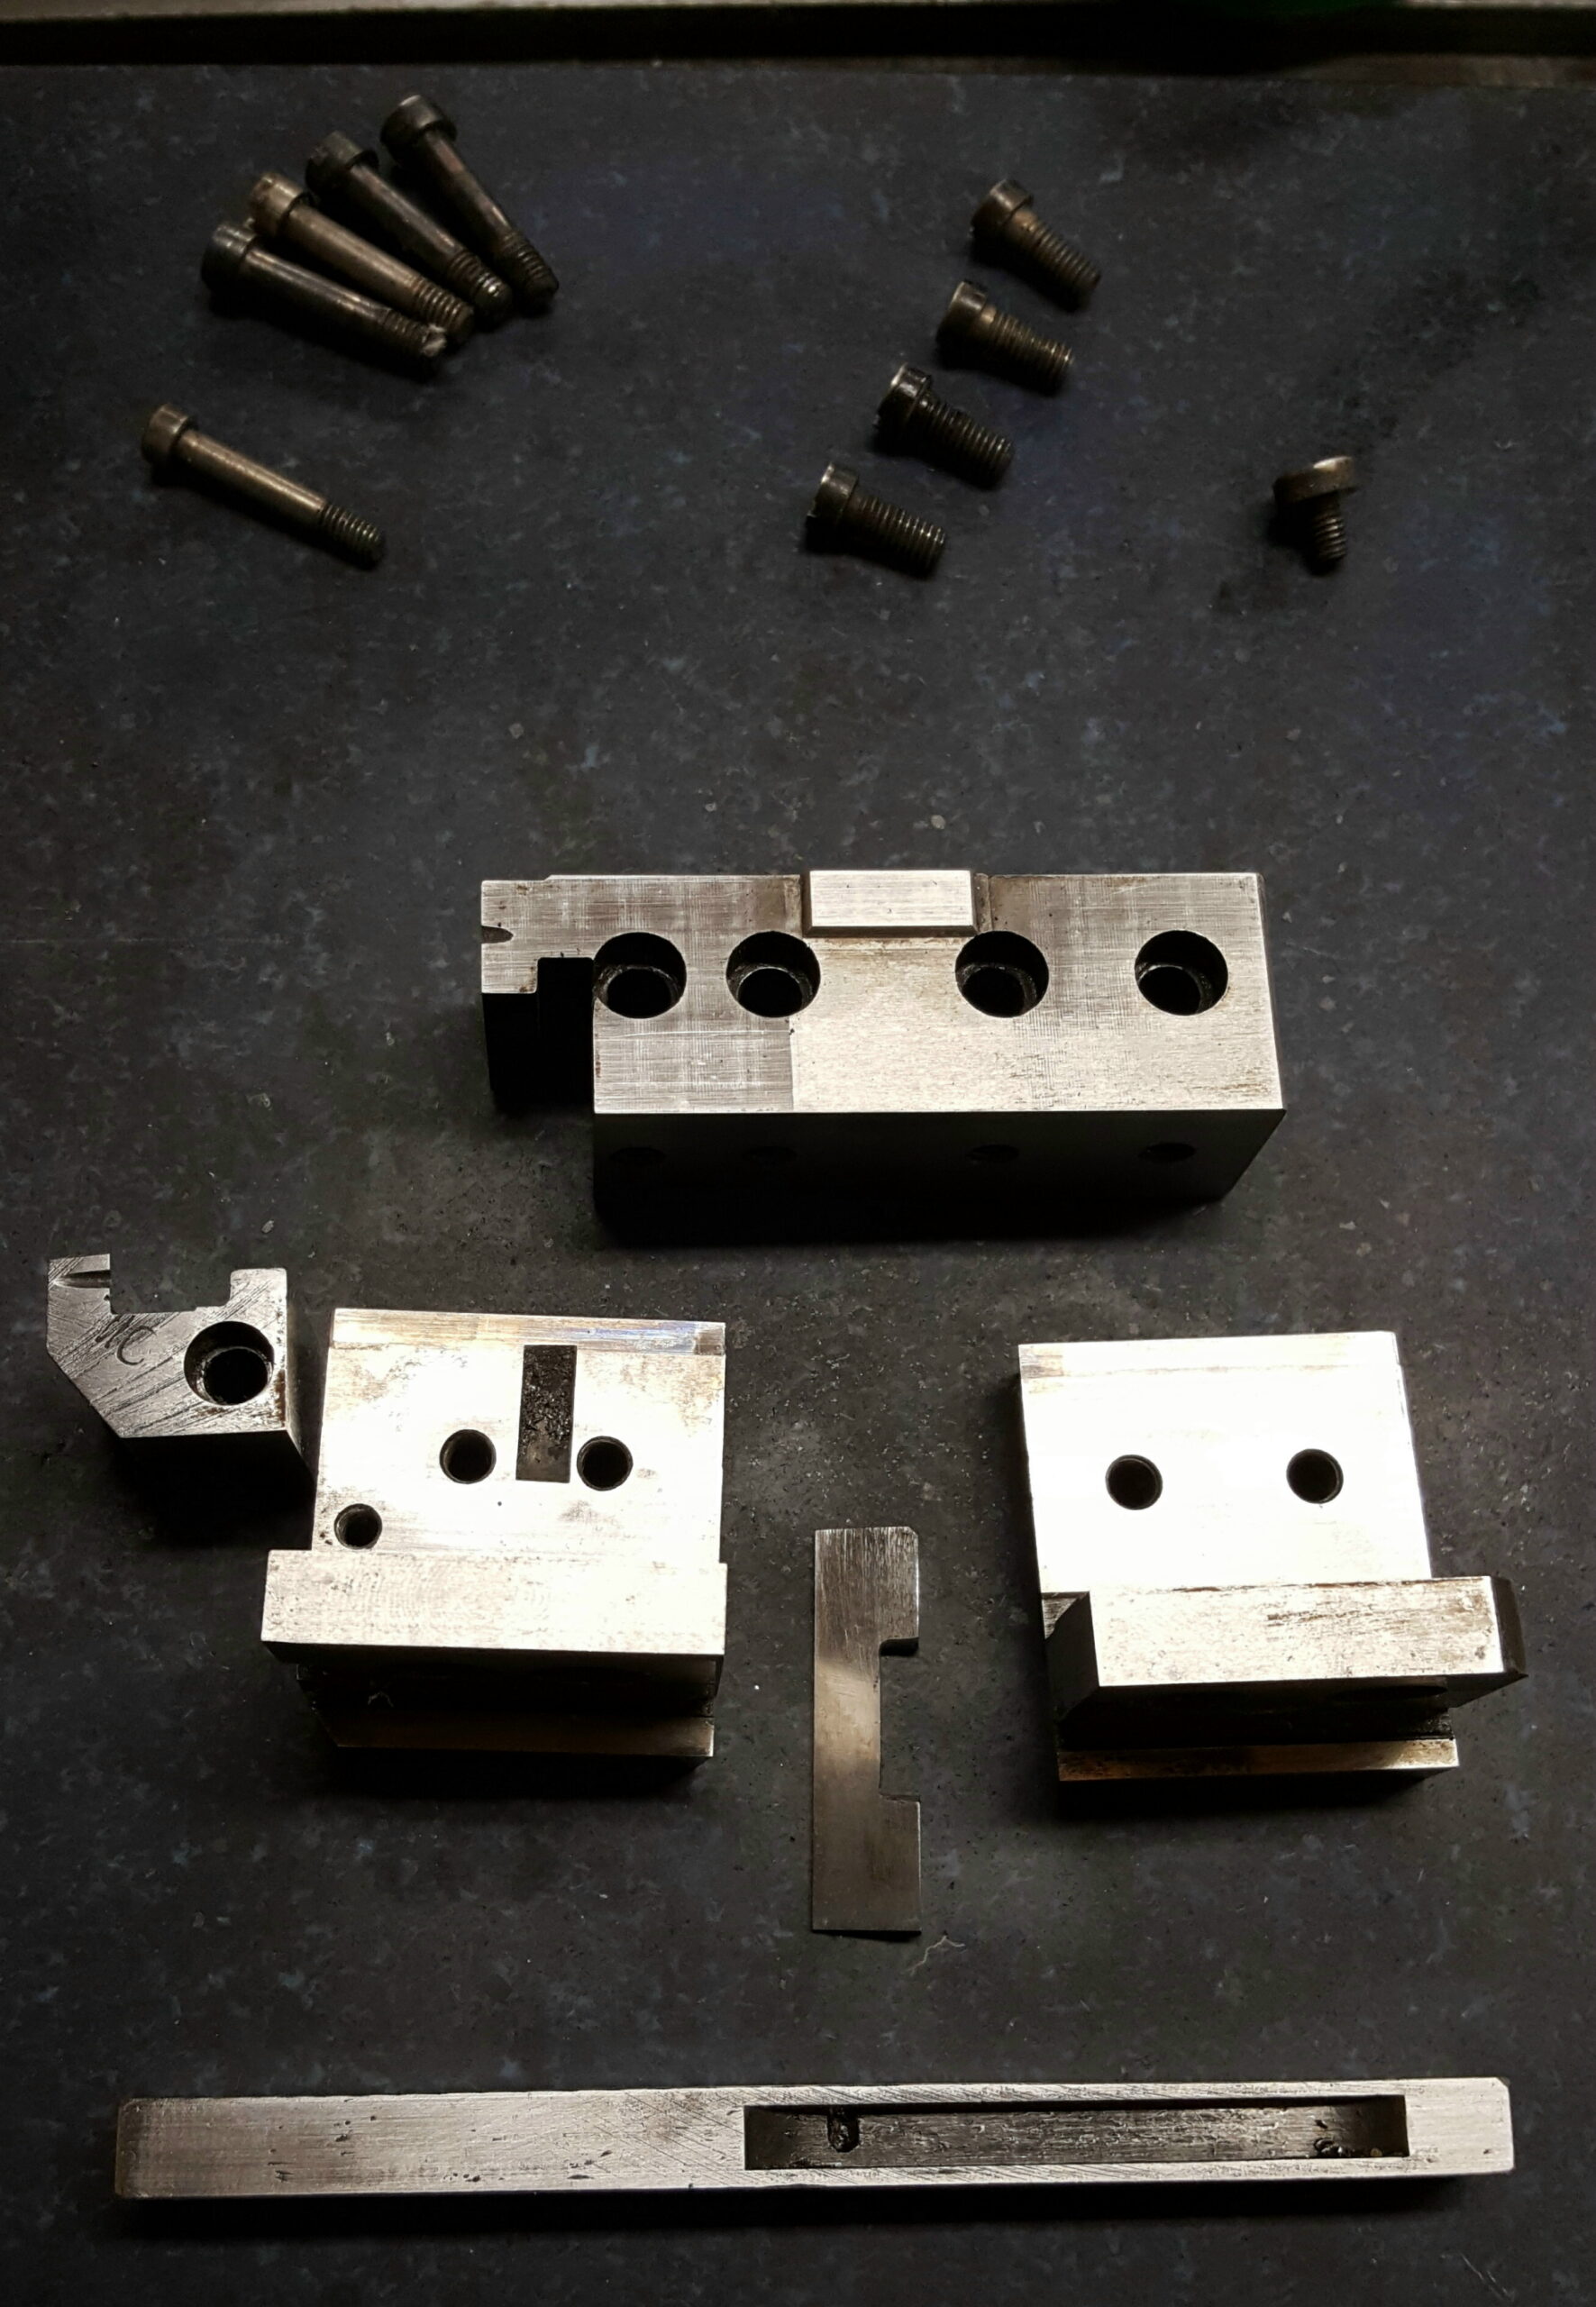 As with the rest of the mould, after disassembly I used a Scotchbrite pad and solvent to clean and polish the parts. On reassembly, the spacing of the left and right blocks must be adjusted so the gate ejector fits into its V-shaped groove so it is just flush with the bottom of the crossblock. If the groove is too narrow, the ejector sits proud and and crossblock cannot be inserted into the mould; if the groove is too wide, the ejector will have side clearance and type metal will enter the gaps. For this adjustment the ejector should be oiled lightly.
Once the crossblock is re-assembled and inserted into the mould, the crossblock shoe must be adjusted to hold the crossblock tightly against the type blocks. When oiled, and with the mould cold, it should be just possible to move the type block by hand between its casting and eject positions.
All back together again
I did another casting run and the mould now gives cleaner type, which was the whole point of this exercise. I had also adjusted the height of the caster’s carrying frame on the bridge, which might have helped as well, though I am not sure if the adjustment actually changed.
I have several other 12-point composition moulds that I could try. Two of them are English moulds made for 0.050″-drive mats and so are unsuitable. I also have another Lanston mould, 3E1613H (also a Hartzell refurb) but it also needs a re-build and is showing visible wear around the cavity opening, and an English mould (serial number 400009) specially made for use with Lanston 0.030″-drive matrices. The latter appears to be in excellent condition, and although the low-quad mechanism might not work with a Lanston bridge, low quads are not necessary for the font casting that I am currently attempting. Later English moulds had a replaceable dual-purpose arm which allowed the low quads to work with either type of bridge, and this mould might have that.
Leave a Reply