
My JD185 lawn tractor can be fitted with a snowblower attachment. The one I have has no part or model number; it is just called the “38 inch snowblower” in the manuals.
At the driver’s seat there is a crank which aims the chute from side to side through about 180 degrees, but to adjust the height and distance of the thrown snow, I have to walk to the front of the blower to loosen some nuts and set the deflector height. There aren’t even handles to loosen the nuts with; I have to use a wrench. This was generally a big nuisance.
I got fed up with this so I decided to fit a linear motor to the chute deflector so I could adjust the throw height while seated. I bought a linear motor with a 2″ stroke from the local Princess Auto store, and fitted it to the chute so it could adjust the height. They have two actuators that are almost identical, same size, same box, same price, same stroke, and at first I bought the wrong one. It turns out they differ in gearing and I initially bought the one that was slower and produced more force, which I later exchanged for the faster, weaker one.

The actuator mounted on the chute. The chute deflector hinges at the black piece, which is a plastic “live hinge.” The upper pivot pin attaches to the deflector through a mess of steel angle iron and a 3/4″-thick polyethylene spacer. The lower pivot pin is in a store-bought fitting.
It took a bit of time working with a sketch of the chute geometry to determine the best place for the pivot pin on the deflector. I located it so a line drawn through the two limits of motion of the pivot pin is more or less in line with the actuator, giving it the best leverage, and so the actuator’s 2″ stroke moves the deflector through pretty much its entire range of motion.
The new parts were attached to the chute using stainless steel ¼NC-20 bolts placed into suitably-tapped holes in the chute. This isn’t very strong because the chute is made of sheet metal, but there isn’t much stress so it should hold OK. The bolts are just long enough to catch the tapped thread without sticking out inside the chute where they would interfere with the thrown snow.
I have a pigtail connector attached to the battery which allows me to quickly attach a battery maintainer, and I bought the matching connector from the battery maintainer manufacturer so I could use this pigtail to tap the power to run the actuator. The pigtail even has an appropriate fuse in it. I installed a center-off DPDT momentary contact toggle switch into a small metal box and wired everything up.
Finding a place to mount the box stumped me at first, but I found a handy way to mount it near the control crank. The linkage used to lift and lower the blower has a pivot pin near this crank, so I replaced this with a pivot pin permanently attached to the side of the box, and a small C-shaped piece at the rear of the box hooks around the lift rod to prevent the box from rotating.
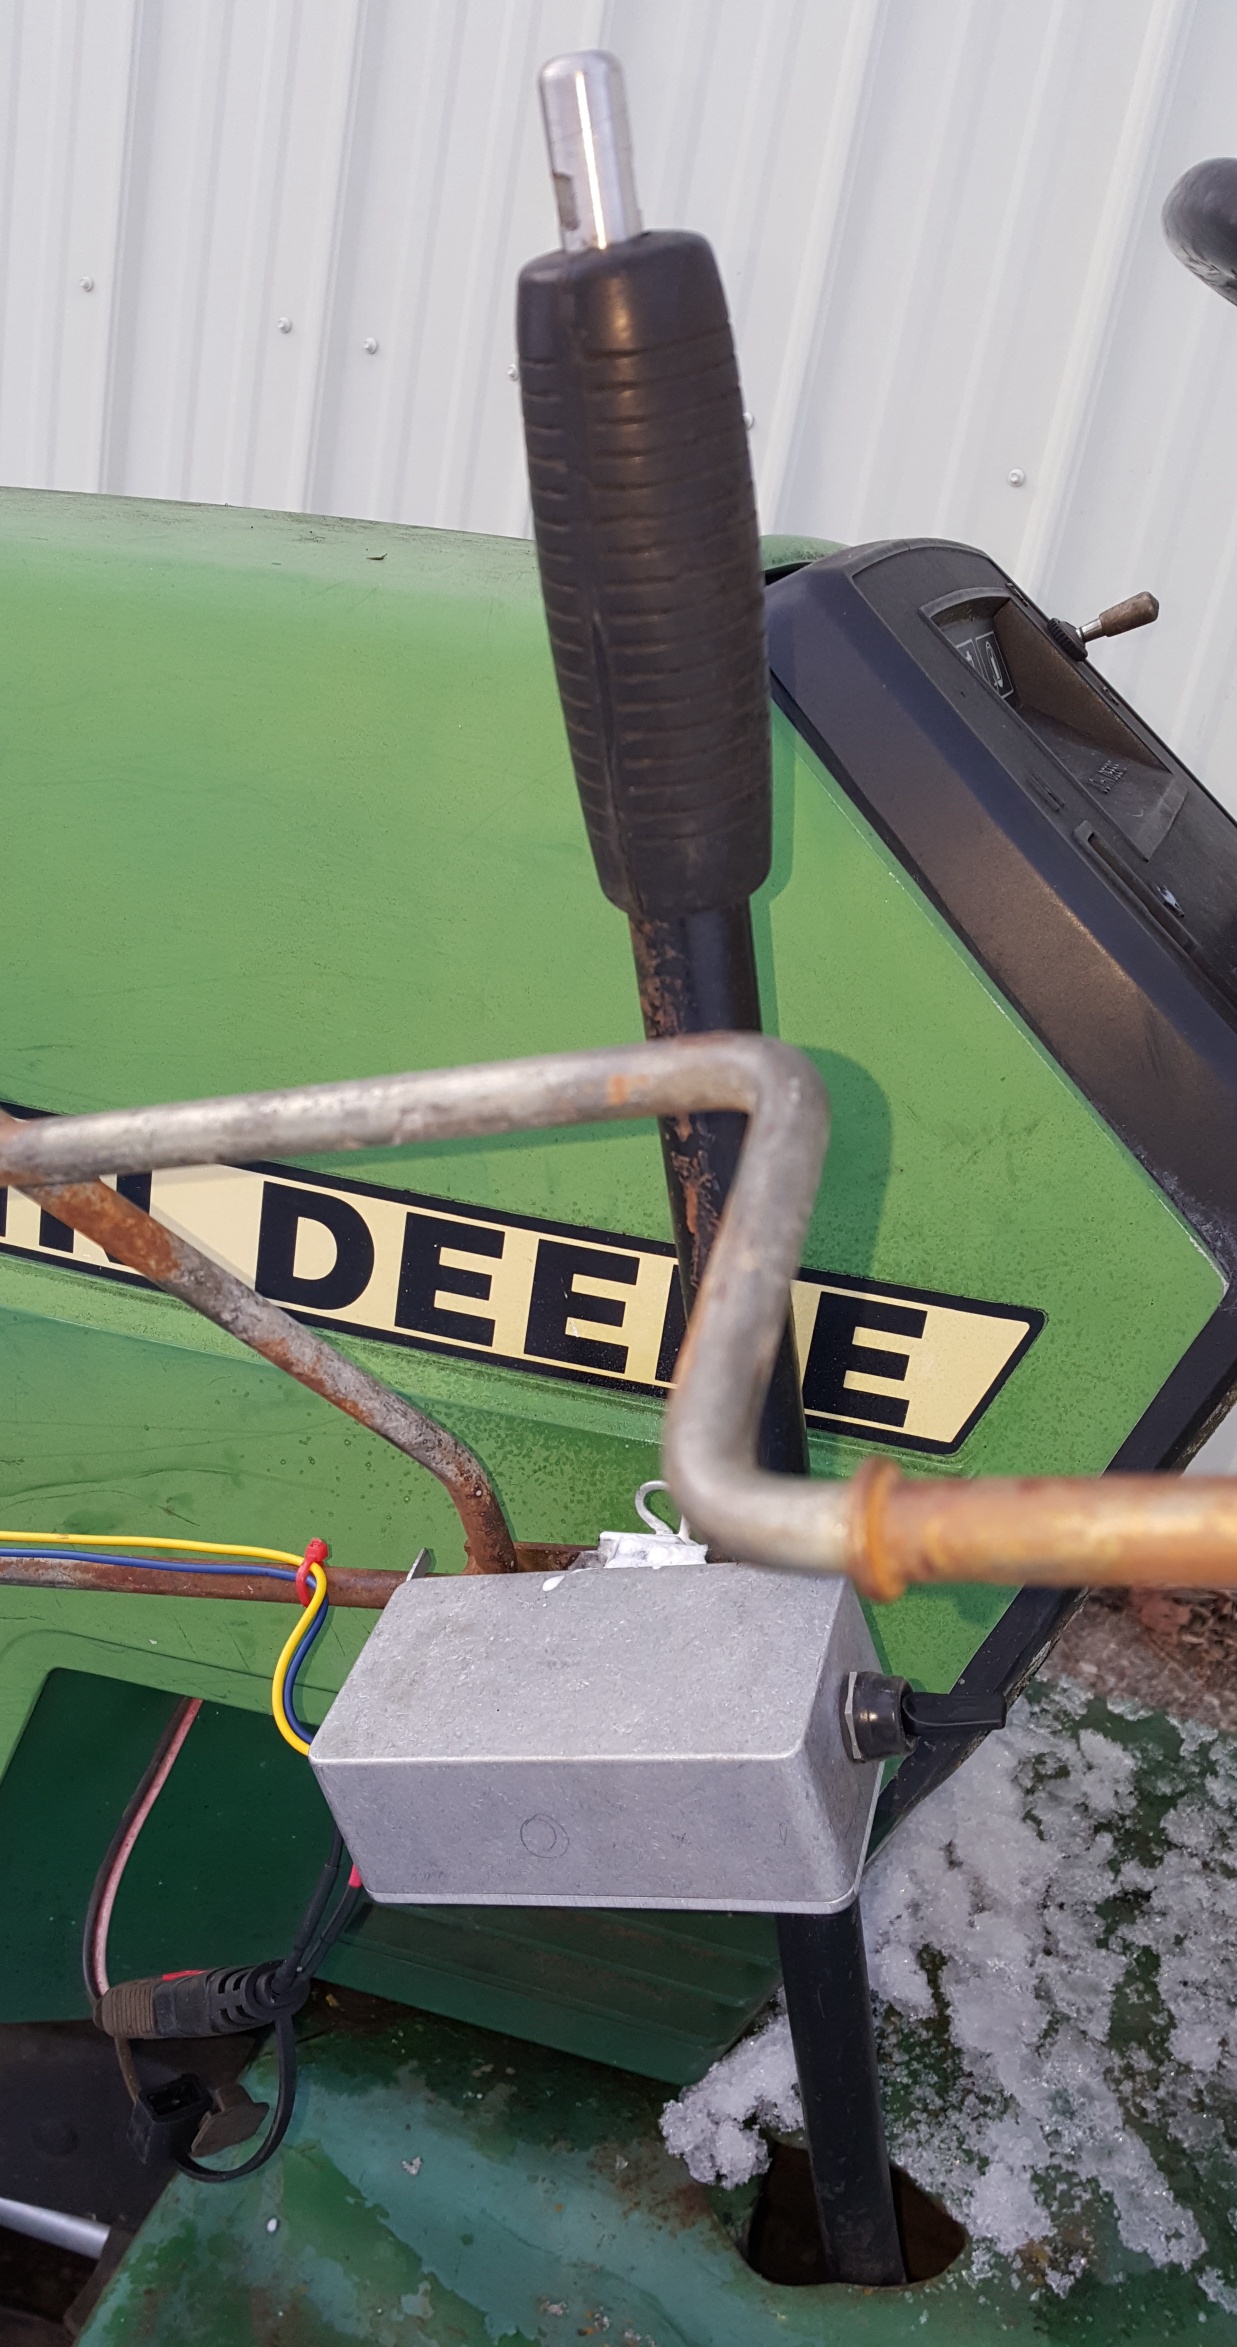
The new control box mounted as the linkage pin for the lift rod. This rod runs to the left in this photo and also has another rod running upwards to hold the aiming crank. The linkage pin is hiding behind that smear of white grease and you can just see part of the C-shaped plate that keeps the box in the correct orientation. The big black handle is used to raise the blower, and that rusty handle foreground right is the aiming crank. In the lower left you can see the connector to the battery.
The switch box itself isn’t sealed, but the cover is on the bottom so water intrusion isn’t a concern. The switch has a rubber boot added to keep it dry as well.
The wire from the box to the actuator runs along the lift rod, where it ends at a waterproof connector. The mating connector is on the wire from the actuator, and when it is plugged in a short support wire attached to the front grille keeps the electricals from becoming tangled in the lift and rotate mechanisms.
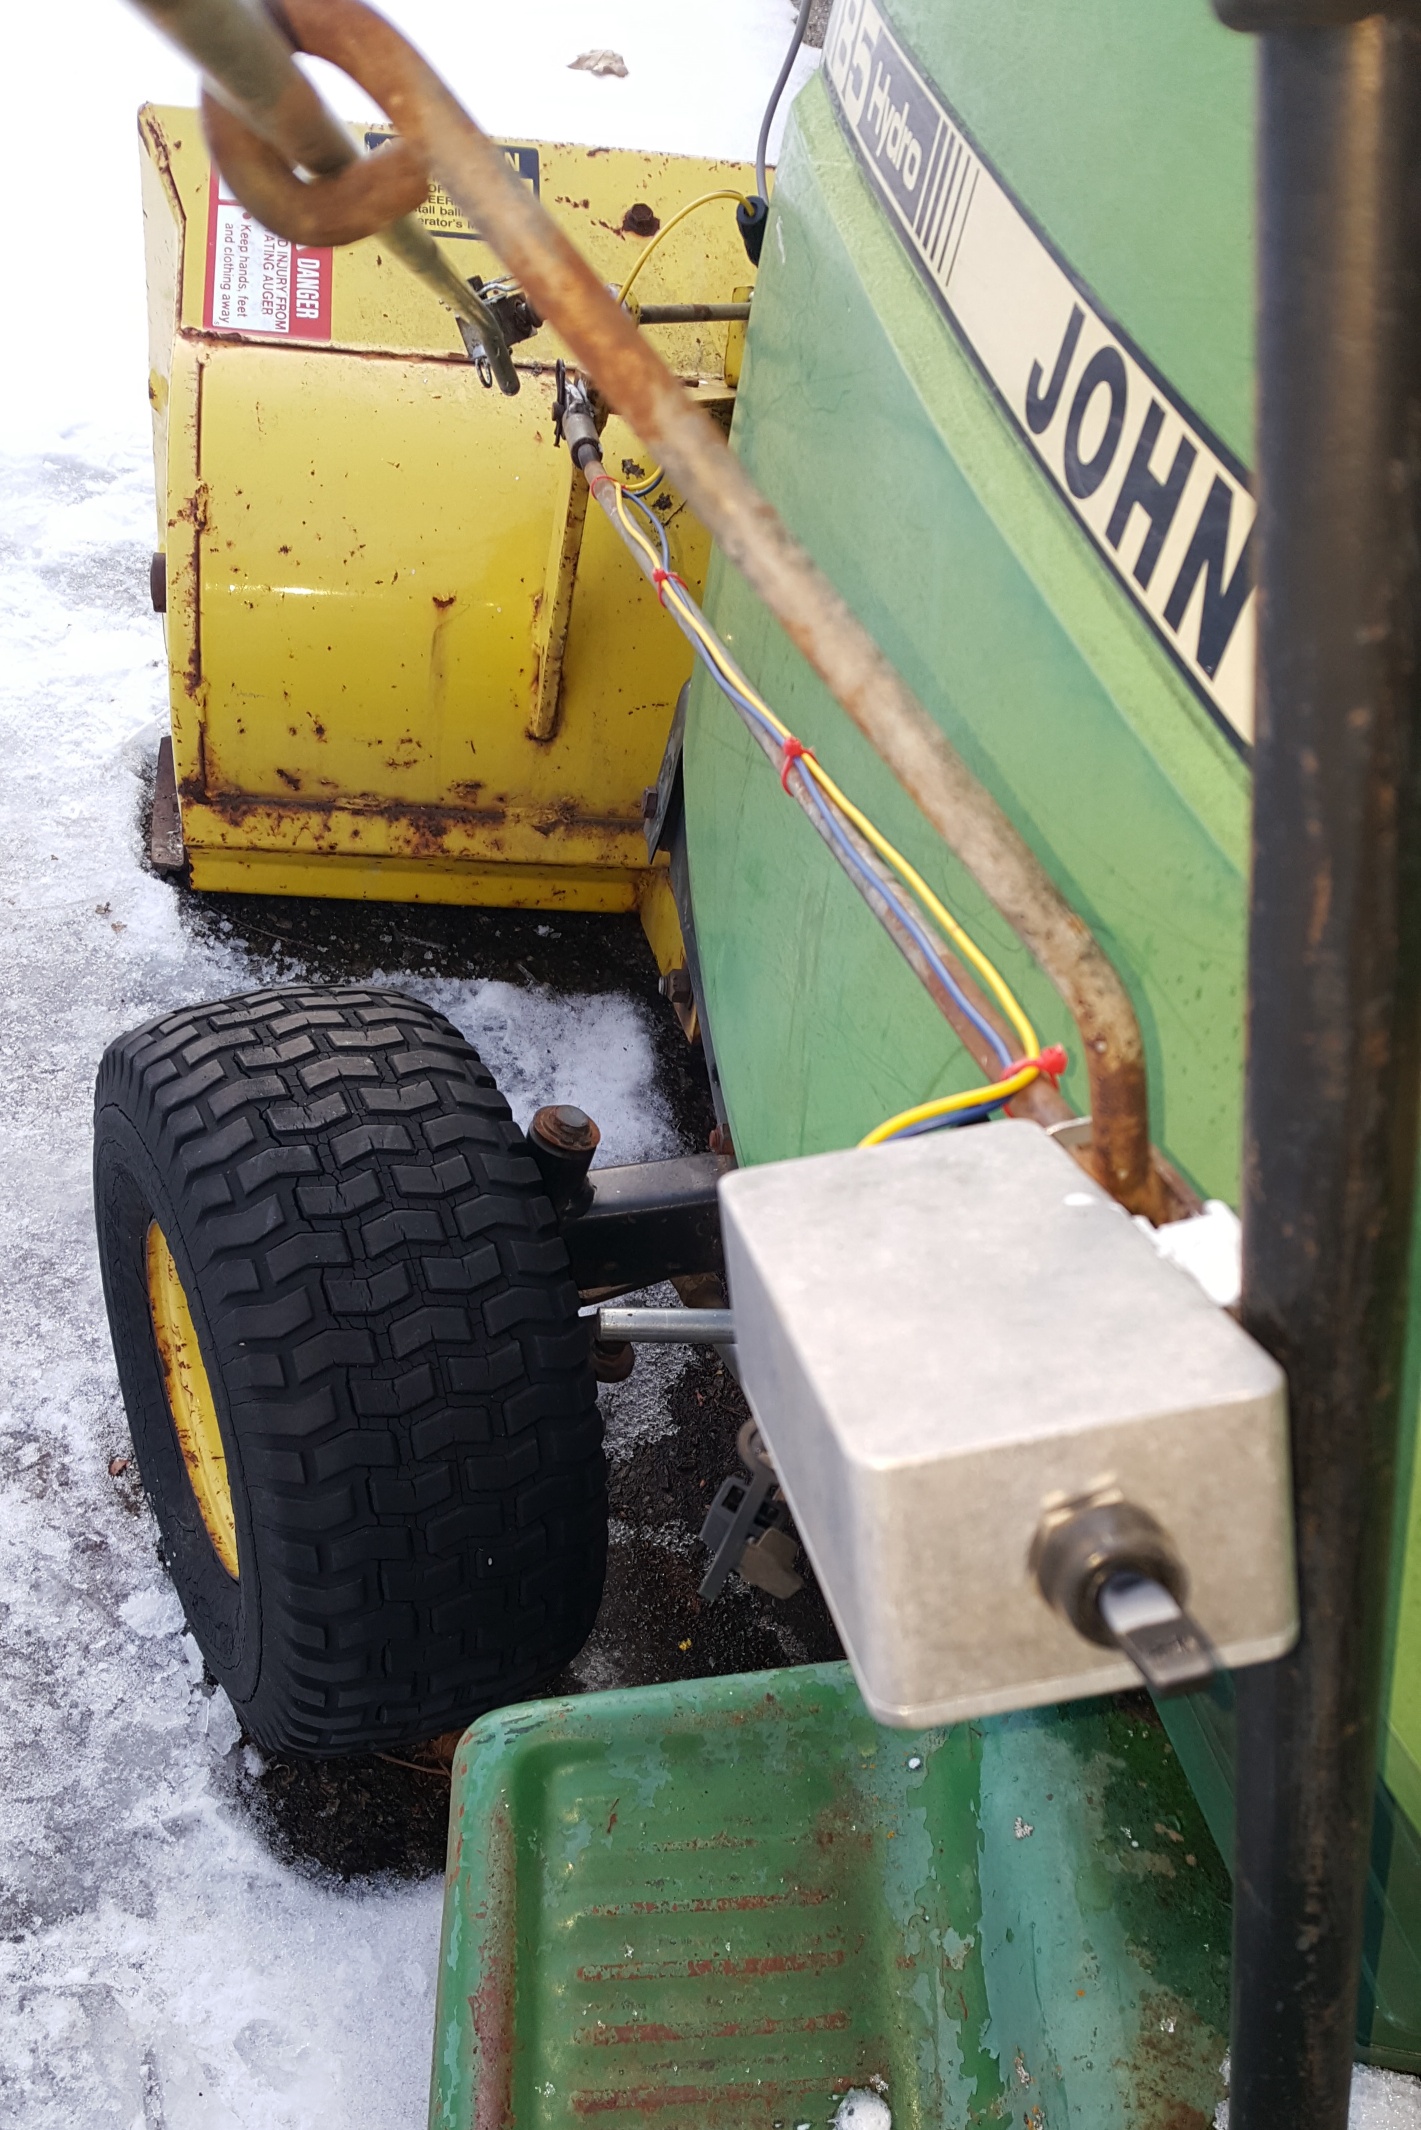
Wiring to the actuator, zip-tied to the blower lift rod.
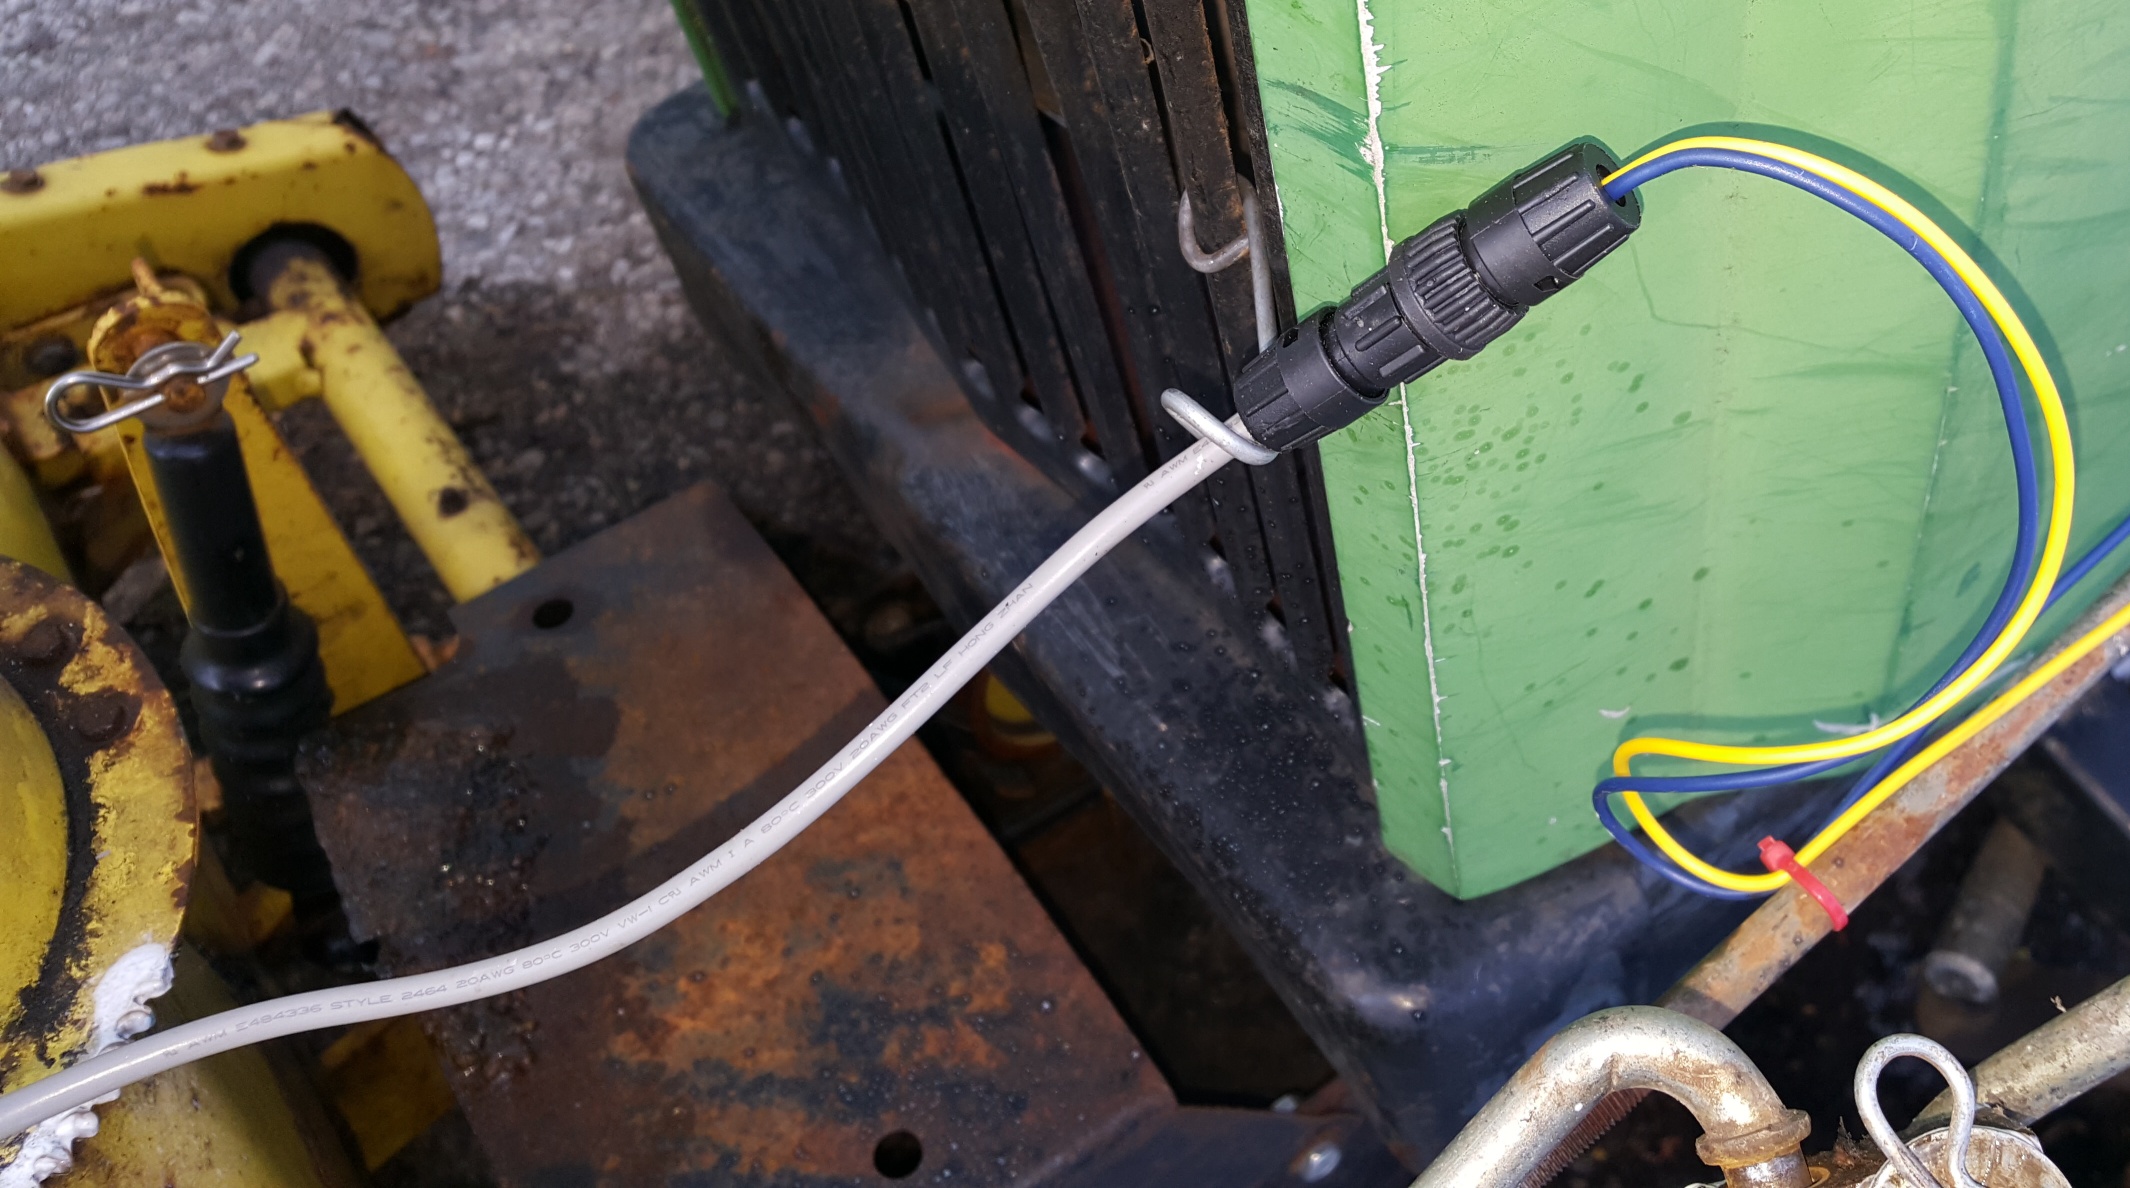
At the front of the tractor, the connector between the actuator and the switch box, showing the bail attached to the grille to keep the wiring out of trouble.
This means everything disconnects at good locations when the time comes in spring to remove the snowblower (and install the mower deck), and all the wiring parts stay attached to the mechanical parts they belong with.
While I was installing this, I tightened up the lift rod a bit so it doesn’t flop around so much when I turn the aiming crank, and also adjusted the lift rod length so the blower lifts and locks properly in its raised position.
Here’s a video showing the deflector moving all the way down, then all the way up again:
Now I just have to wait for more snow so I can see how it behaves. If things go well, I won’t get snow blown back in my face quite so often from now on.
Looks good if you know of anybody that is looking for this type of blower attachment I have one for sale at the right price moved south and it’s looking for a new home fits a John Deere L 120. Than putting this attachment on it will make it a double winner