
The question came up recently on the Typecasting mailing list as to the best way of storing American-style display mats. These originally came in boxes with a slotted wood insert and a covering made of heavy cardboard covered with faux-leather cloth. The cloth provided hinges for a flip-over cover which was held closed by a pair of snap fasteners.
With age the cloth and paste have deteriorated and most of these boxes are crumbling, although one occasionally finds a few in good condition. Besides disintegrating with age, these boxes also occupy a lot of space, as each font of mats 3.5 ×8×22cm (about 1½×3¼×9 inches).
The storage system I use is pretty much the same as the one used by Rich Hopkins. Each set of 5 sizes in a single face is stored in one polyethylene box with a hinged lid. This particular box, a Flambeau V501 with home-made partitions, is pretty much the ideal size, as long as the partitions are not too thick. The box outside dimensions are 25.5×10.8×3.8cm (10×4¼×1½ inches), so stored mats only use about one third the volume (assuming you have most of the sizes of most of the faces).
At the time I bought them (early 2009) I paid $3.82 each for 48 of them. With shipping and currency conversion they ended up costing me CAD6.40 each—the Canadian dollar was really in the dumps back then. Now their web site lists them at $4.04 each in unit quantities. They don’t mention any discount for full cases but it probably wouldn’t hurt to ask…
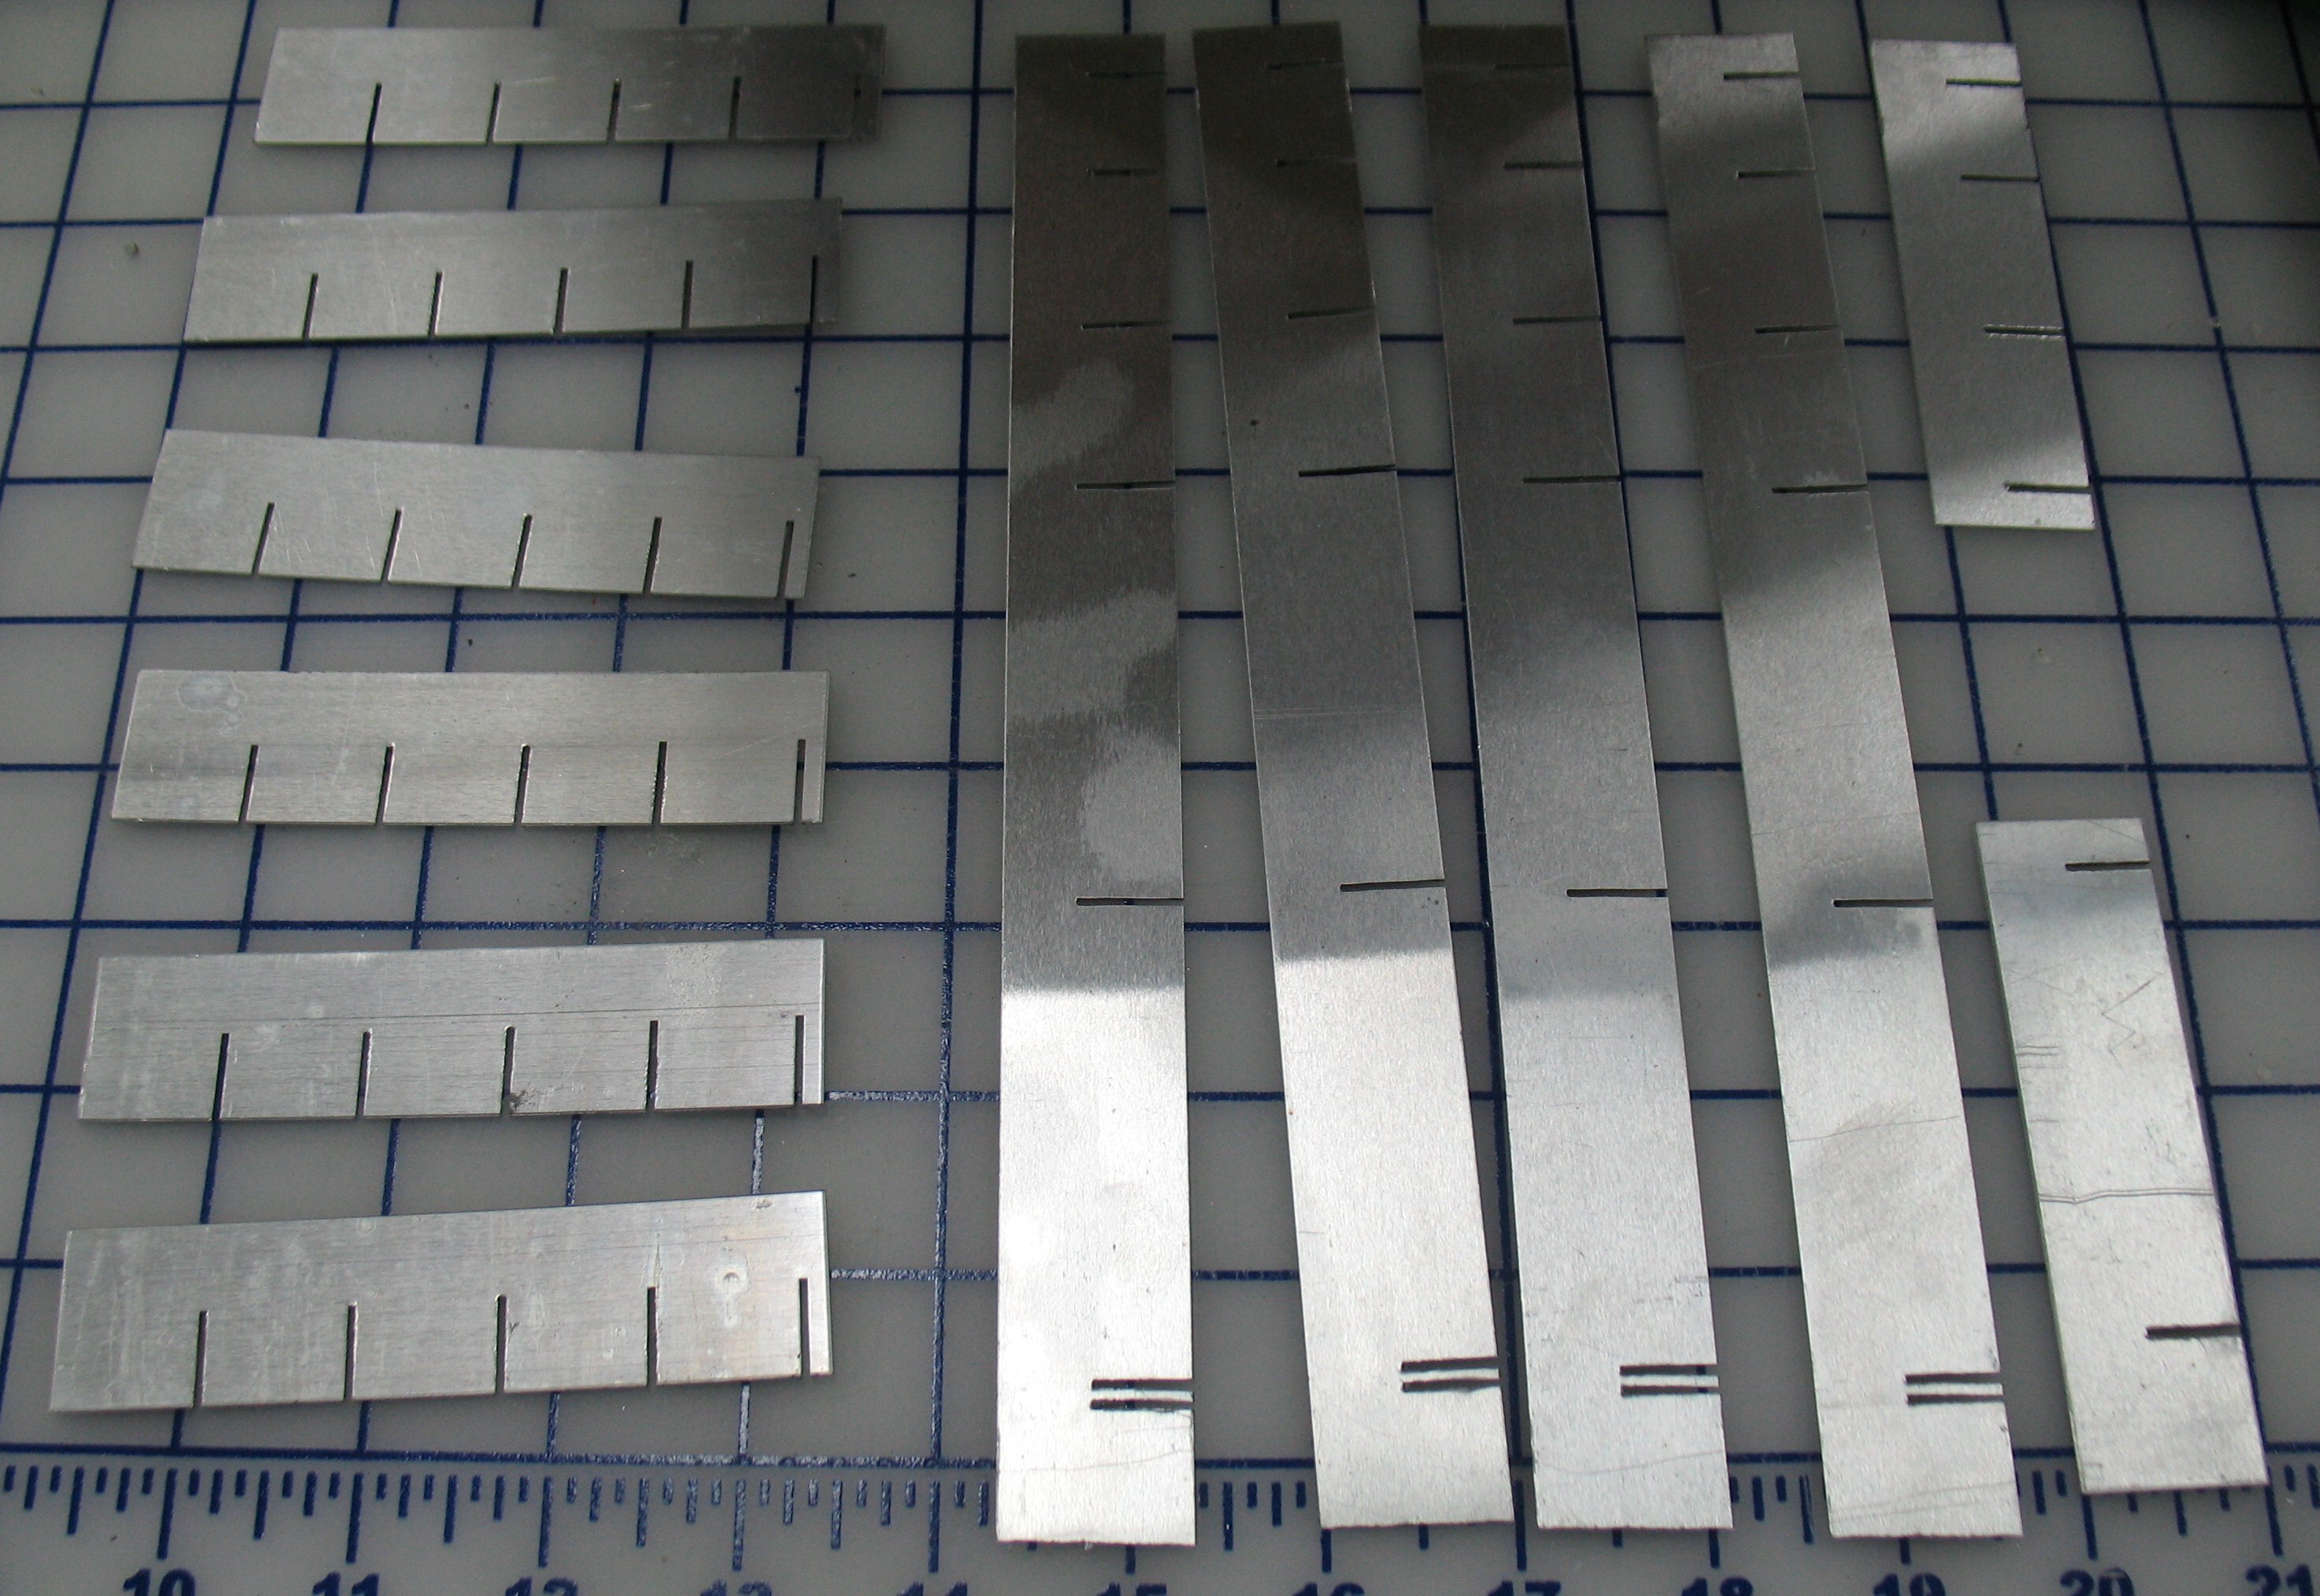 I used sheet aluminum (some 0.025″ and some 0.032″) to make the partitions, cut to size using a shear and notched using a slitting saw. This notching was a tedious process and although the accurate slot widths look pretty they aren’t really very useful. I could have spent a tenth the time just using my bandsaw to cut the slots.
By the way, the double slots at the bottom of the five long piece are a cutting mistake.
Rich used reglets and thin leads for his partitions, cutting the slots on his Hammond saw. I believe he also had a different arrangement of the horizontal partitions.
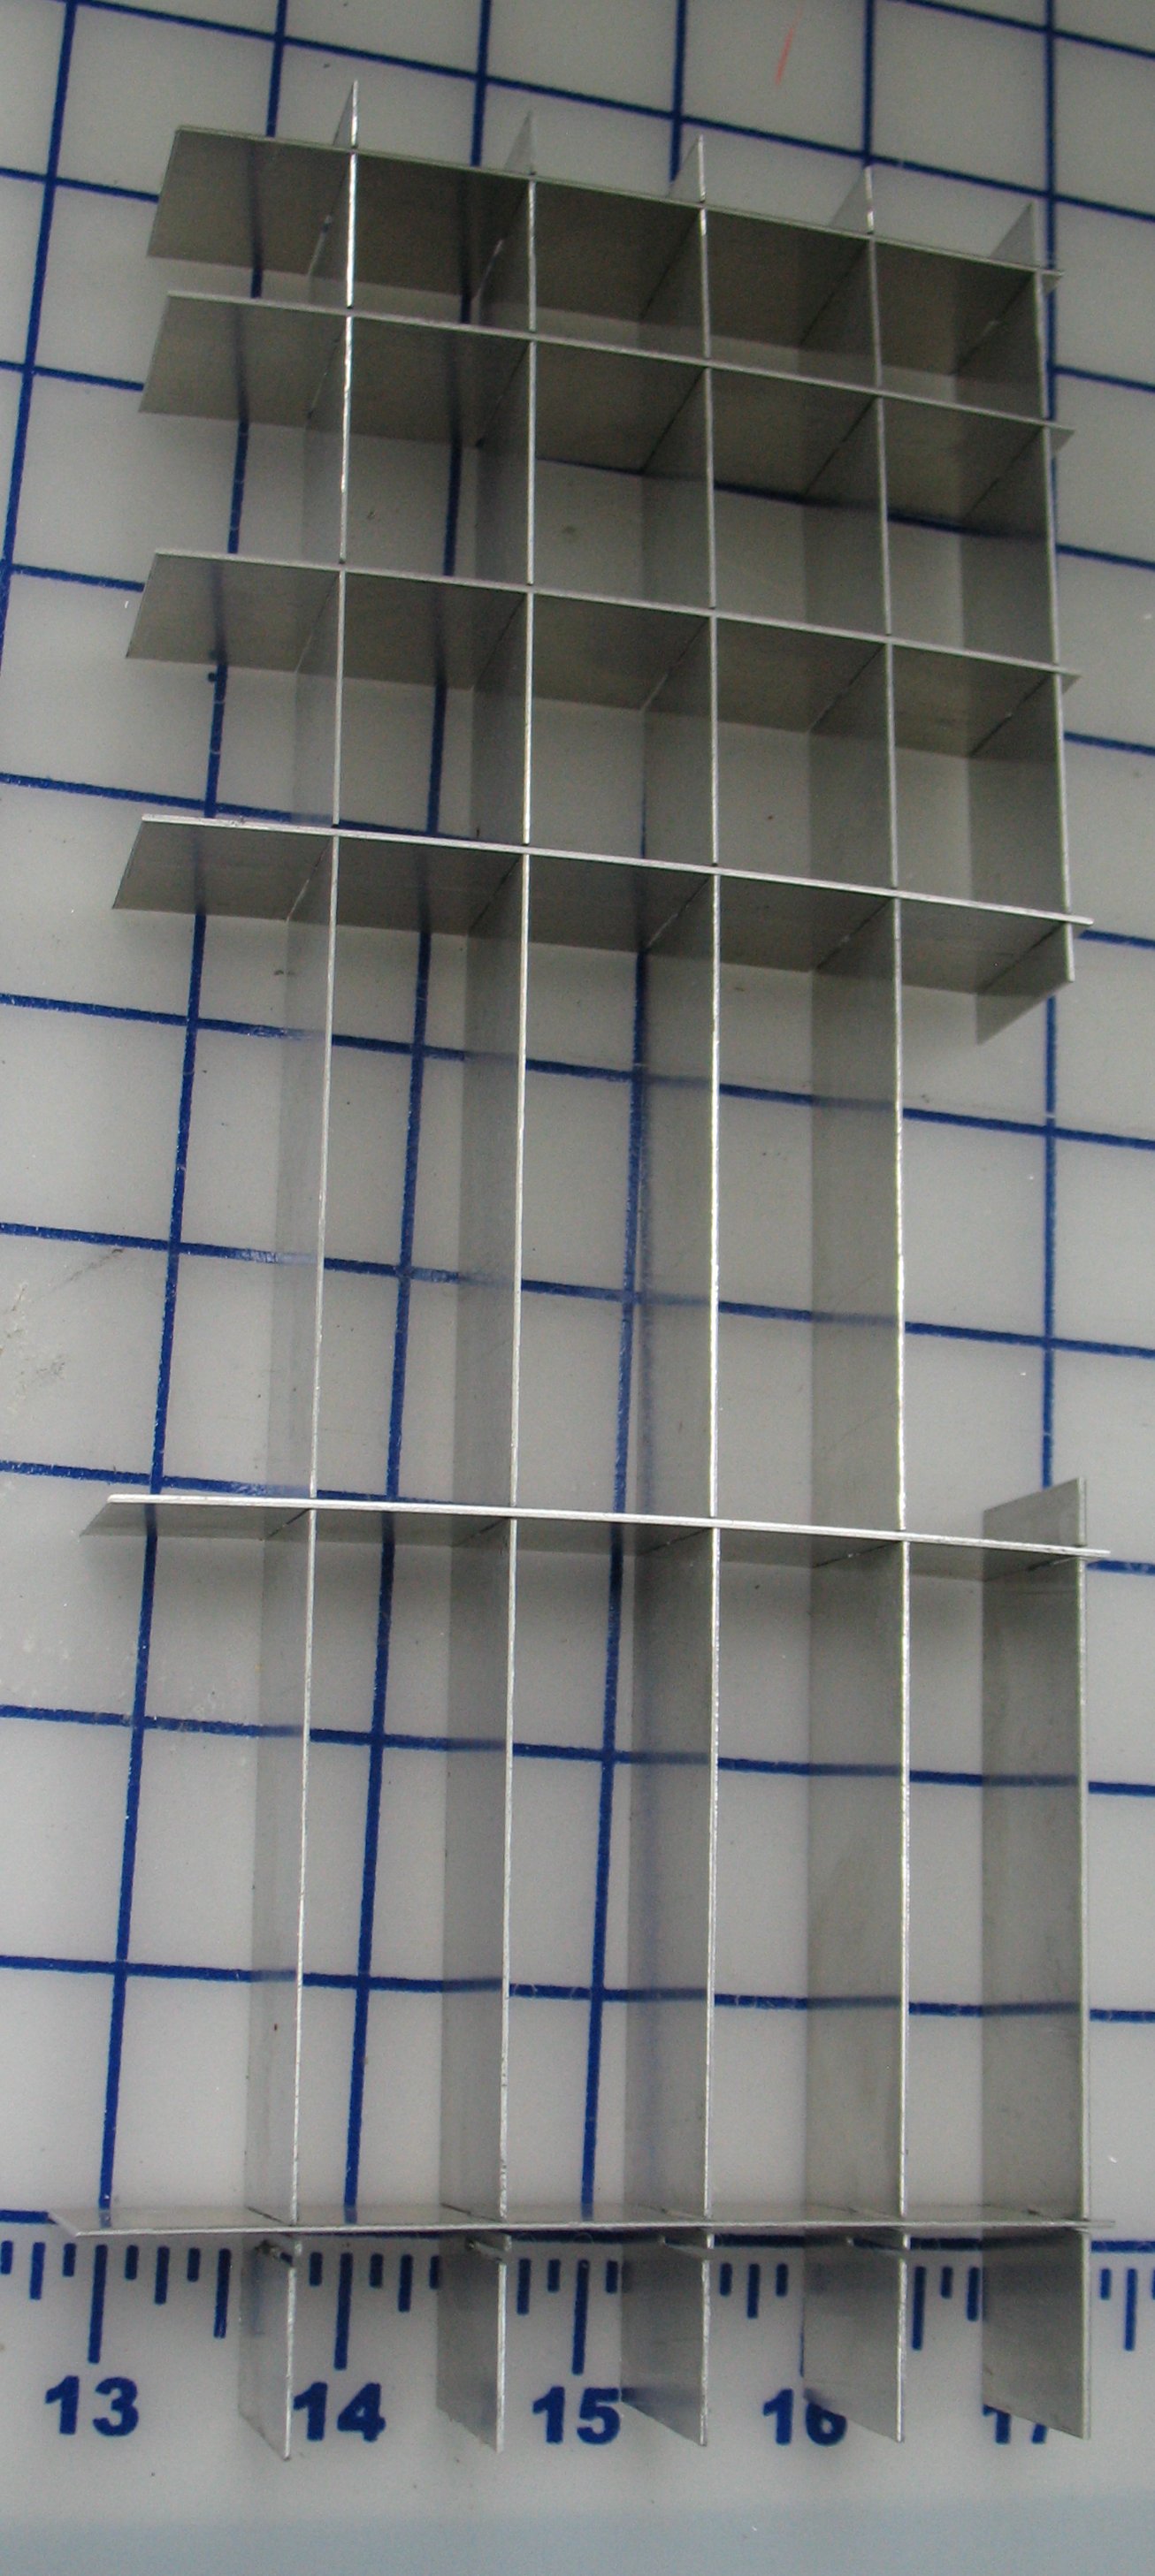 Assembling this grid is something that would also have gone faster with wider slots. Once the box is full of mats the extra slop would not show anyway.
The tricky part at this point is picking up the assembly without letting any of the pieces drop out.
I tried assembling them in place in the box but that was harder than assembling them outside and lifting the assembled dividers.
I picked this partition layout partly so that there would be horizontal dividers near either end of the long vertical dividers to give them lateral support.
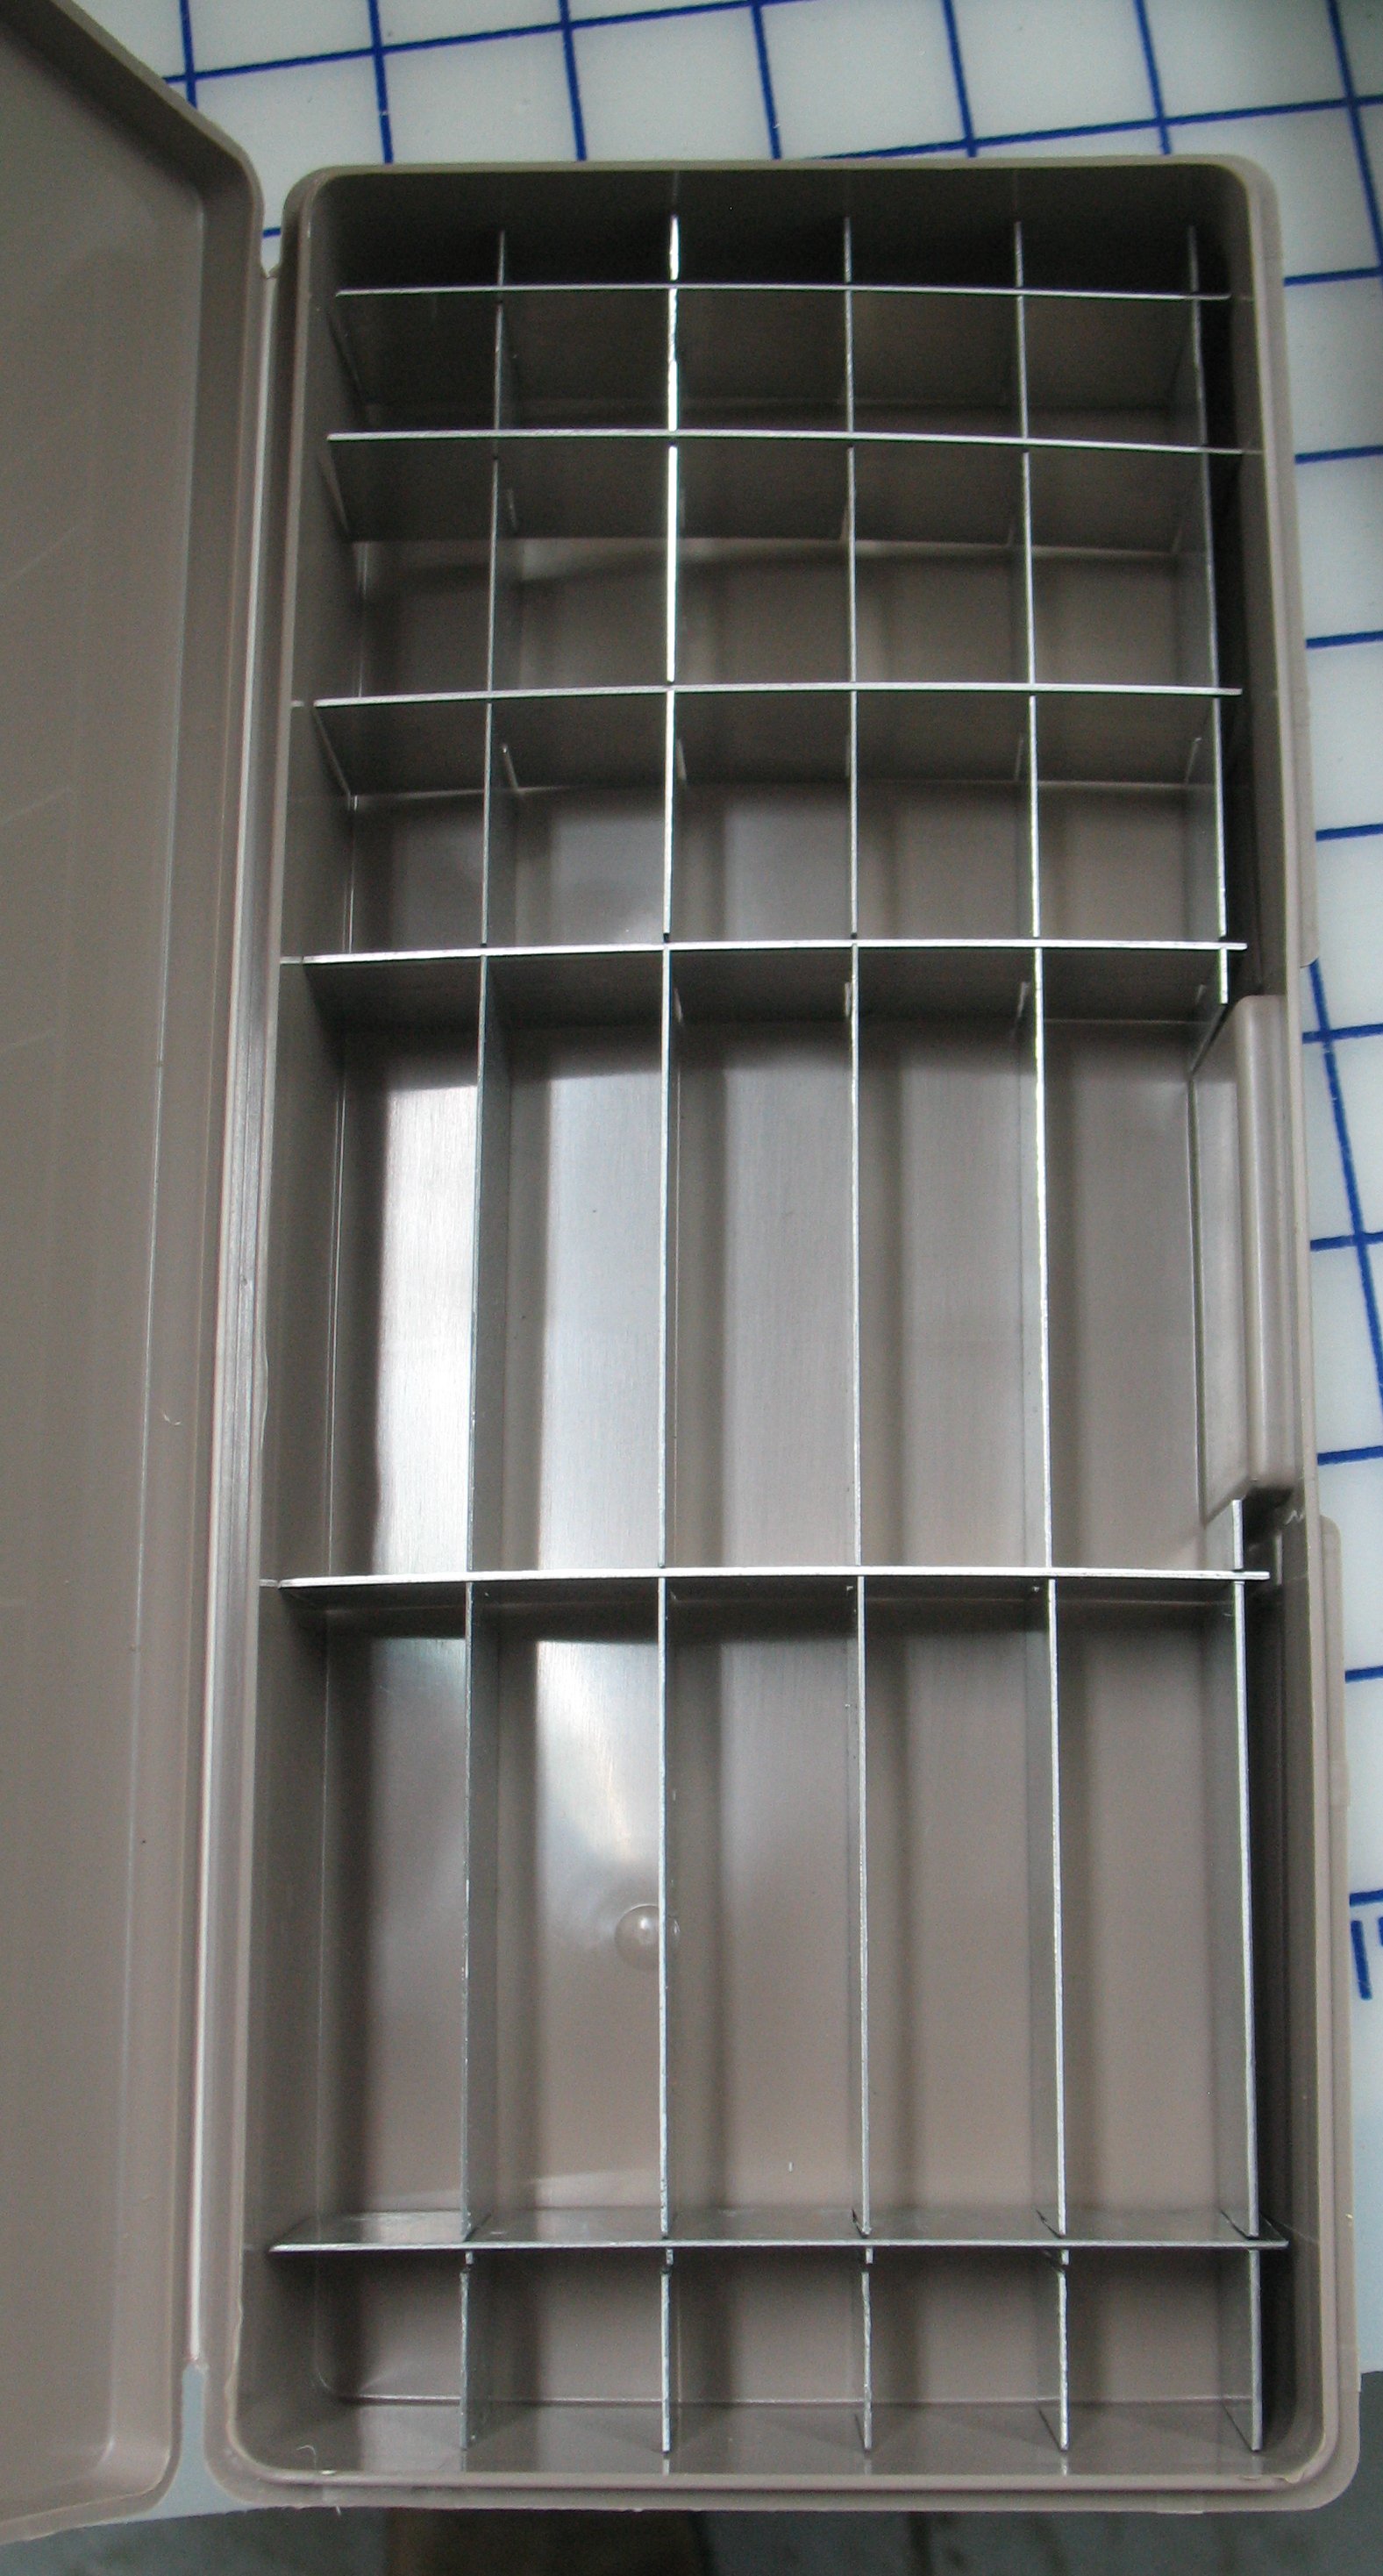 Once the grid of partitions is placed in the box it looks like this.
Because the width is such a tight fit the rightmost vertical strip is actually interrupted to span over the inset area around the cover latch.
Because the leads Rich used were thinner than the aluminum I used he was able to have five full-height vertical dividers.
 Once the box is filled it looks like this. A full box of brass mats weighs a little over 4kg (a little under 9 pounds). Naturally, boxes containing aluminum mats or missing sizes will weigh less.
This was one of the boxes I filled early on when I was ambitious enough to write the sizes and line standards inside the cover.
There is also a bit of room along the right side of the box for a few more mats or other stuff.
From top to bottom the compartments contain:
- Line standard and/or reference sample cap H
- Miscellaneous non-letters
- Standard points (plus & and $)
- Figures (without $)
- Uppercase alphabet
- Lowercase alphabet
- Miscellaneous letters (ligatures and alternate forms)
There is also room on the inside of the cover for other notes about the face as needed.
I find a couple of minor disadvantages in this storage system:
One is that picking out a particular mat, especially an alphabetic one, requires a lot of counting or good guesstimation. I am strongly tempted to use my mill to engrave the letter on the top edge of each mat.
Another is that I think I made the dividers a bit tall, making it harder than it should be to lift out a mat.
As well, the dividers are loose in the box and if they work up it makes pulling a mat even harder. With a full box of brass mats the dividers can work up quite easily as the box flexes in handling under the weight of the mats.
If I were to make up more of these (and it looks like I’ll have to soon, since I’m out of boxes but still have mats to store) I would make the dividers narrower, and somehow arrange that they bit into the box sides (perhaps heat them so they melt into the plastic a bit?). I would also forego the nice accurate slots and just use my bandsaw to cut them.
The boxes can be stored on shelving or a galley cabinet (although only every second slot can be used because of their height). I happen to have a chest of small drawers where each drawer has room for one of these boxes and several matcases should I be so lucky as to find composition mats for the same faces I have in display sizes. The drawers are unfortunately not large enough to hold two of these boxes so I’m not sure what I will do for faces that have many alternates (e.g. a large set of swash caps) or come in other display sizes (such as 12 point).
I updated the link for the Typecasting Mailing List to reference http://lists.riverweb.com/listinfo/index/typecasting which is a page of information regarding the list, including subscription information.
Updated the link for the Typecasting Mailing List again, now hosted on lists.welliver.org.