
The actual papermaking workshop
At last, on to the actual workshop!
Please also see the other parts of this series:
- Part 1: Introduction
- Part 2: Travel and sightseeing
- Part 3: Extracurricular activities
- Part 5: Other Notes
Monday: Fibre Preparation
We were using fibre from previous years’ kozo harvests, when the stems had been steamed and the bark stripped off and dried. We started with this raw bark, which had been soaked to soften it up again, and spent a good chunk of the morning scraping off the “black bark”, which is the outermost bark layer that you see on the surface of the live stems. This bark is a fairly thin, almost flimsy, non-fibrous layer which was scraped off by dragging the bark strips against large kitchen knives with a scrap of carpeting as a backer.
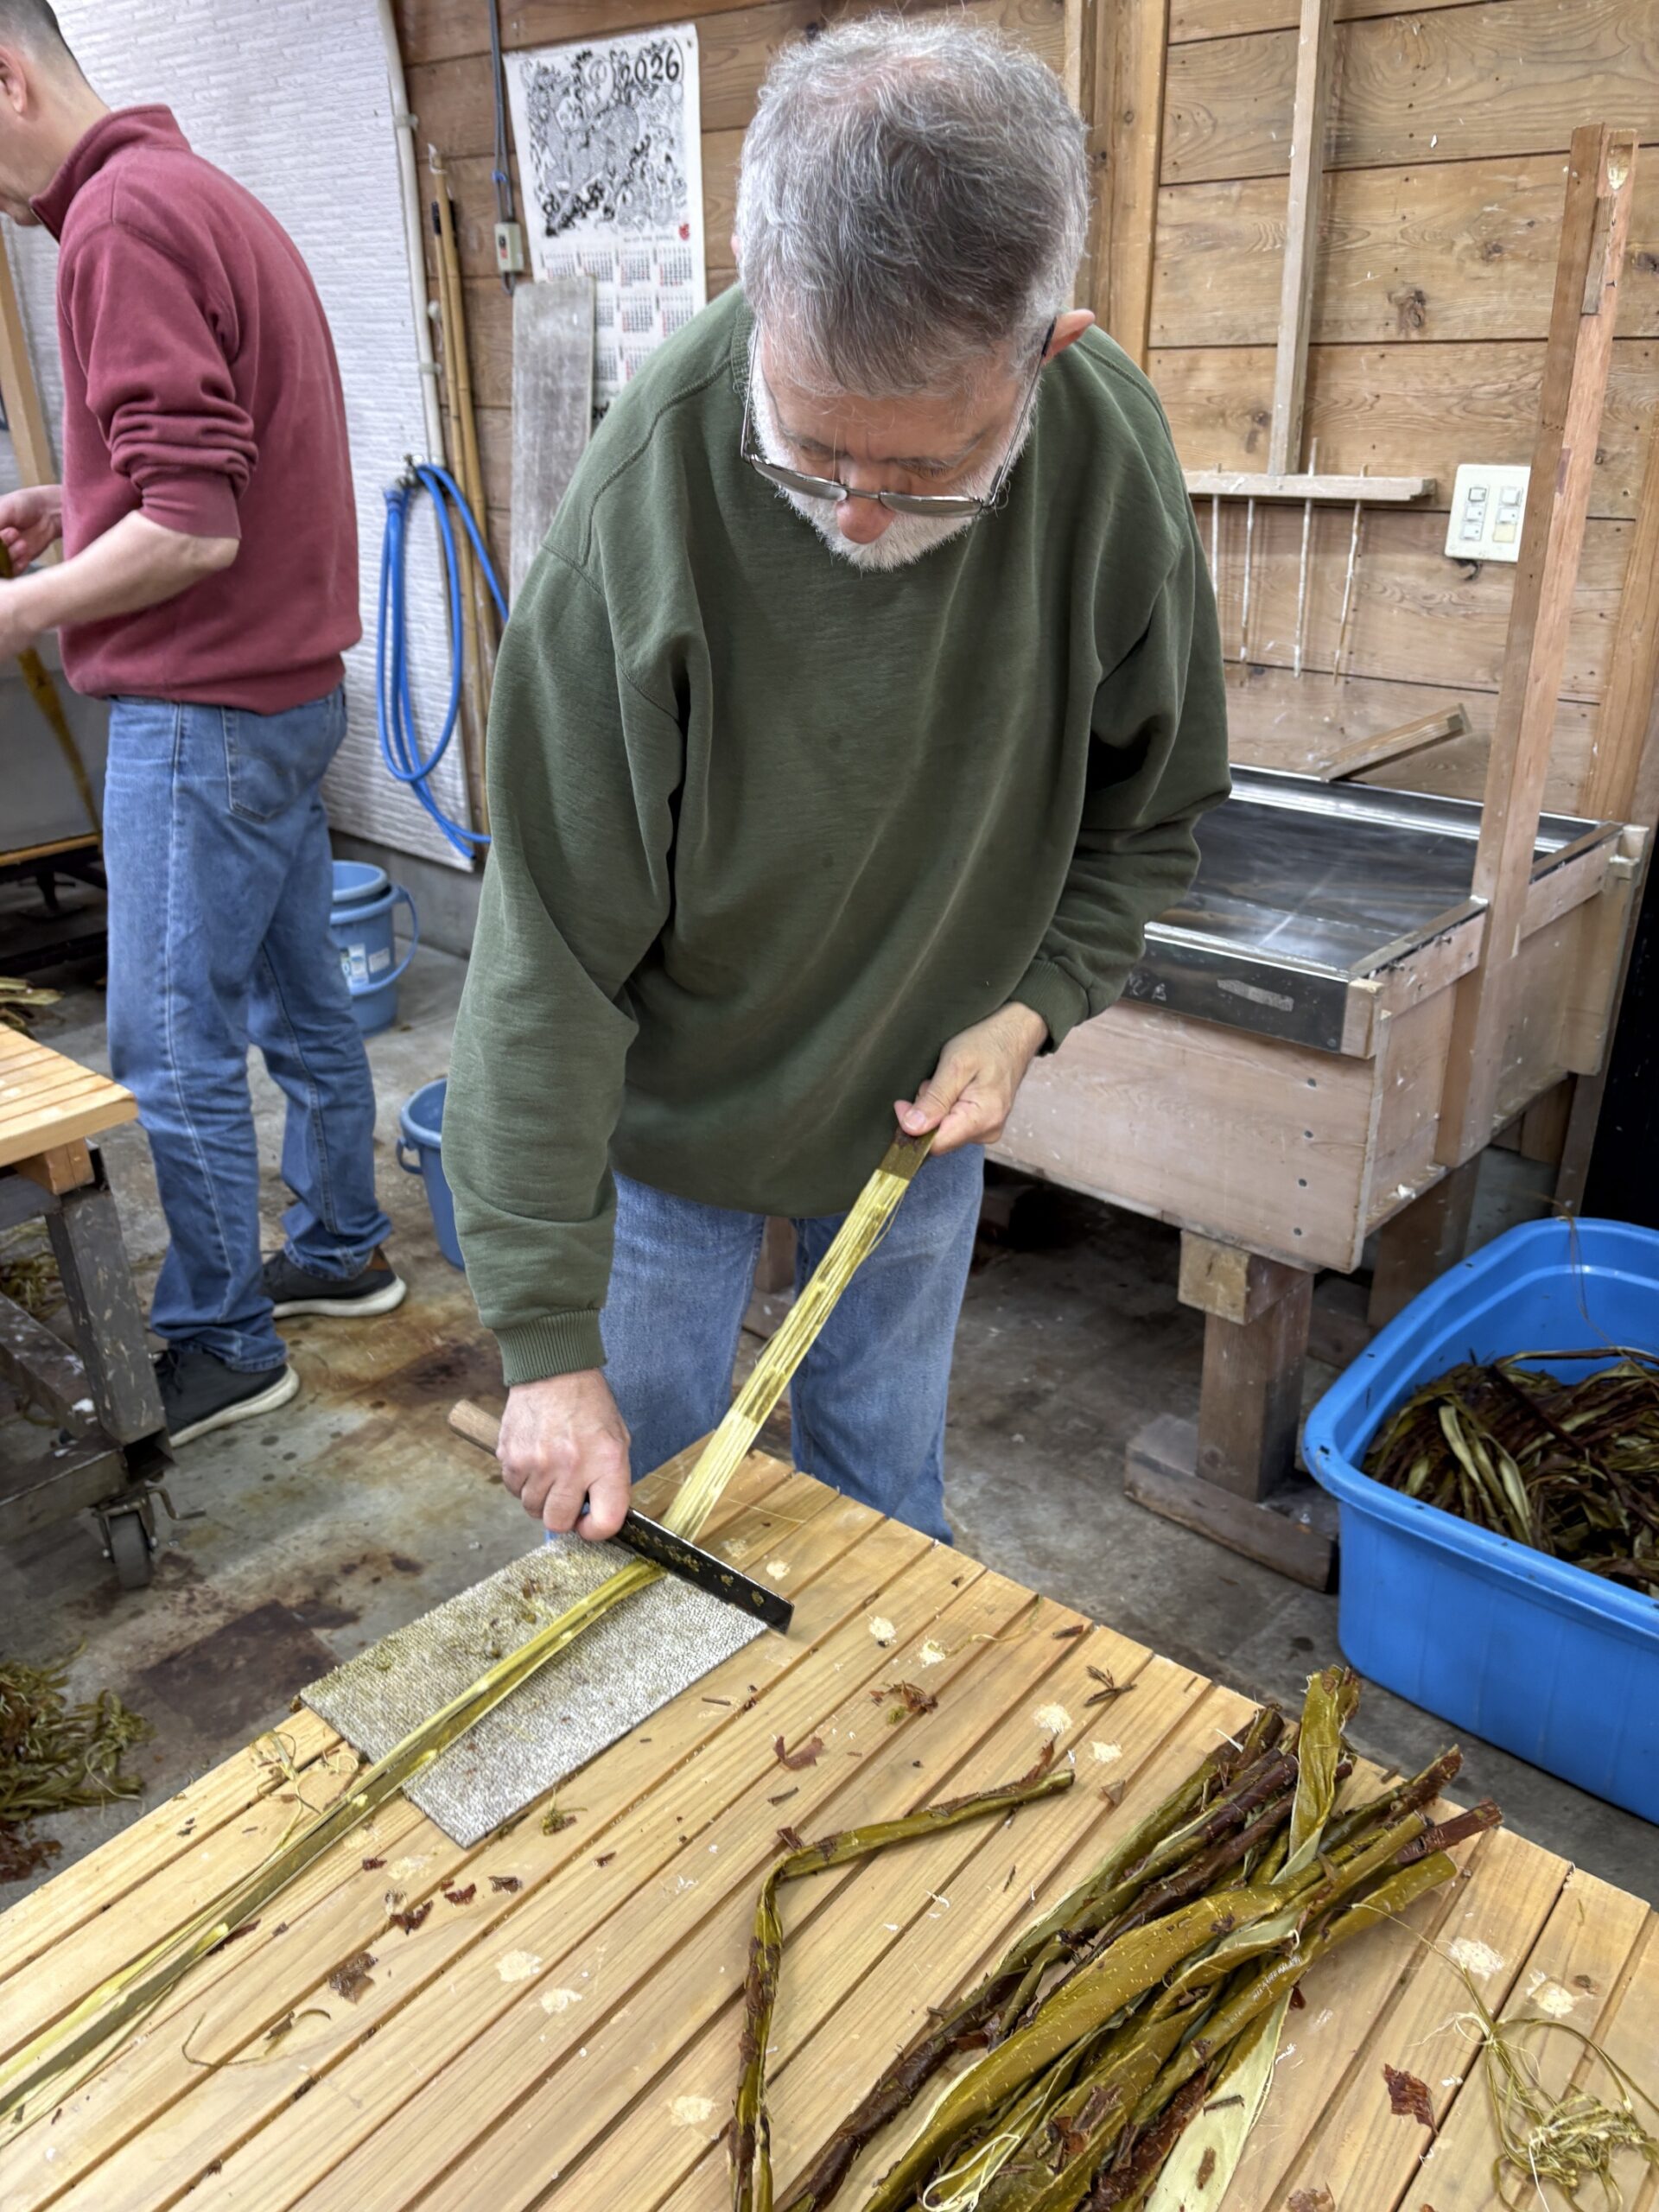
Scraping off some of the green bark. Bits of the black bark, already all removed, are visible on the table
By adjusting the blade angle, you could control how much of the next layer, the “green bark”, is also scraped off, leaving the inner “white bark”. The white bark is the thickest layer and the cleanest fibre, producing the whitest paper, while the green bark provides better inter-fibre bonding but contributes a yellow-green colour to the finished paper, which eventually ages to a pale brown. Removing as much green bark as possible will give the whitest paper but will reduce yield because of the fibres of the green bark being lost.
After scraping, the bark strips were given a quick swish in clean water to rinse away any remaining loosened bits of outer bark
After lunch, we loaded a cooking pot with the fibre we had scraped. The pot contained water which had been leached through wood ashes, making it alkaline. This was left to cook through the day; the original plan was for us to do draining and rinsing as well, but the cook started late, so Imai-san did the draining and rinsing after supper once we were all back in Nagaoka.
While this was cooking, we worked on snow-bleaching. After a short discussion on the process, we each put out a few strips of the bark we had scraped to bleach on the snow for a few days.
 We also prepared for bleaching a batch of scraped bark Imai-san had; this had been dried for storage and had to be soaked before bleaching. We put up the soaked fibres in small bundles using zip-ties for easy handling in the bleaching process, but by then the day was warming enough that the crust on the snow could not support us reliably, so we had to wait until morning to put them out. We left the bundles hanging on pipes overnight; they would dry out a bit but not enough to interfere with bleaching.

Soaked bark strips, in bundles, ready for tomorrow’s bleaching
Tuesday: Making the pulp
In the morning, we laid out Imai-san’s fibre prepared the day before onto the snow for bleaching. The snow is still quite deep here, over 1 metre, so morning is be best time to do this because the snow has a crust to support our weight. As the day warms up, the crust softens and it is much more likely that you might sink up to your hip into the snow.
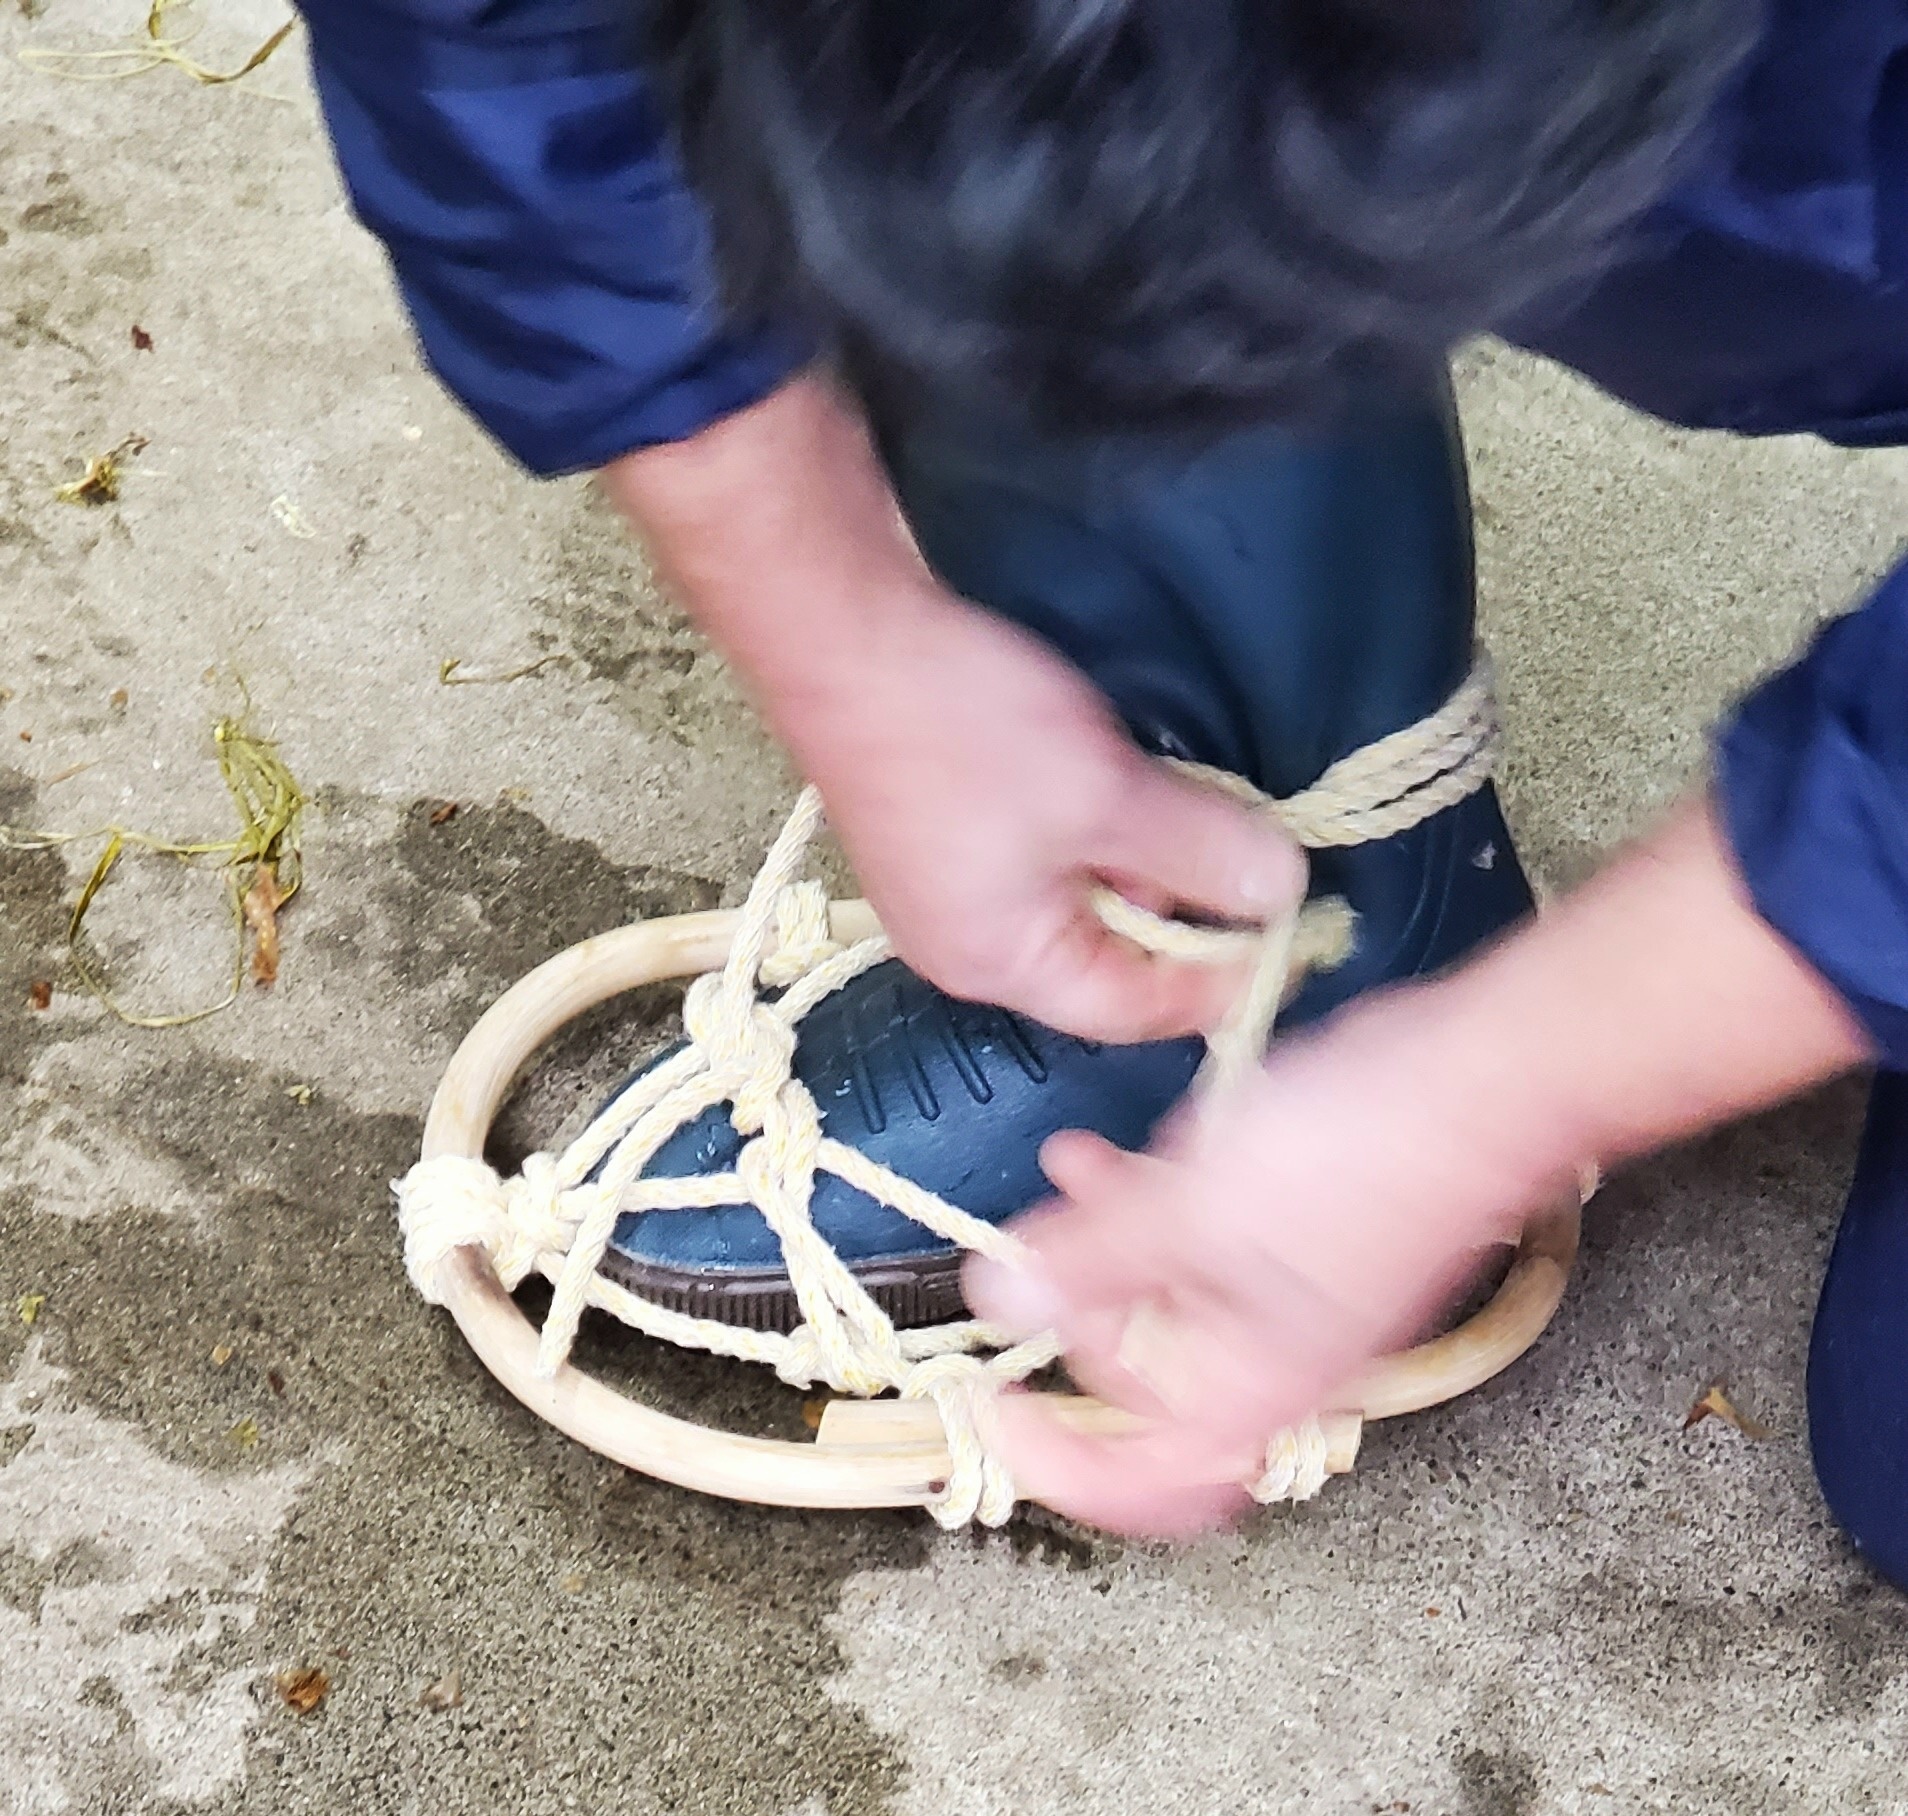
Imai-san’s snowshoes for when the snow is too soft

Contrast between the fibre we put out and what had been bleaching for a few days. The stake shows the date, March 12th, so the whiter stuff has been out for 5 or 6 days. Note the brown flecks and cut ends on the fibre
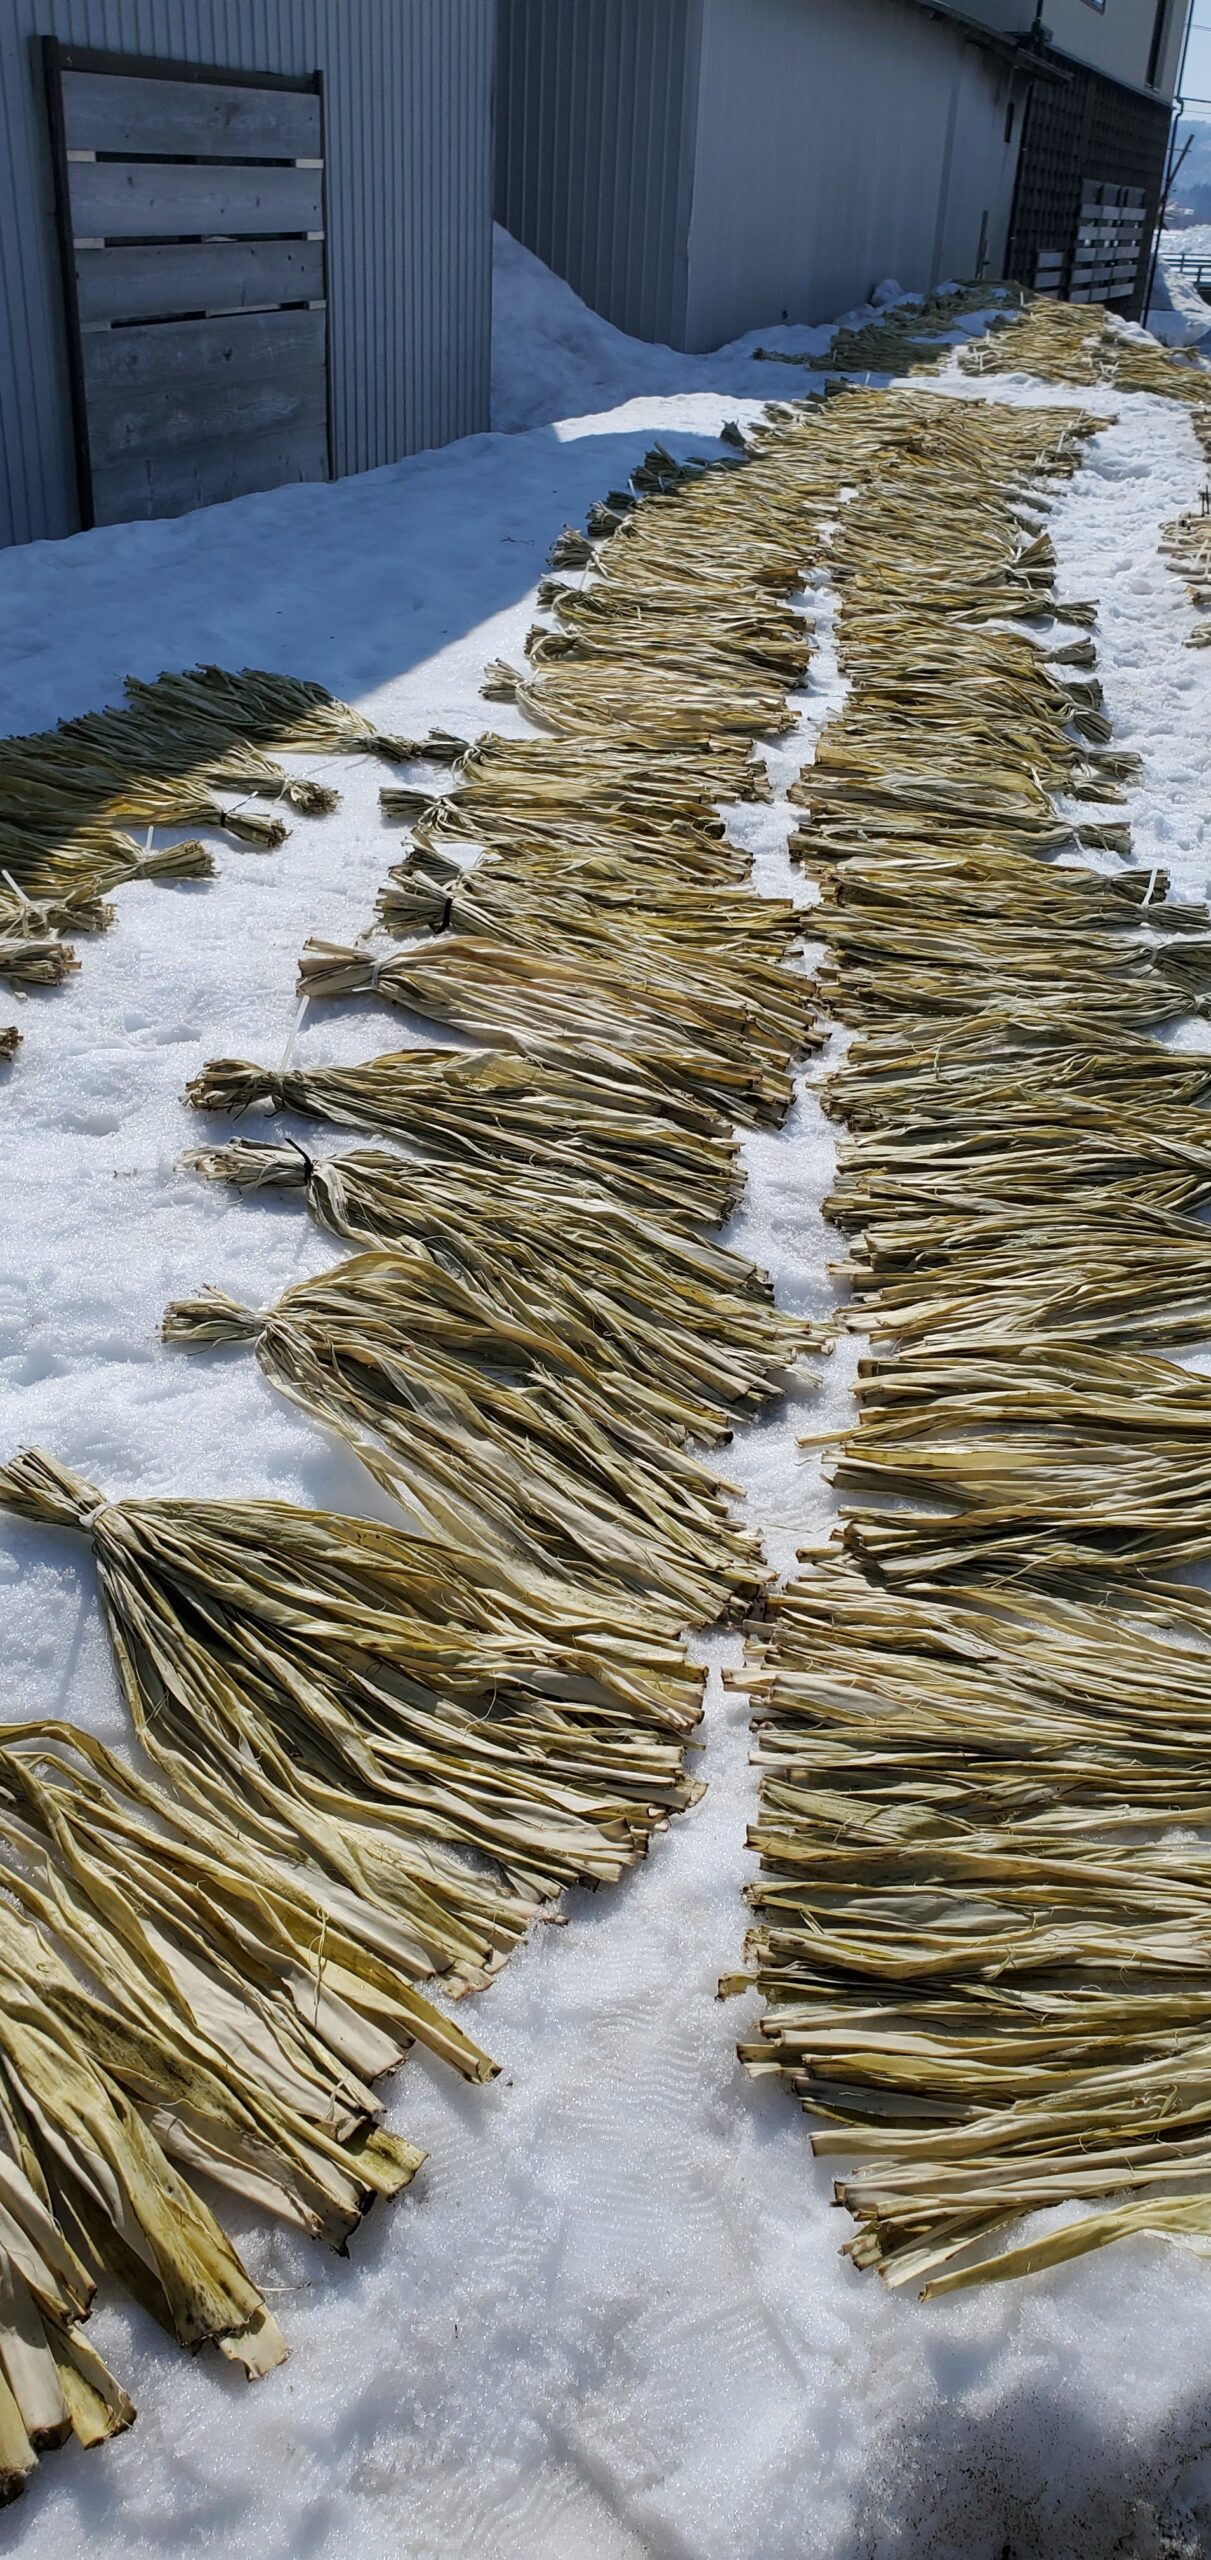
Some of the fibre we set out to bleach. The bundles should really be smaller
The evening before, Imai-san had drained and rinsed the cooked unbleached fibre, and for us, after lunch, it was on to the tedious task of chiri-tori, removing any small dark flecks that would disfigure the finished paper. This involves carefully examining each strip of cooked bark while it is floating in water, and picking out any dark bits. These come from the cut ends of the strips, stumps of side branches, and insect or other damage to the plant while it was growing. You can see these on the close-up of bleaching fibre, above.
Chiri-tori. Some of us sat down for this but I found this put me at an awkward height, so I just stood
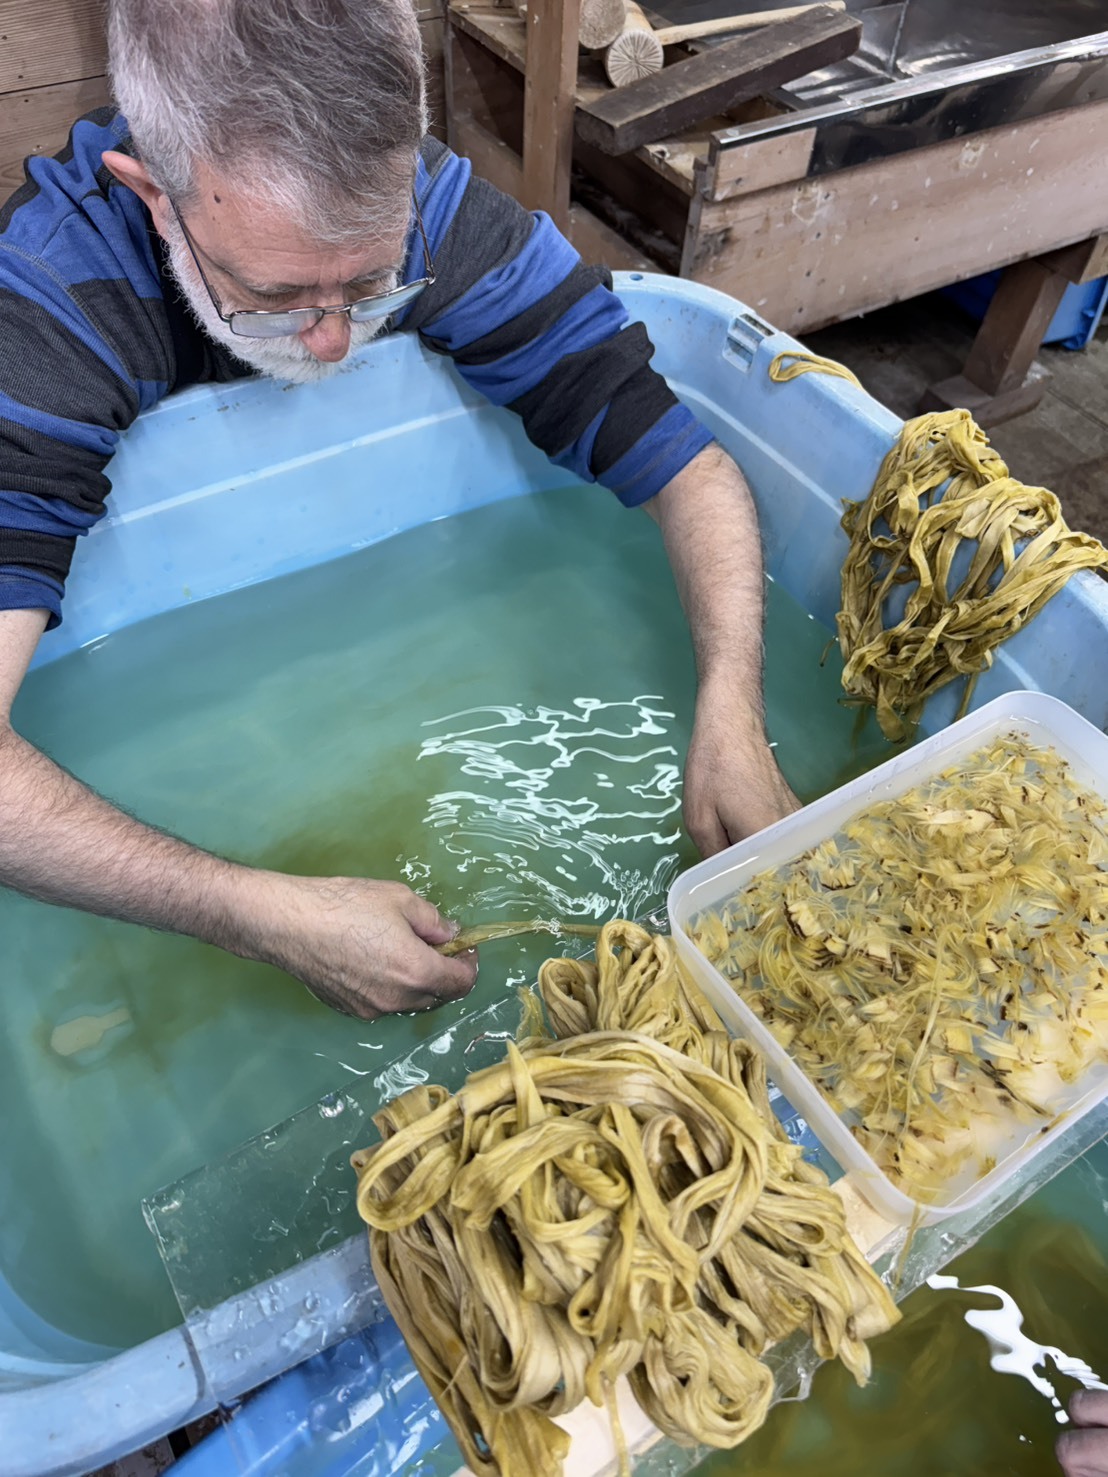
Close-up of the process, with me trying the seated position. Unprocessed fibre is draped over the side of the tub. Cleaned fibre is piled loose on the plank, and dark bits are rinsed off our fingers into water in the smaller tub
These dark bits, along with some of the black and green bark removed Monday, were collected to use as a decorative feature in some of the paper we will make. This stuff is considered a flaw in what should be a plain white sheet, but is a feature when used deliberately to decorate the paper.
Once the cooked fibre was cleaned of flecks, it was time for beating. We beat some of the fibre by hand using a couple of styles of beating tool, but we loaded most of the fibre into the studio’s naginata for mechanical beating, so we would have enough pulp ready for the next day.
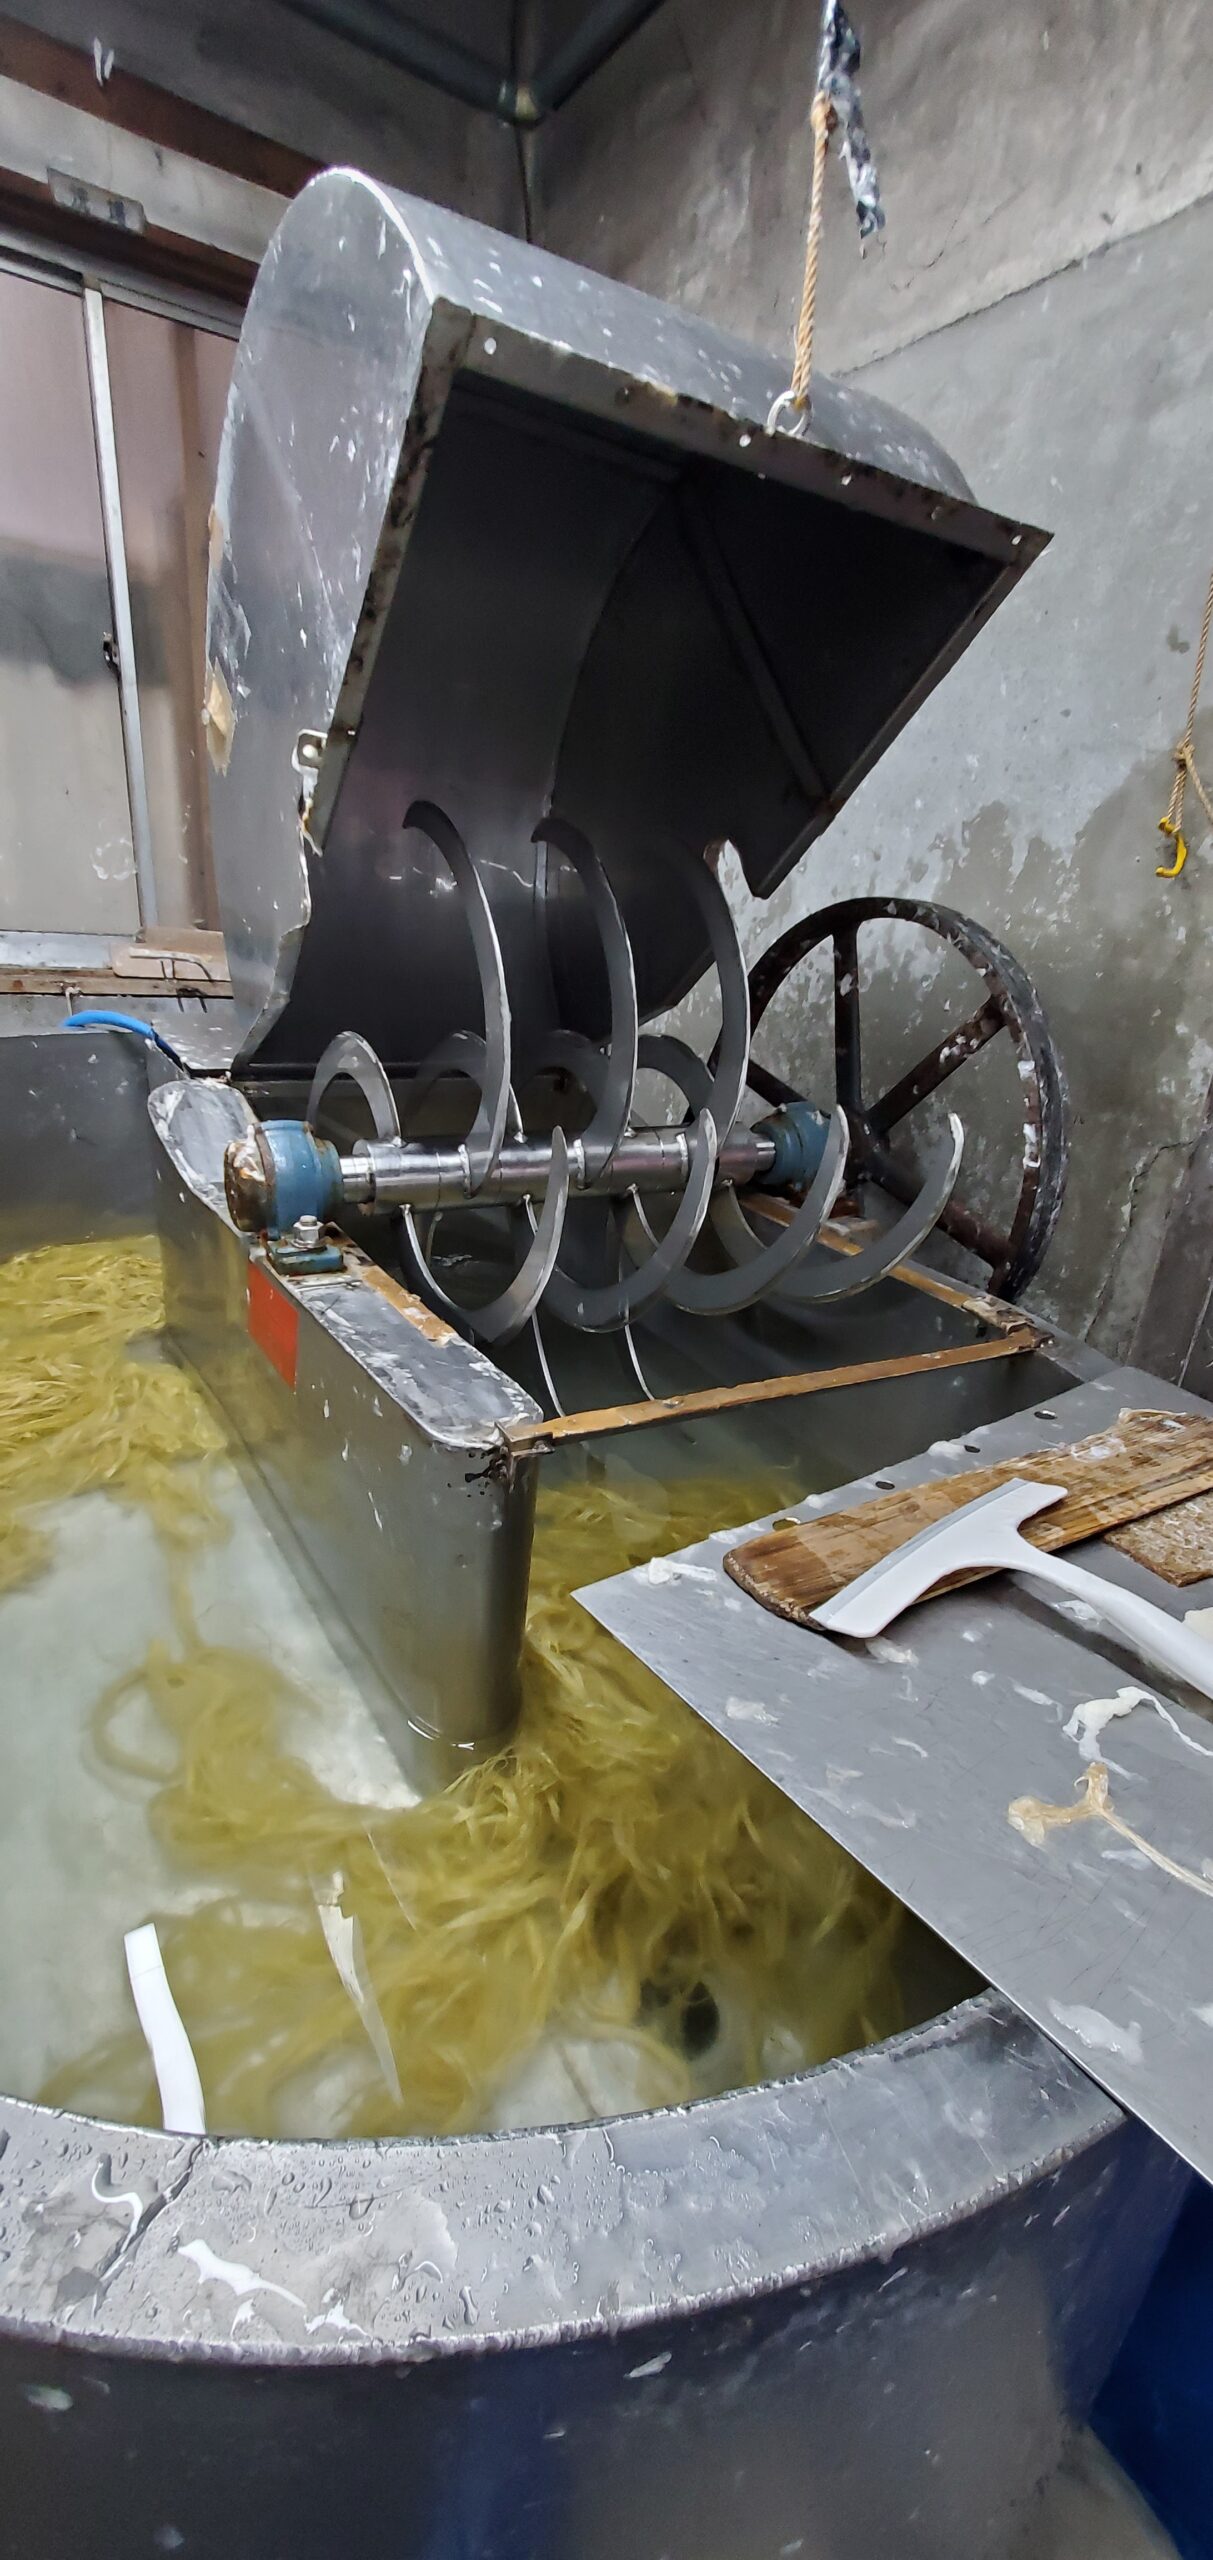
The naginata beater. The shaft rotates clockwise seen from this end, and for size reference, the channel under the blades is about 40cm (16″) wide. The blades are not very sharp, so the effect is mostly to tease the fibres apart by dragging them rapidly through the water
While we were beating our fibre, Imai-san was busy preparing neri, the slimy formation aid made from tororo-aoi roots. He goes through a lot of this in his own papermaking, and so prepares it in large batches. Rather than growing the plants himself, he buys the tororo-aoi roots; I’m not sure if this is because the plant grows better further south, or if this is just another complication he wants to avoid. He smashes the roots on the floor using a heavy wooden post as a stamper, and places the roots into a tub of water. After soaking for a while, the water, now very slimy, is decanted off, and the roots are put into a sieve to continue draining. The drained roots are usually given a second soak and drain to extract more neri.
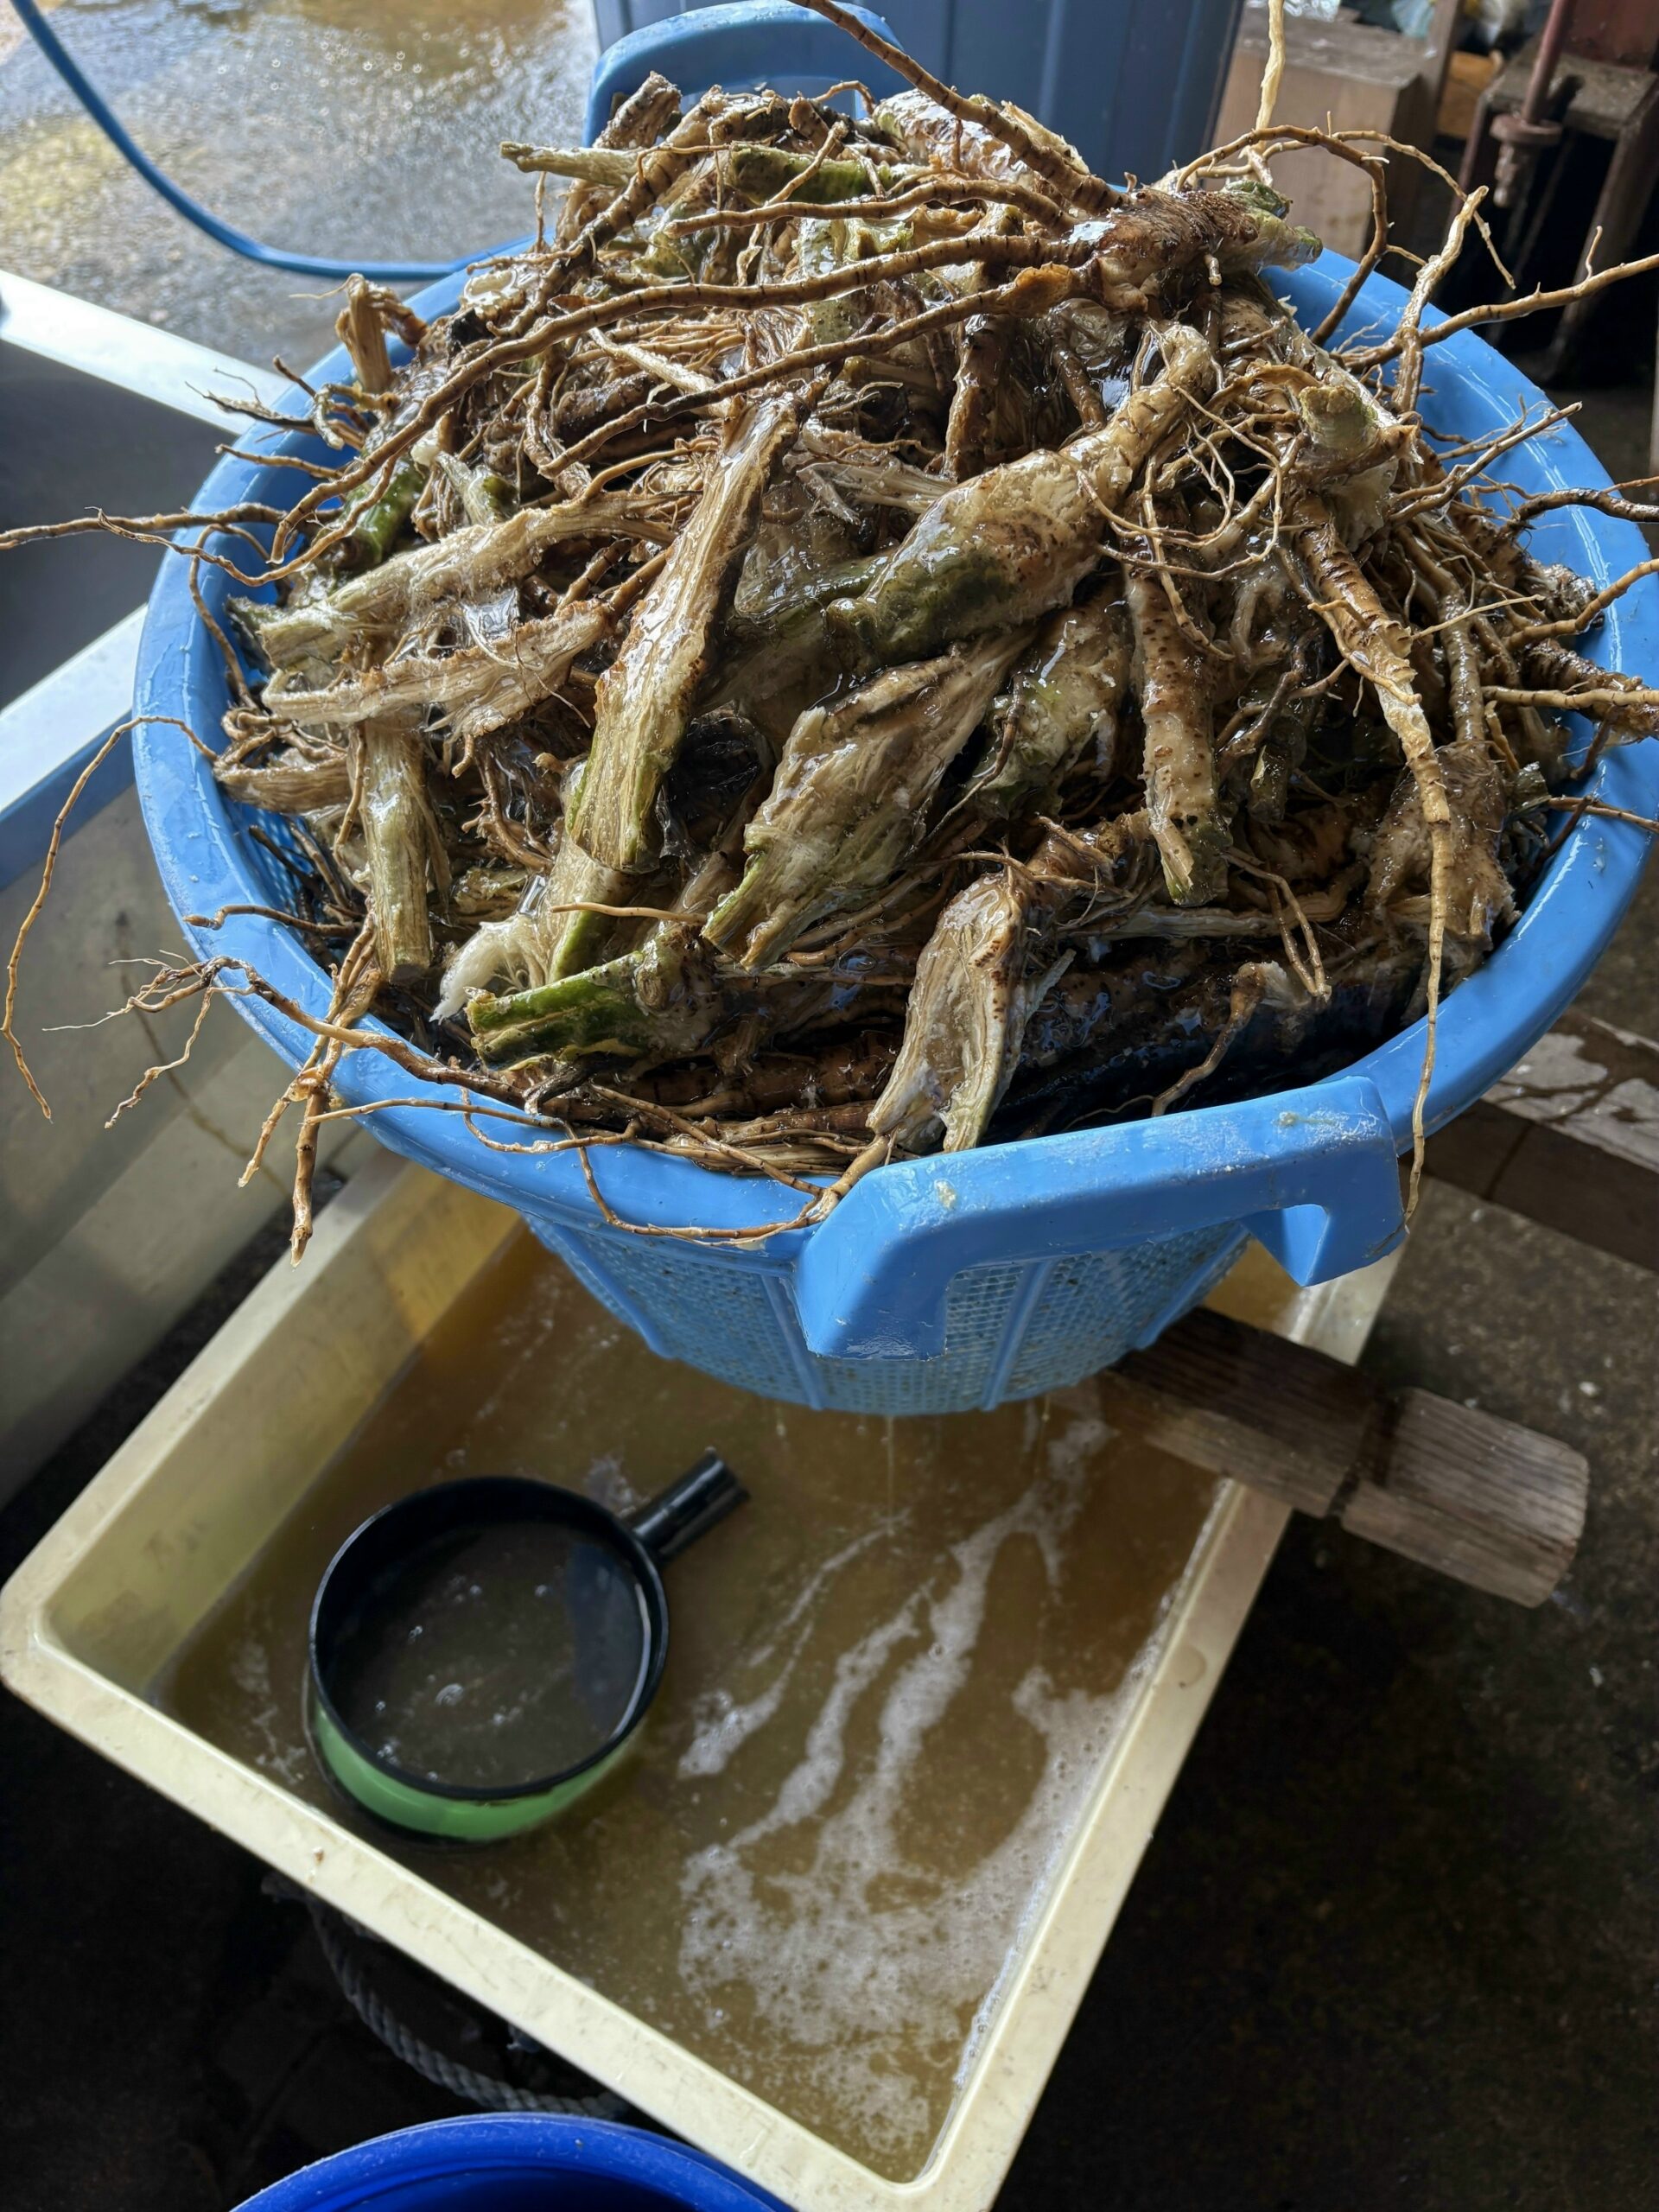
The neri formation aid draining off the crushed and soaked tororo-aoi roots
To remove the finer dirt from the formation aid, the liquid is poured into a pillowcase and hung up to drain.
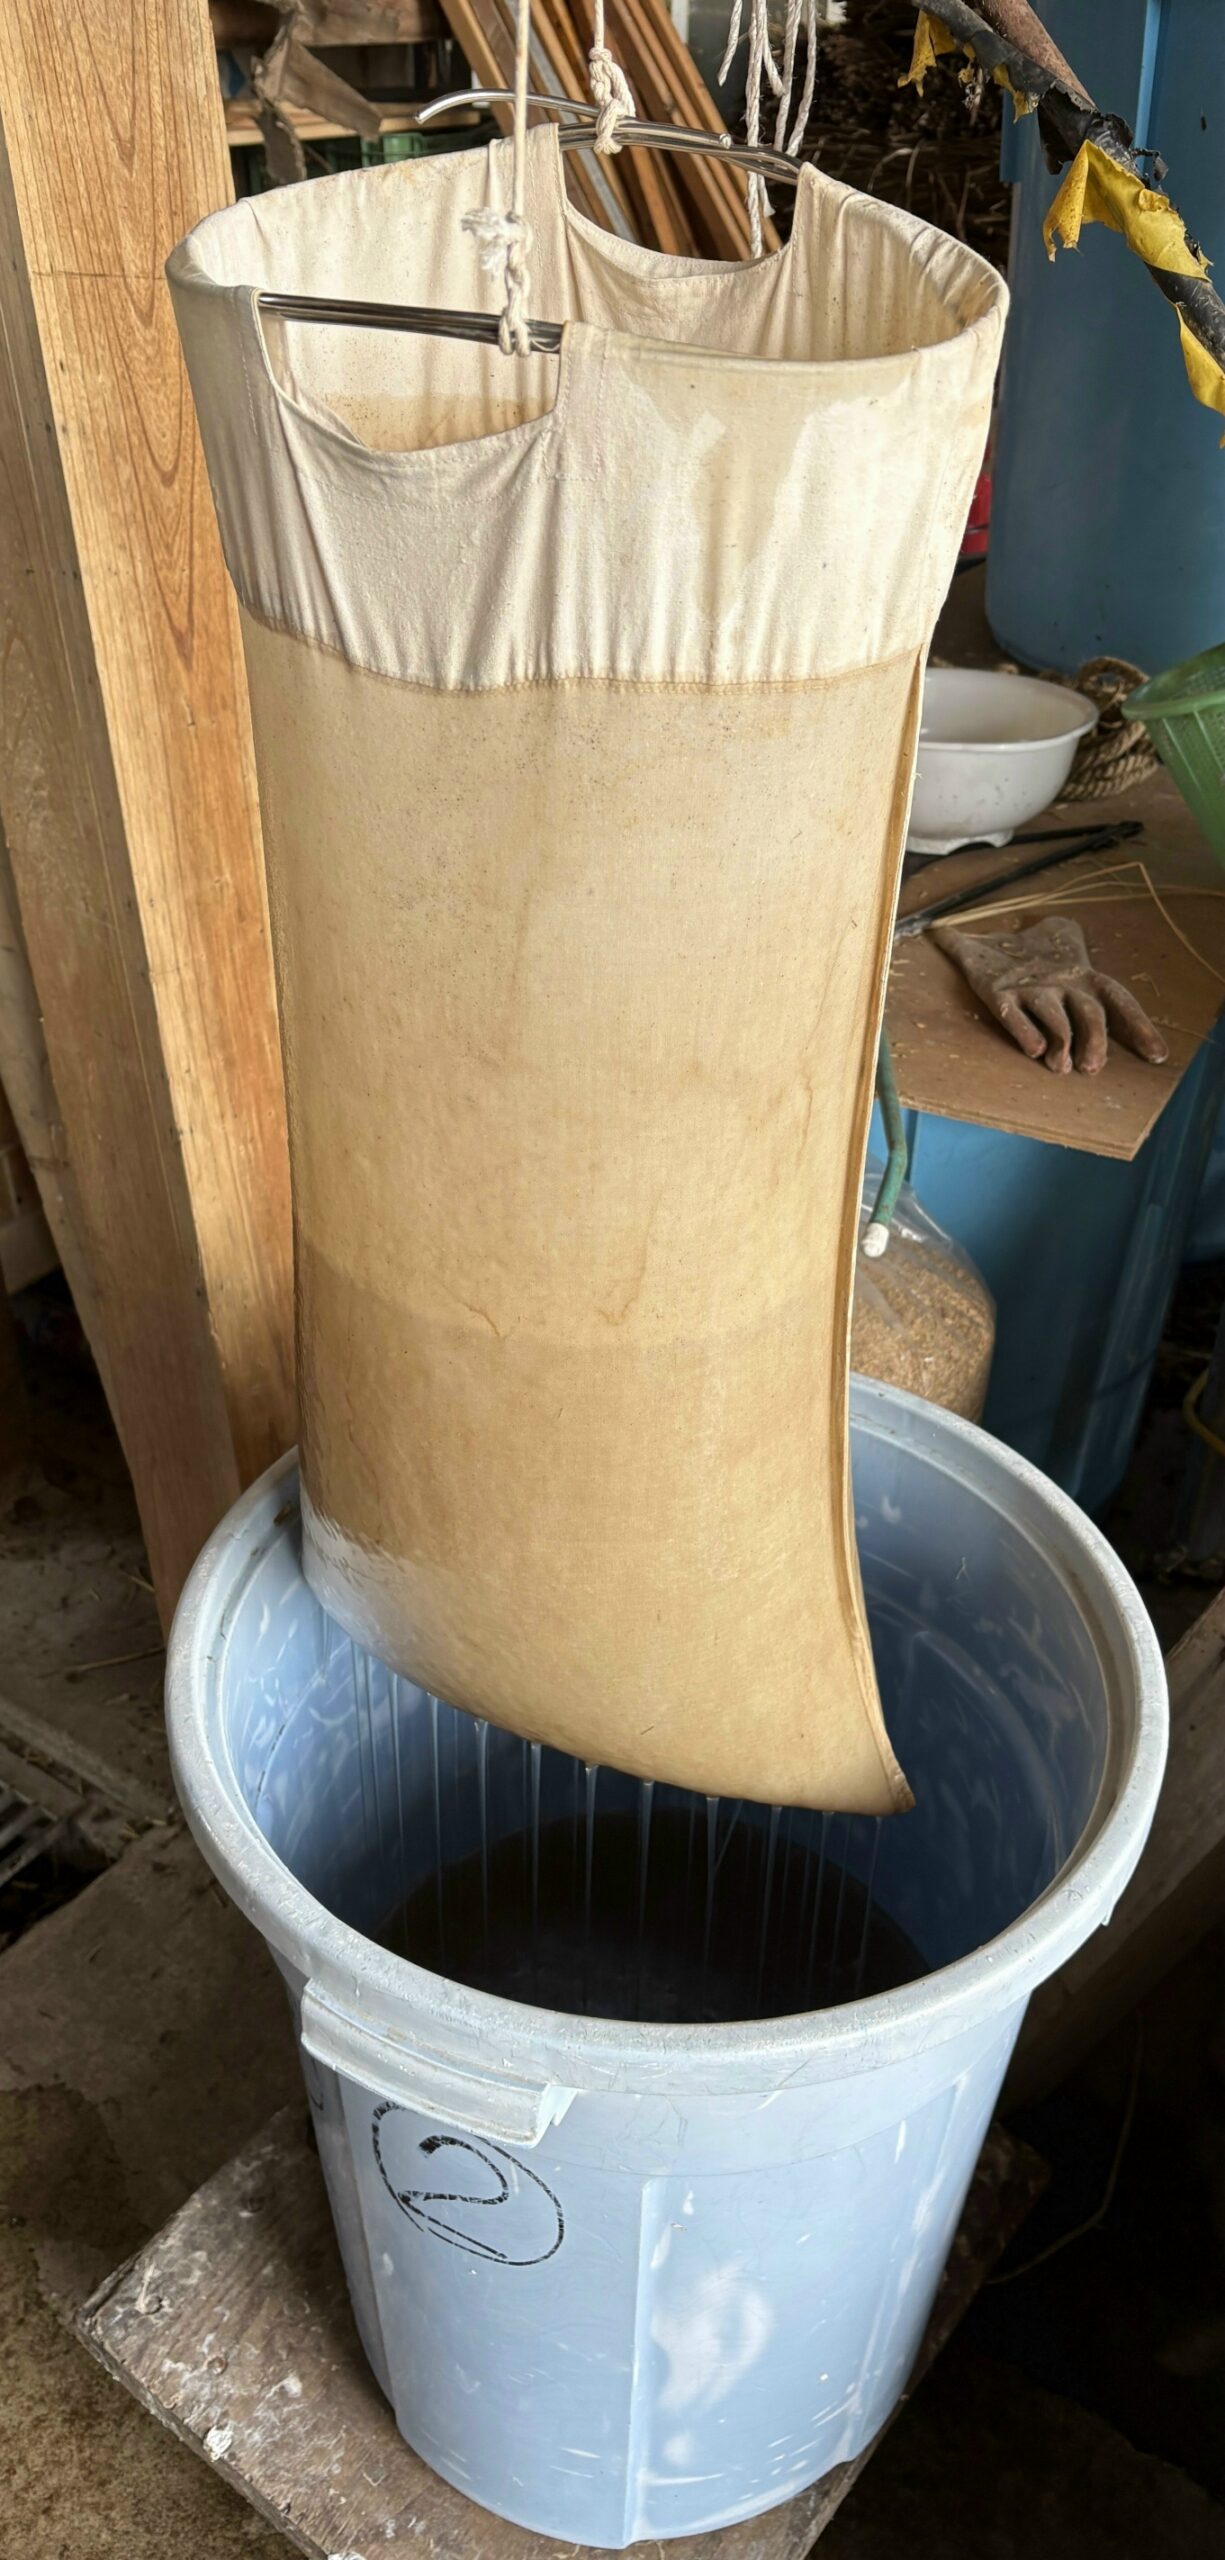
Filtering the neri using a pillowcase
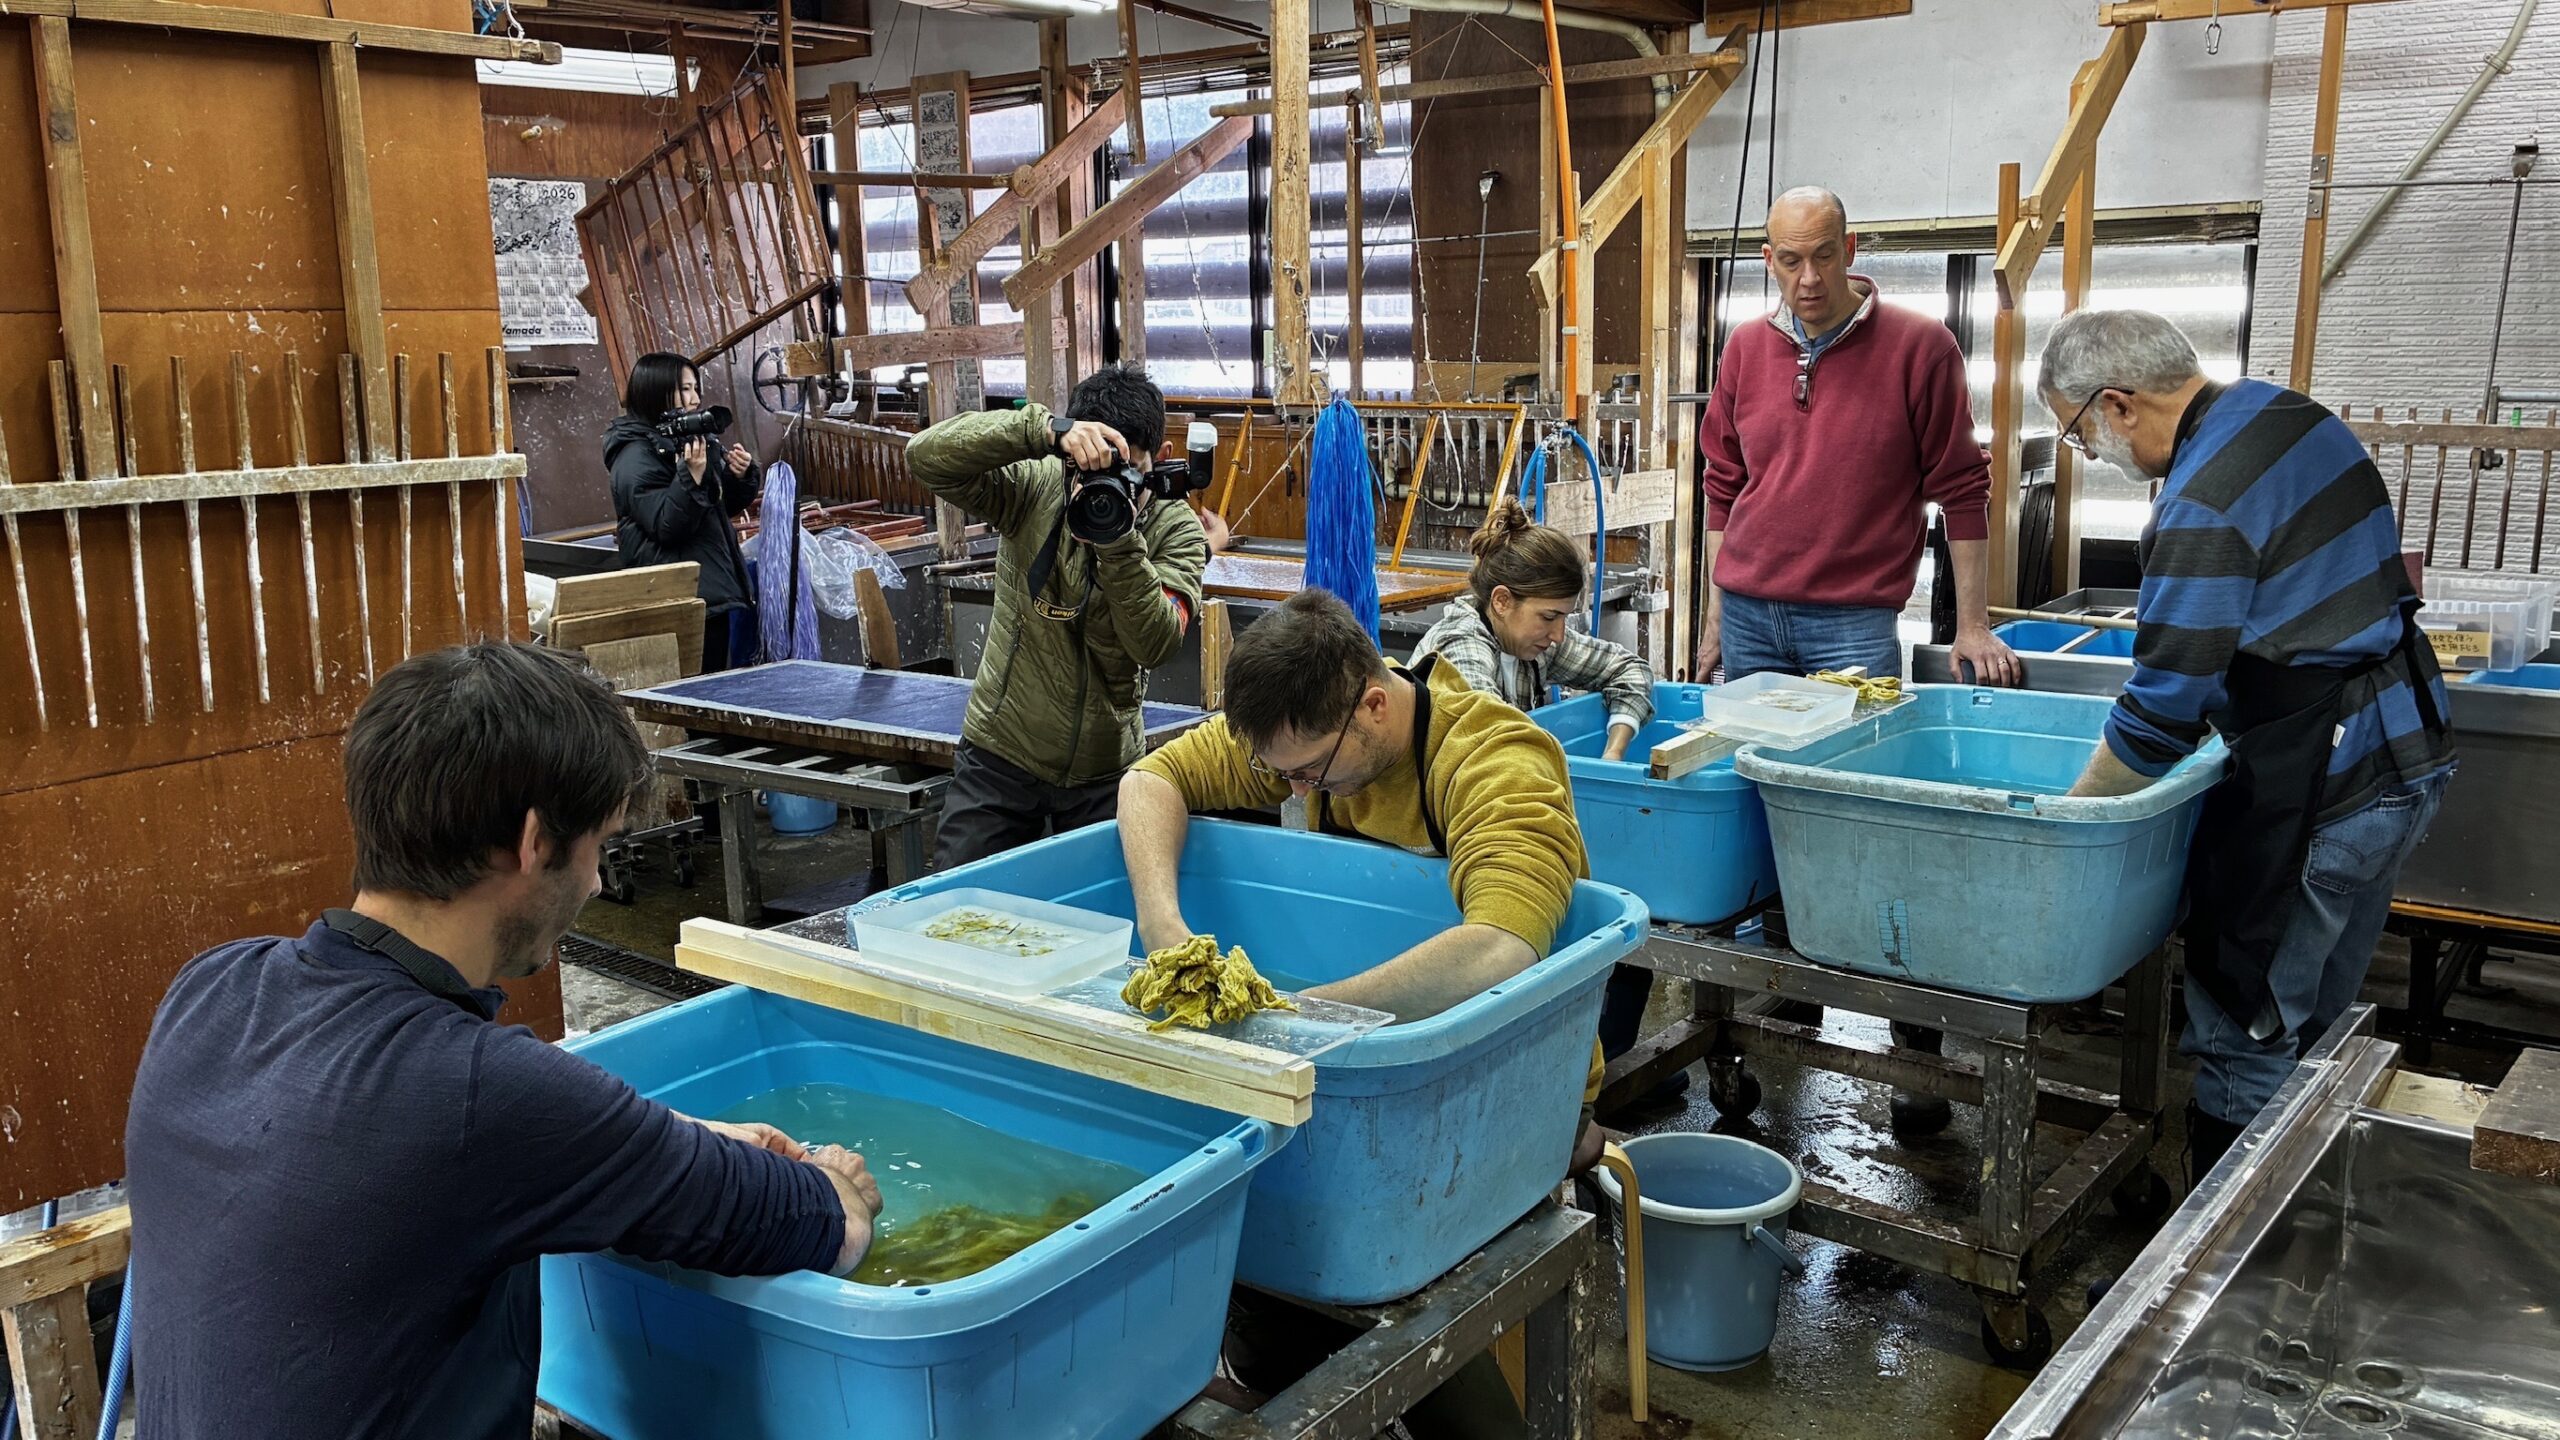
Mid-afternoon, we learned how to charge the vat, add neri, and get everything sufficiently dispersed. The vats are fitted with a maze (pronounced mah-zay), a frame with several teeth submerged in the vat water, pivoted horizontally above, which is vigourously pulled back and forth to break up the clumps of added fibre and help disperse the neri.

Michele using the maze on his vat on Wednesday
The maze usually leaves some smaller soft fibre lumps, from the fibres that drape onto its teeth, so the final dispersion is done with a pole, again very vigourously run through the vat water.
Here is Imai-san showing the final stirring technique on our vat. That tearing “shoomph” sound means you’re doing it right. It seems that, unlike the maze teeth, the pole does not accumulate fibres. This is likely partly because of its larger diameter, slicker surface, and the circular motion used.
We then learned how to actually form and couch the sheets. Our su (screen, pronounced “soo”) had thin bamboo strips at the top and bottom edges, and our keta (support frame and deckle, pronounced “kay-tah”) consisted of two separate flat frames, the lower one having two ribs to support the central area of the su. Before making each sheet we had to position the su on the lower frame of the keta, place the upper frame lined up on top, and hold tightly while making the paper so nothing shifted. When Imai-san is making his paper, he uses a su with larger wooden sticks top and bottom, and a keta with a hinged top and cutouts to hold the wooden sticks of the su in position. We each made a few sheets from a shared vat for practice, and couched them all onto a shared post with coloured Post-It tabs identifying which sheets were whose.
The opening in the keta is 29×40cm, so most of our sheets are this size as well.
Normally, paper made this way is couched with no separators between the sheets, just a ribbon or thread along one edge to help to start parting the sheets after pressing. For us beginners, though, we had some very light spun-bonded polyester interfacing sheets to separate the paper. After forming each sheet and removing the upper half of the keta, we would lay the interfacing onto the sheet, then transfer the su, paper, and interfacing together to the post, interfacing side down, and remove the su. There were various steps (su placement on keta, placing the interfacing, and laying the su/paper/interfacing onto the post) providing inaccurate positioning, so our posts we made the next day were, at least at first, not very straight stacks. I eventually got the knack of ignoring the position of the interfacing, and positioning the starter strip of the su relative to the board under the post which gave a neater post. Imai-san’s setup has alignment blocks so he can easily get the sheets stacked neatly, which is much more important because he is not using separators between the sheets, just an edge ribbon.
Wednesday: Making paper
We started the day by each preparing our own vat for papermaking: Adding fibre, breaking it up with the maze, adding neri (usually done by either Paul or Imai-san so we get a suitable amount), and final mixing with a pole. We then spent the morning making paper.
Every papermaker has their own technique for actually forming the sheets; the method Imai-san showed us was to start with three quick dips, just picking up a bit of vat water on the near edge of the sugeta (su and keta together) and tipping it back to run to the far edge where it is tossed back into the vat. This forms a thin starting layer of fibre on the su. Then the main body of the sheet is formed by taking full dips in the vat, more or less filling the upper half of the keta frame, and moving/rocking the sugeta to and fro to keep the water moving on the su, and once maybe half or two thirds of the water had drained through the su, tossing the remaining water back into the vat. The rocking motion aligns the fibres and also prevents larger fibre clumps from settling on the su; these get thrown back into the vat, leaving a sheet made of fine fibres. You could also rock the sugeta side-to-side to produce a paper with more cross-grain. Once you felt your sheet was thick enough, one more quick dip (like the starting dip) produced a uniform surface and it was time to couch off the sheet.
As beginners we judge the sheet is finished by essentially counting how many dips and how long each is kept on the su, but as fibre is used up in the vat this will make the sheets thinner and thinner. The proper way is to visually evaluate how much fibre has accumulated on the su, but that requires a lot more experience.
I don’t have a video of any of us making a sheet on our sugeta, but further down there is one of me making a sheet on Imai-san’s larger setup.
We would then remove the upper keta frame, and hold the su and lower keta frame tilted for a few second to allow some water to drip off. Then we cover the su and paper with a sheet of interfacing, and pick up the su, paper, and interfacing all together from the near edge of the su, holding the su vertically, interfacing/paper away from us, with our other hand holding what was the far edge. We would then simultaneously turn around (our posts were behind us) and also flip the su top-to-bottom.
We place what was the far edge of the su onto the top of the post, trying to get the new sheet lined up with ones already there, and lower our second hand so the su and paper roll onto the top of the post, until what was the near edge when on the keta is laid down at the far edge of the post. The goal is to not trap any air pockets between the sheet and the top of the post. A quick outward rub on the back of the su can be used to try to expel any bubbles and get good contact between the sheets.
We seemed to have our own preferred hand choices for the transfer process; I picked up the near edge with my right (dominant) hand, and that hand then ends up rolling the sheet onto the post, with my left hand having positioned the starting edge. Based on photos, it looks like Michele did the same but Clara did the opposite, and Alex, who is left-handed, also used reversed hands but it was still his dominant (left) hand picking up the near edge.
Now it is time for the trickiest part, removing the su (and leaving the sheet on the post undamaged). Imai-san and Chihiro-san showed us two different techniques for this:
Imai-san’s method is to lift the edges of the su, about halfway down either side, separating the su from the sheet along two tip-to-tip wedge-shaped areas, then sliding our lifting fingers towards us moving these separated wedges towards us as well. Once we reached the edge strip of the su (which was as flexible in this orientation as the splints of the su) this would leave us with the near edge of the sheet mostly separated. We continue moving our lifting fingers around the corners of the su and towards each other and then press down on the ends of the edge strip. This would flex the center of the strip upwards lifting it off the sheet. Then the entire su could be peeled off the sheet away from us.
This method only works when the su has thin flexible edge strips. Chihiro-san’s method is the more usual one, used when the su has rigid sticks along its edges. You essentially lightly press down on the stick and immediately tip it up and away from you and quickly lift it a bit, maybe only a centimetre or half an inch, checking if the su has separated from the sheet along the entire edge. If it hasn’t, you put the stick back down and try again, making sure in particular that the spot that did not separate gets pressed down. Once the edge has separated cleanly, you peel off the su as in the other method.
I don’t have a video of the entire process in sequence, but in this clip you see Clara removing the upper keta frame, draining the sheet a bit, and reaching for a piece of interfacing, Alex laying his su and sheet on his post, and me lifting off the su using Chihoro-san’s method.
This is actually from our Thursday session and Michele is doing water-drop paper, a special decorative technique. And yes, once we got into it, the room was very quiet.
When we returned from the Shimenawa workshop after lunch, we spent the rest of the afternoon making more sheets. We also each got a try using the large mould and vat which Imai-san had set up for making his own paper. Because he already had several sheets of his own paper in the post, he did the couching for us so we would not destroy his work. During the day, in addition to working on some of his own paper production, Imai-san also pressed and dried our shared post from Tuesday so we got to see our first finished sheets.
Throughout Wednesday, Imai-san was also preparing some bleached pulp for us to use Thursday. We were partway back to Nagaoka when he realized he had left the heat on the cooking pot and we had to turn back so he could turn that off. By Thursday morning he had this fibre drained, rinsed, chiri-tori’d and beaten in the naginata, and had also pressed his own post that contained our large sheets.
Thursday: More paper, and pressing and drying
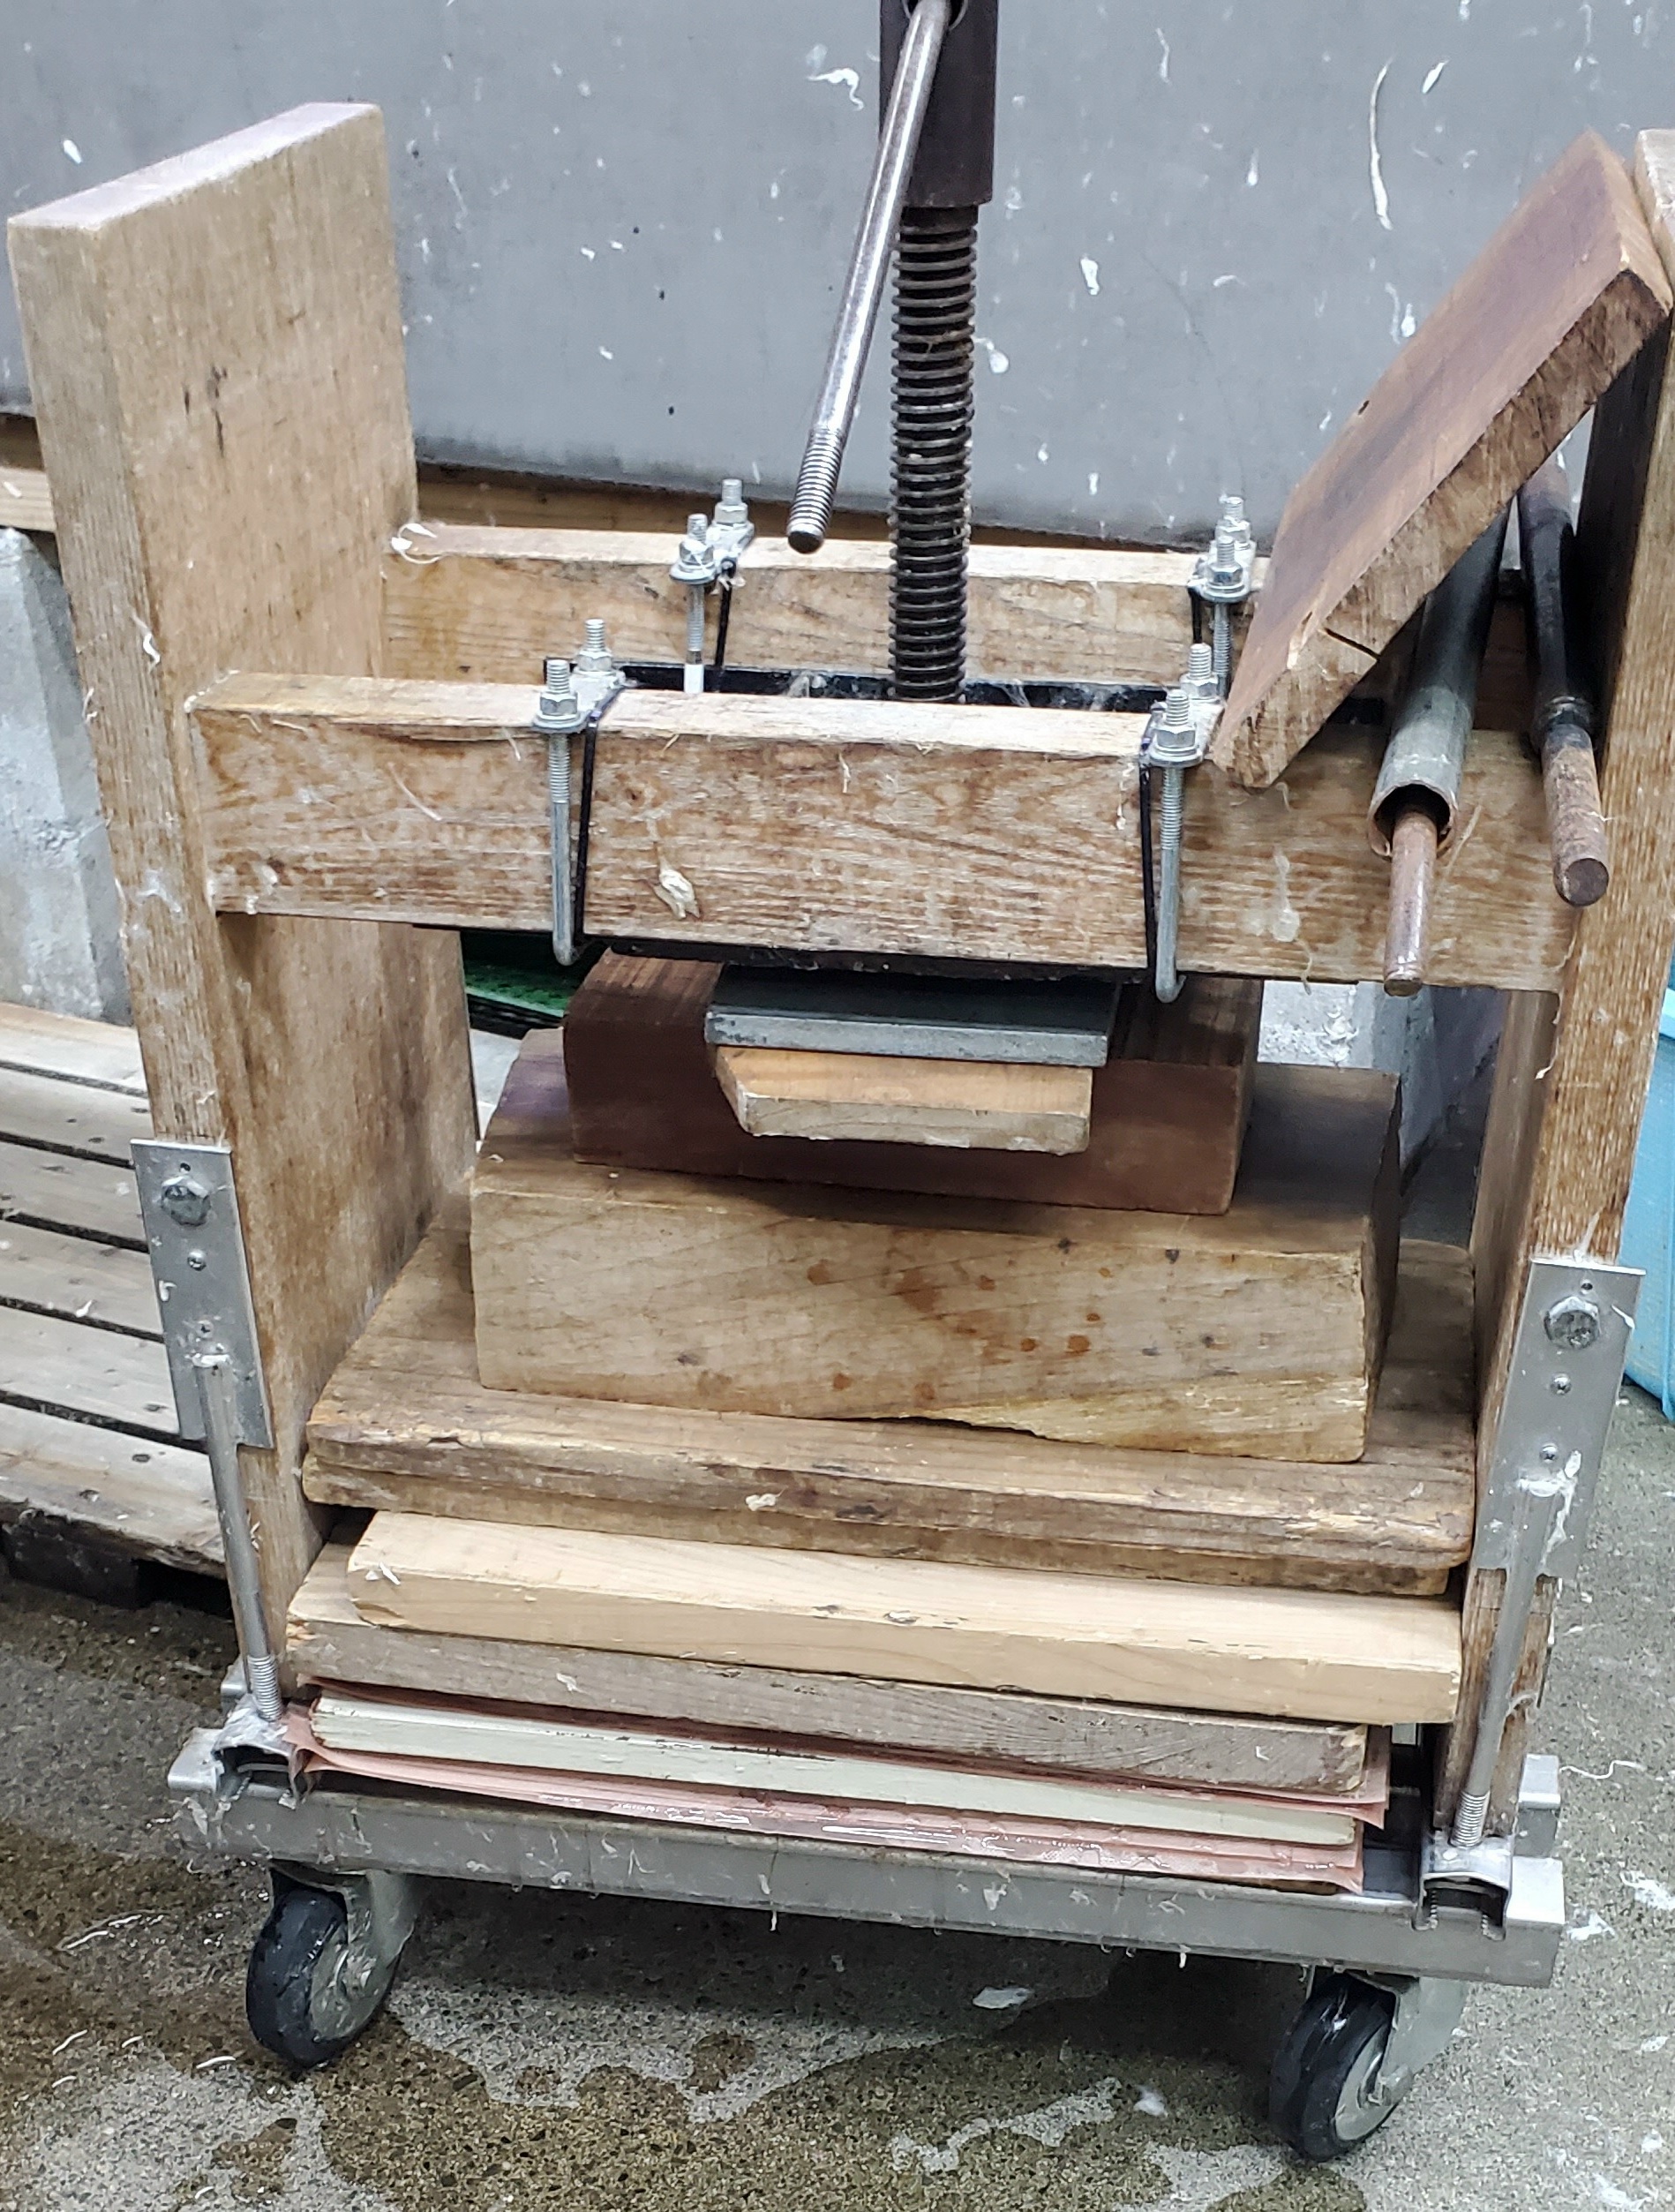
On Thursday morning, we made paper using snow-bleached pulp which Imai-san had prepared for us. Our posts from the day before were also placed in the press and the water was slowly pressed out. For our paper, the press is just a small screw-press, which we occasionally tightened using just a single finger on the bar to avoid pressing too fast. If you press too fast the outward movement of the water will drag fibres with it, giving the sheets a bulgy shape and making them hard to separate. As pressing neared completion we would use a short pipe on the bar to get a bit more force.
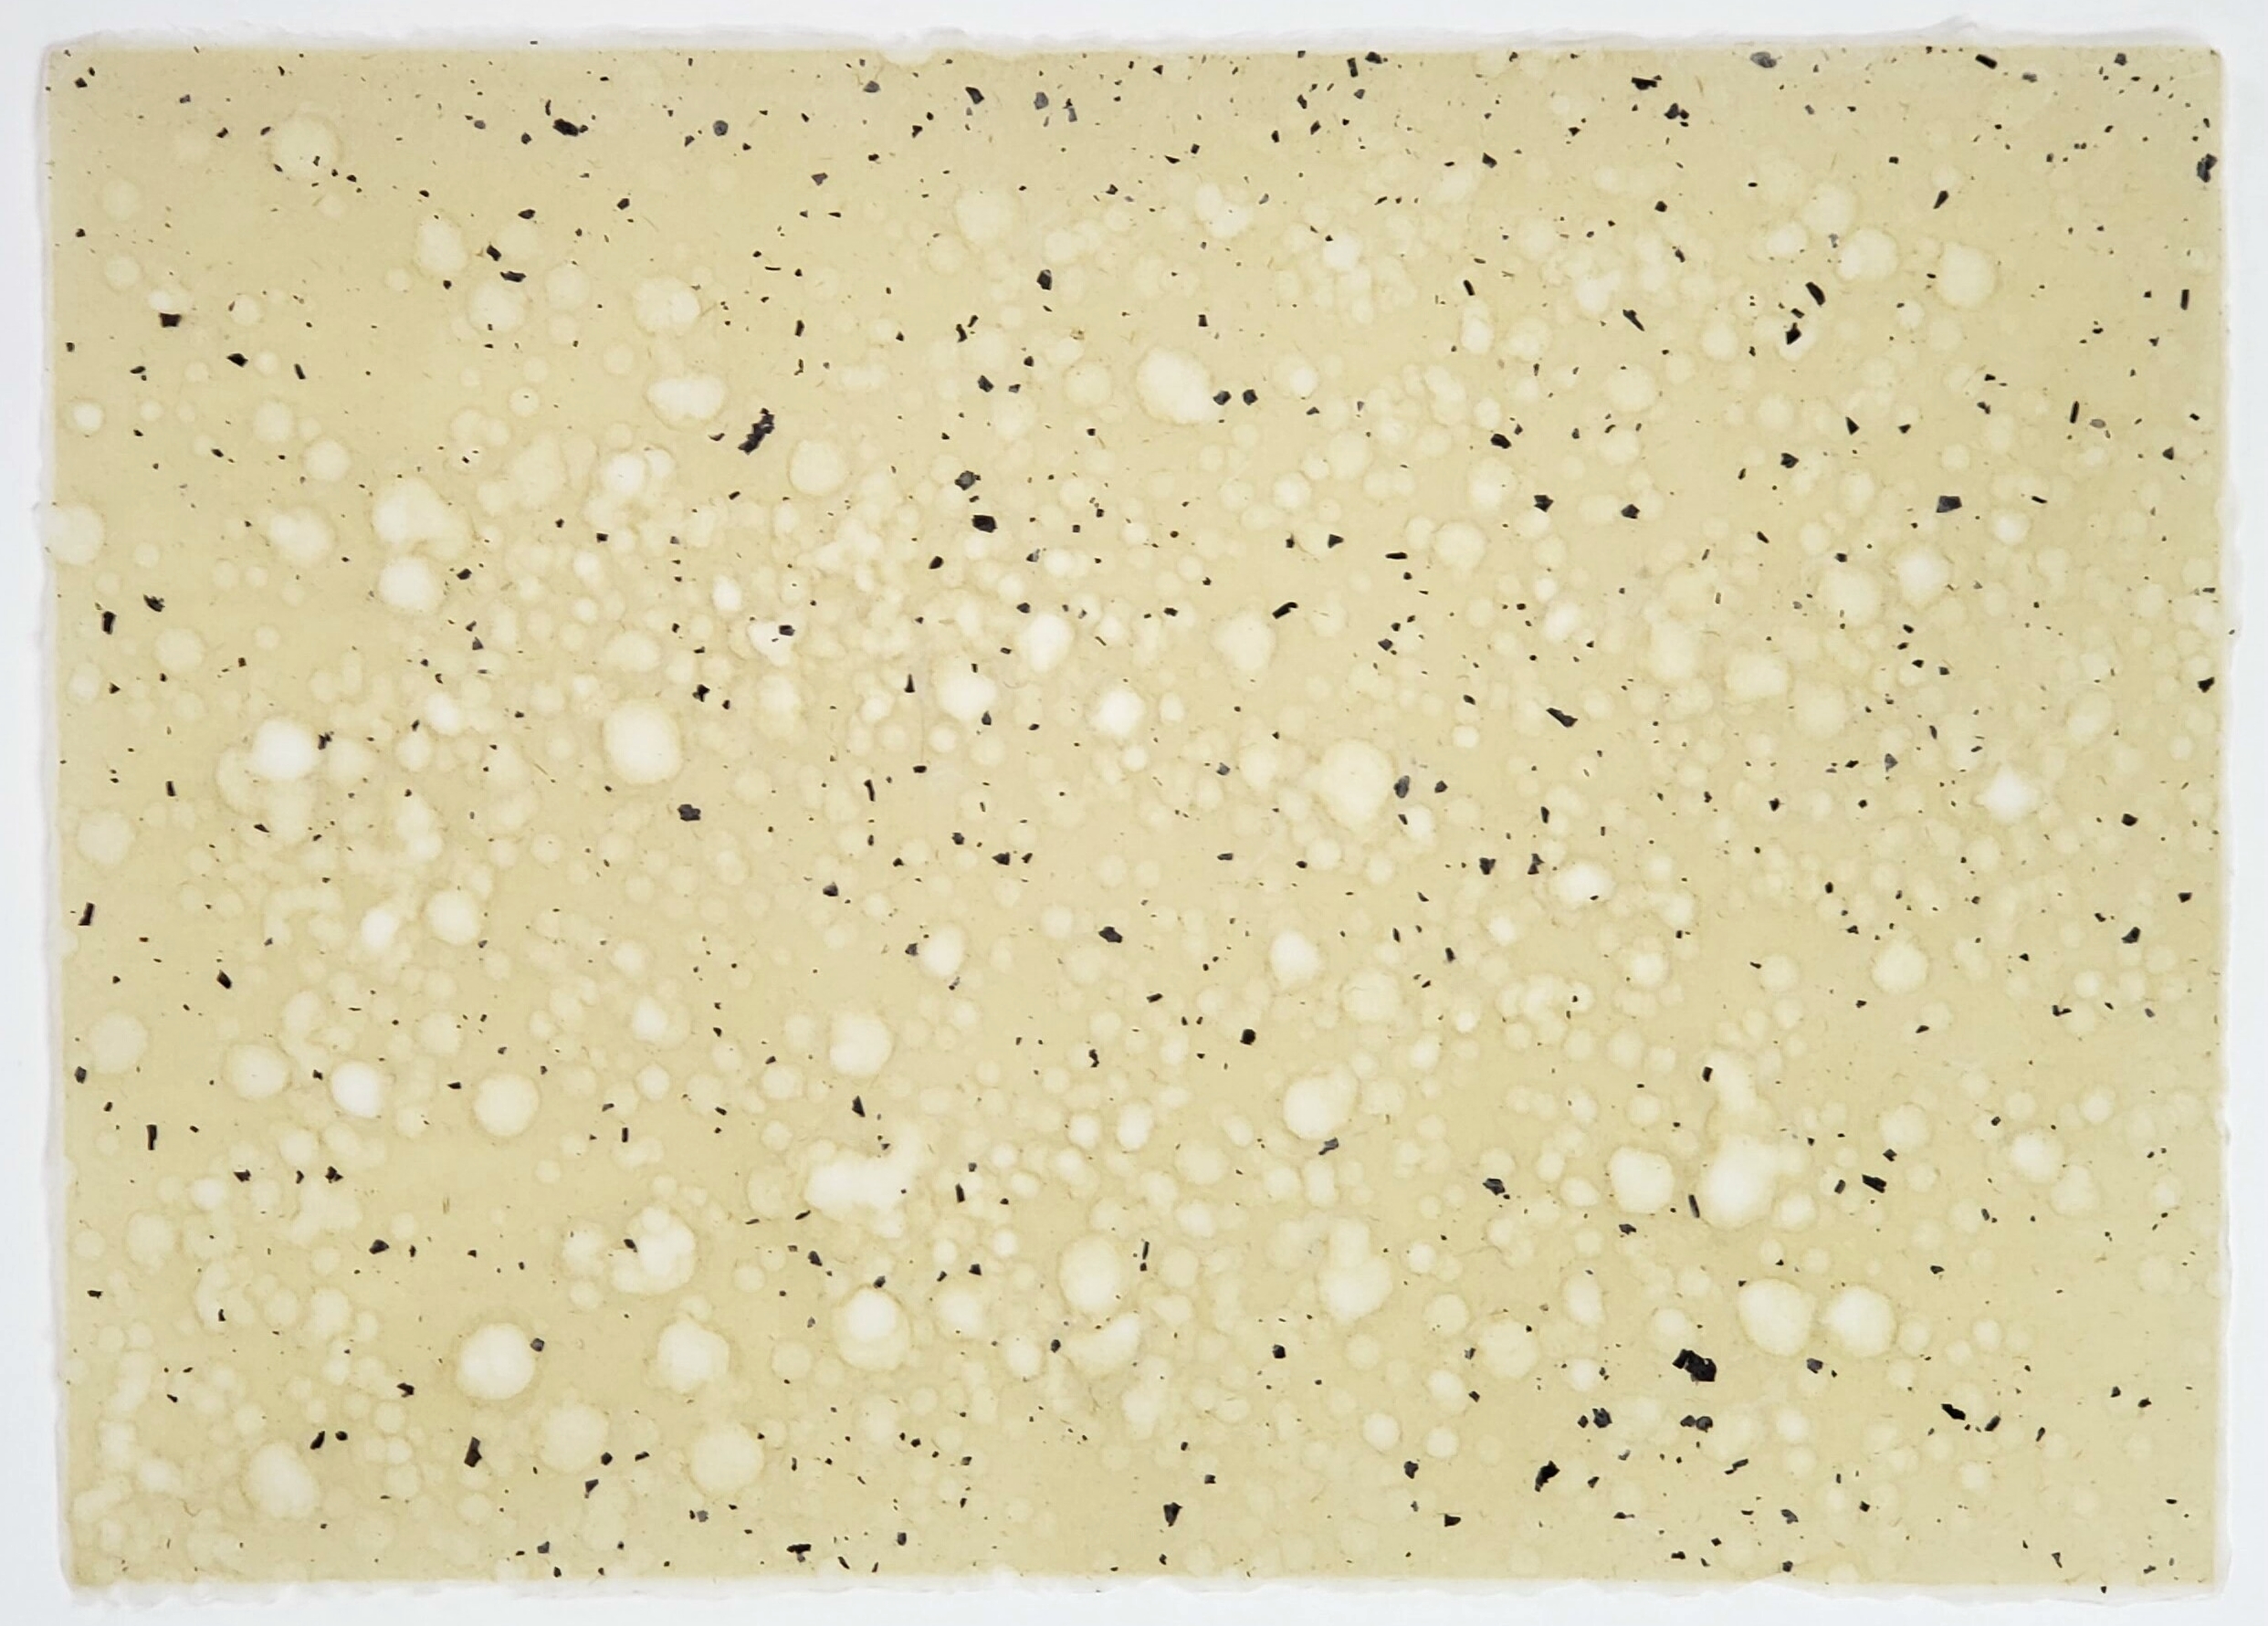
In the afternoon, we re-loaded our vats, with one vat of bleached pulp from the morning, one with the “chiri” pulp which included black and green bark and chiri flecks from earlier in the week, one with the unbleached pulp, and one with a varying blend of bleached and unbleached. We used the various vats to make decorated paper in various styles, mostly by combining a sheet of the white pulp with a layer of either the chiri or unbleached pulp.
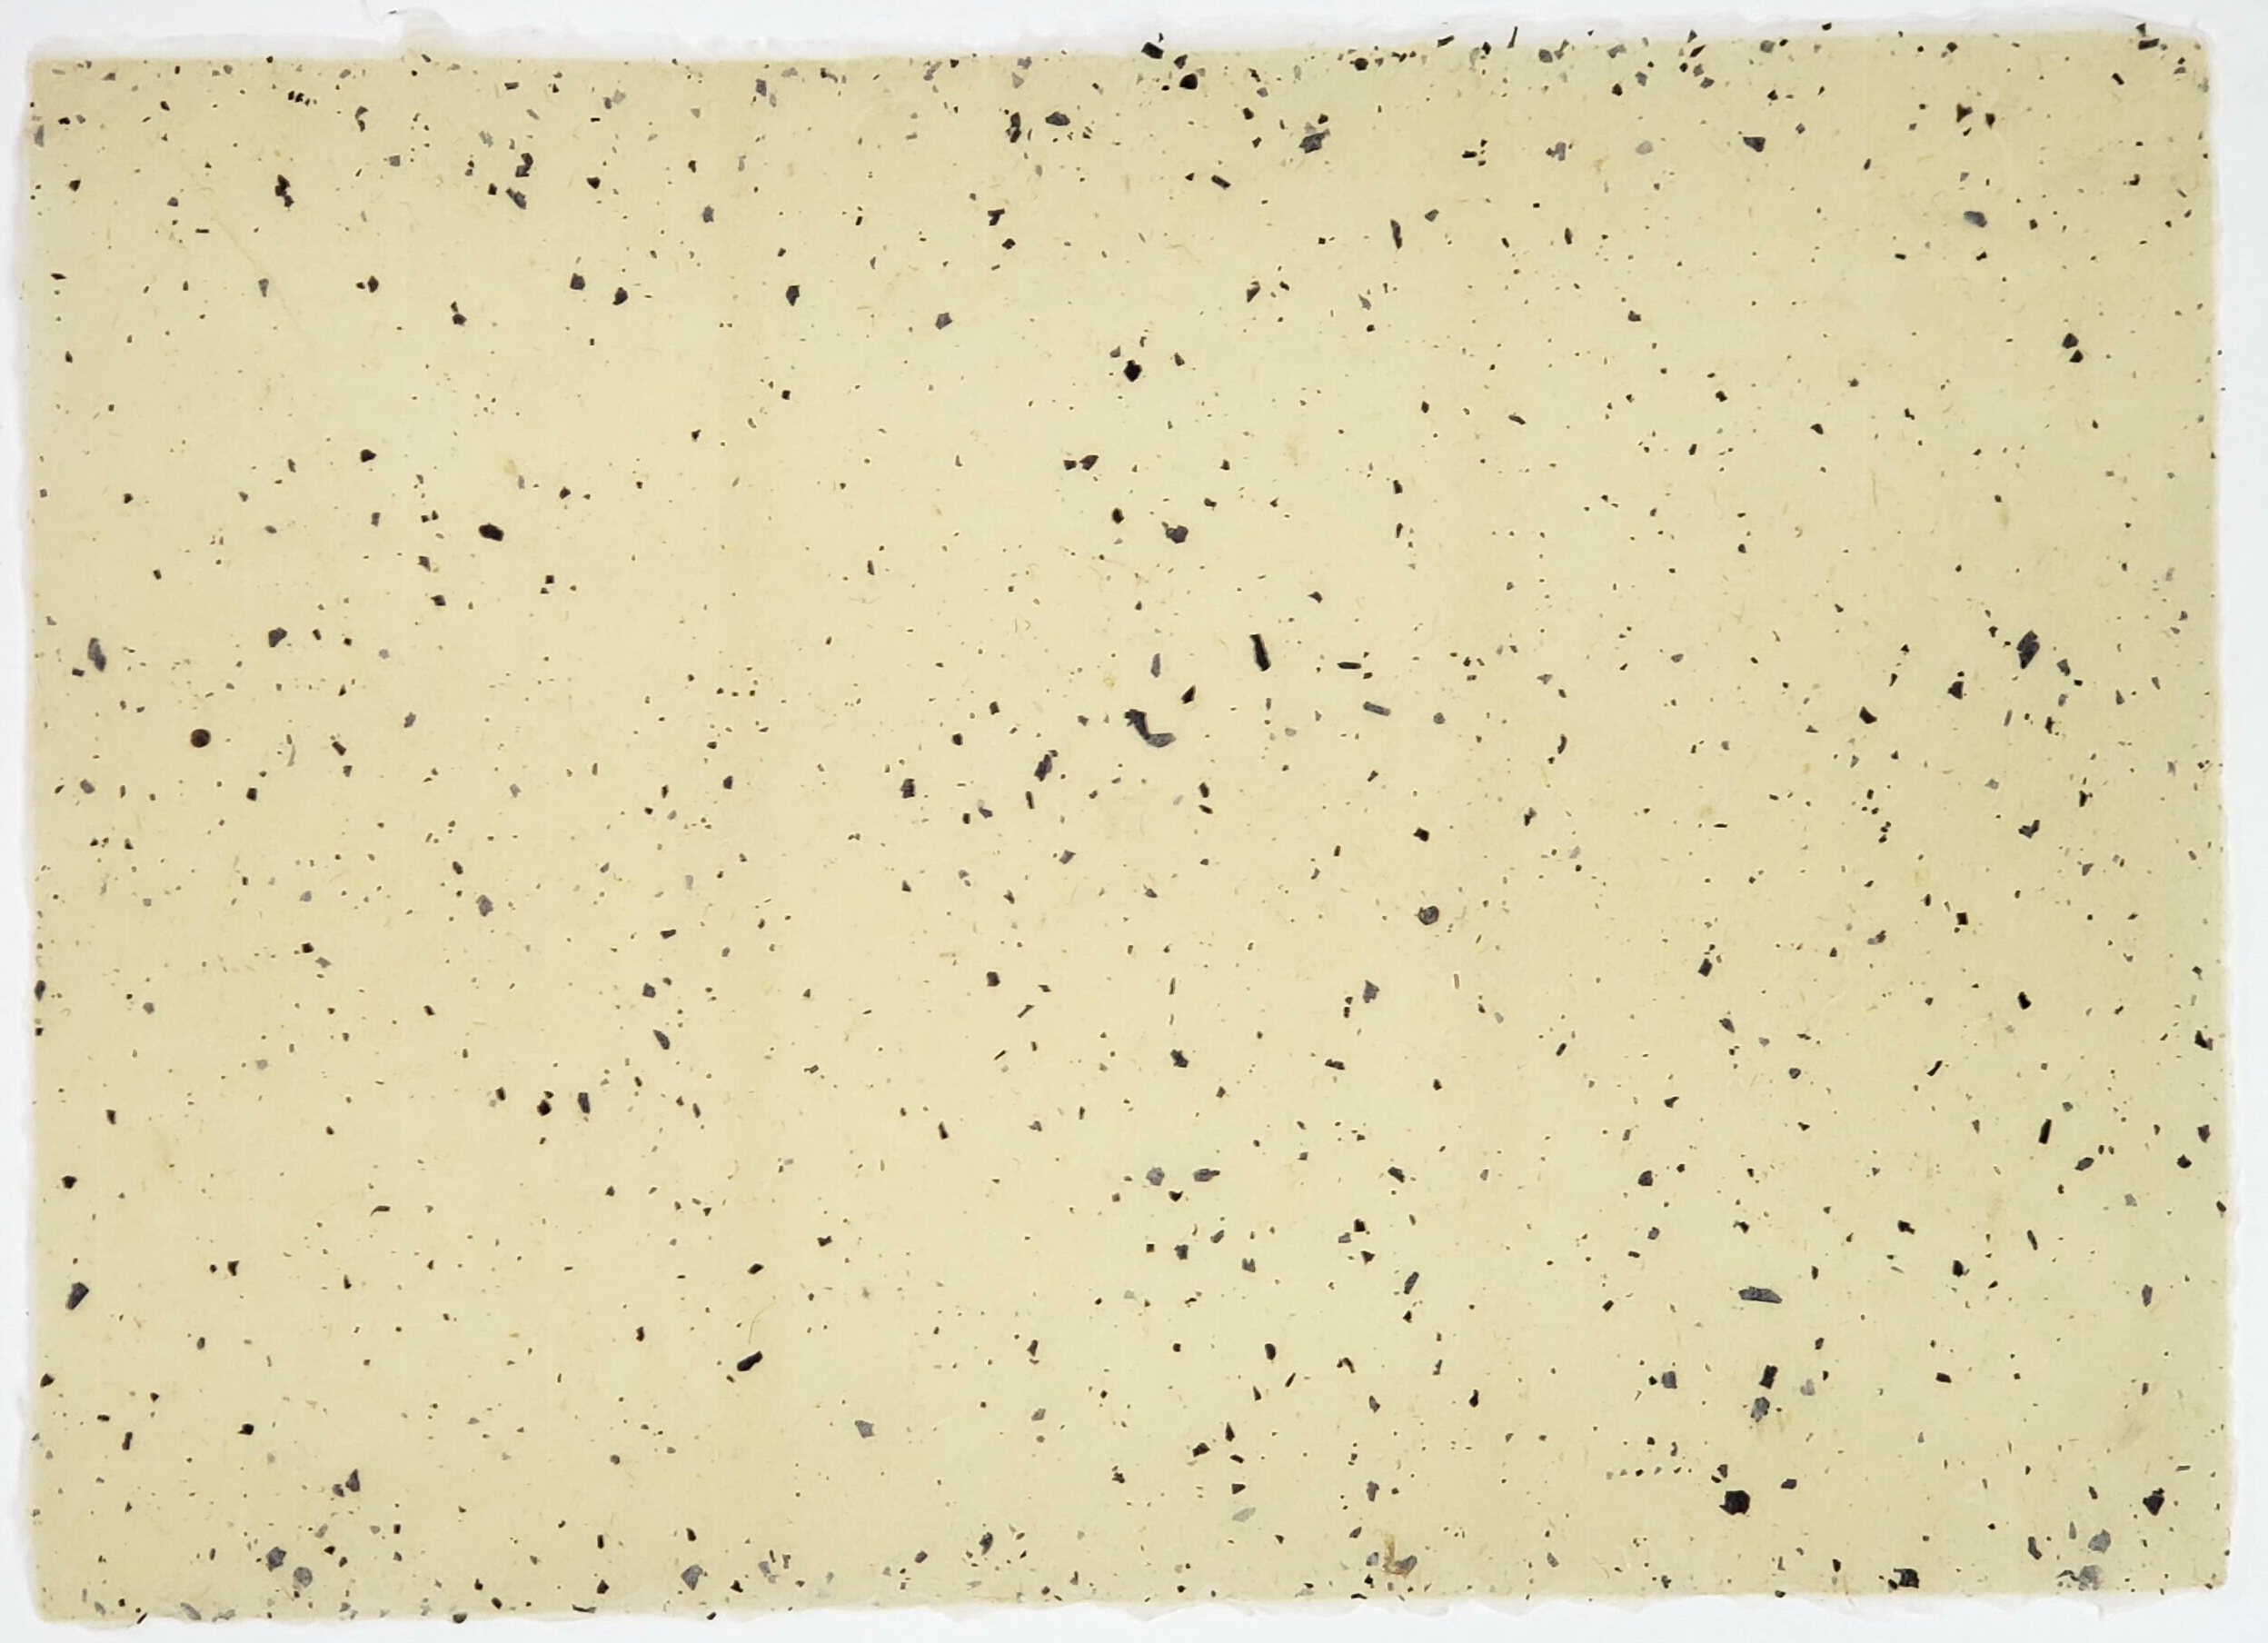
Chiri sheets were just sheets made from unbleached pulp that included the chiri flecks and some black bark.
Stencil sheets were made by combining a sheet made with a stencil on the su surface with a full sheet made with a contrasting pulp. These elements were either made separately and couched onto each other, or formed on top of each other on the su and couched together. Our stencils were supported on full sheets of fine mesh so we had to use the double-couching method, but if using a stencil whose open areas are fully open and with good control of the sheet forming, you could remove the stencil from the su leaving the stenciled sheet behind and form the backing sheet right on top of the stencil sheet. I couched them onto each other and had a bit of trouble both while peeling off the su and also later when separating the pressed paper, because the two layers did not bond very well. I also did not get the two layers aligned well, so the sheet is a couple of centimetres oversize.
By holding a thread between both hands, and dipping it in the vat, it comes out draped in fibre. This fibre can then be applied to the top sheet on the post or on the su and the thread slipped out the end, leaving a line of fibre on the base sheet. I did this with threads of chiri pulp on a bleached background sheet, but even done with the same pulp as the base sheet, the line reveals itself with a different sheen because the fibres on the thread are all aligned.
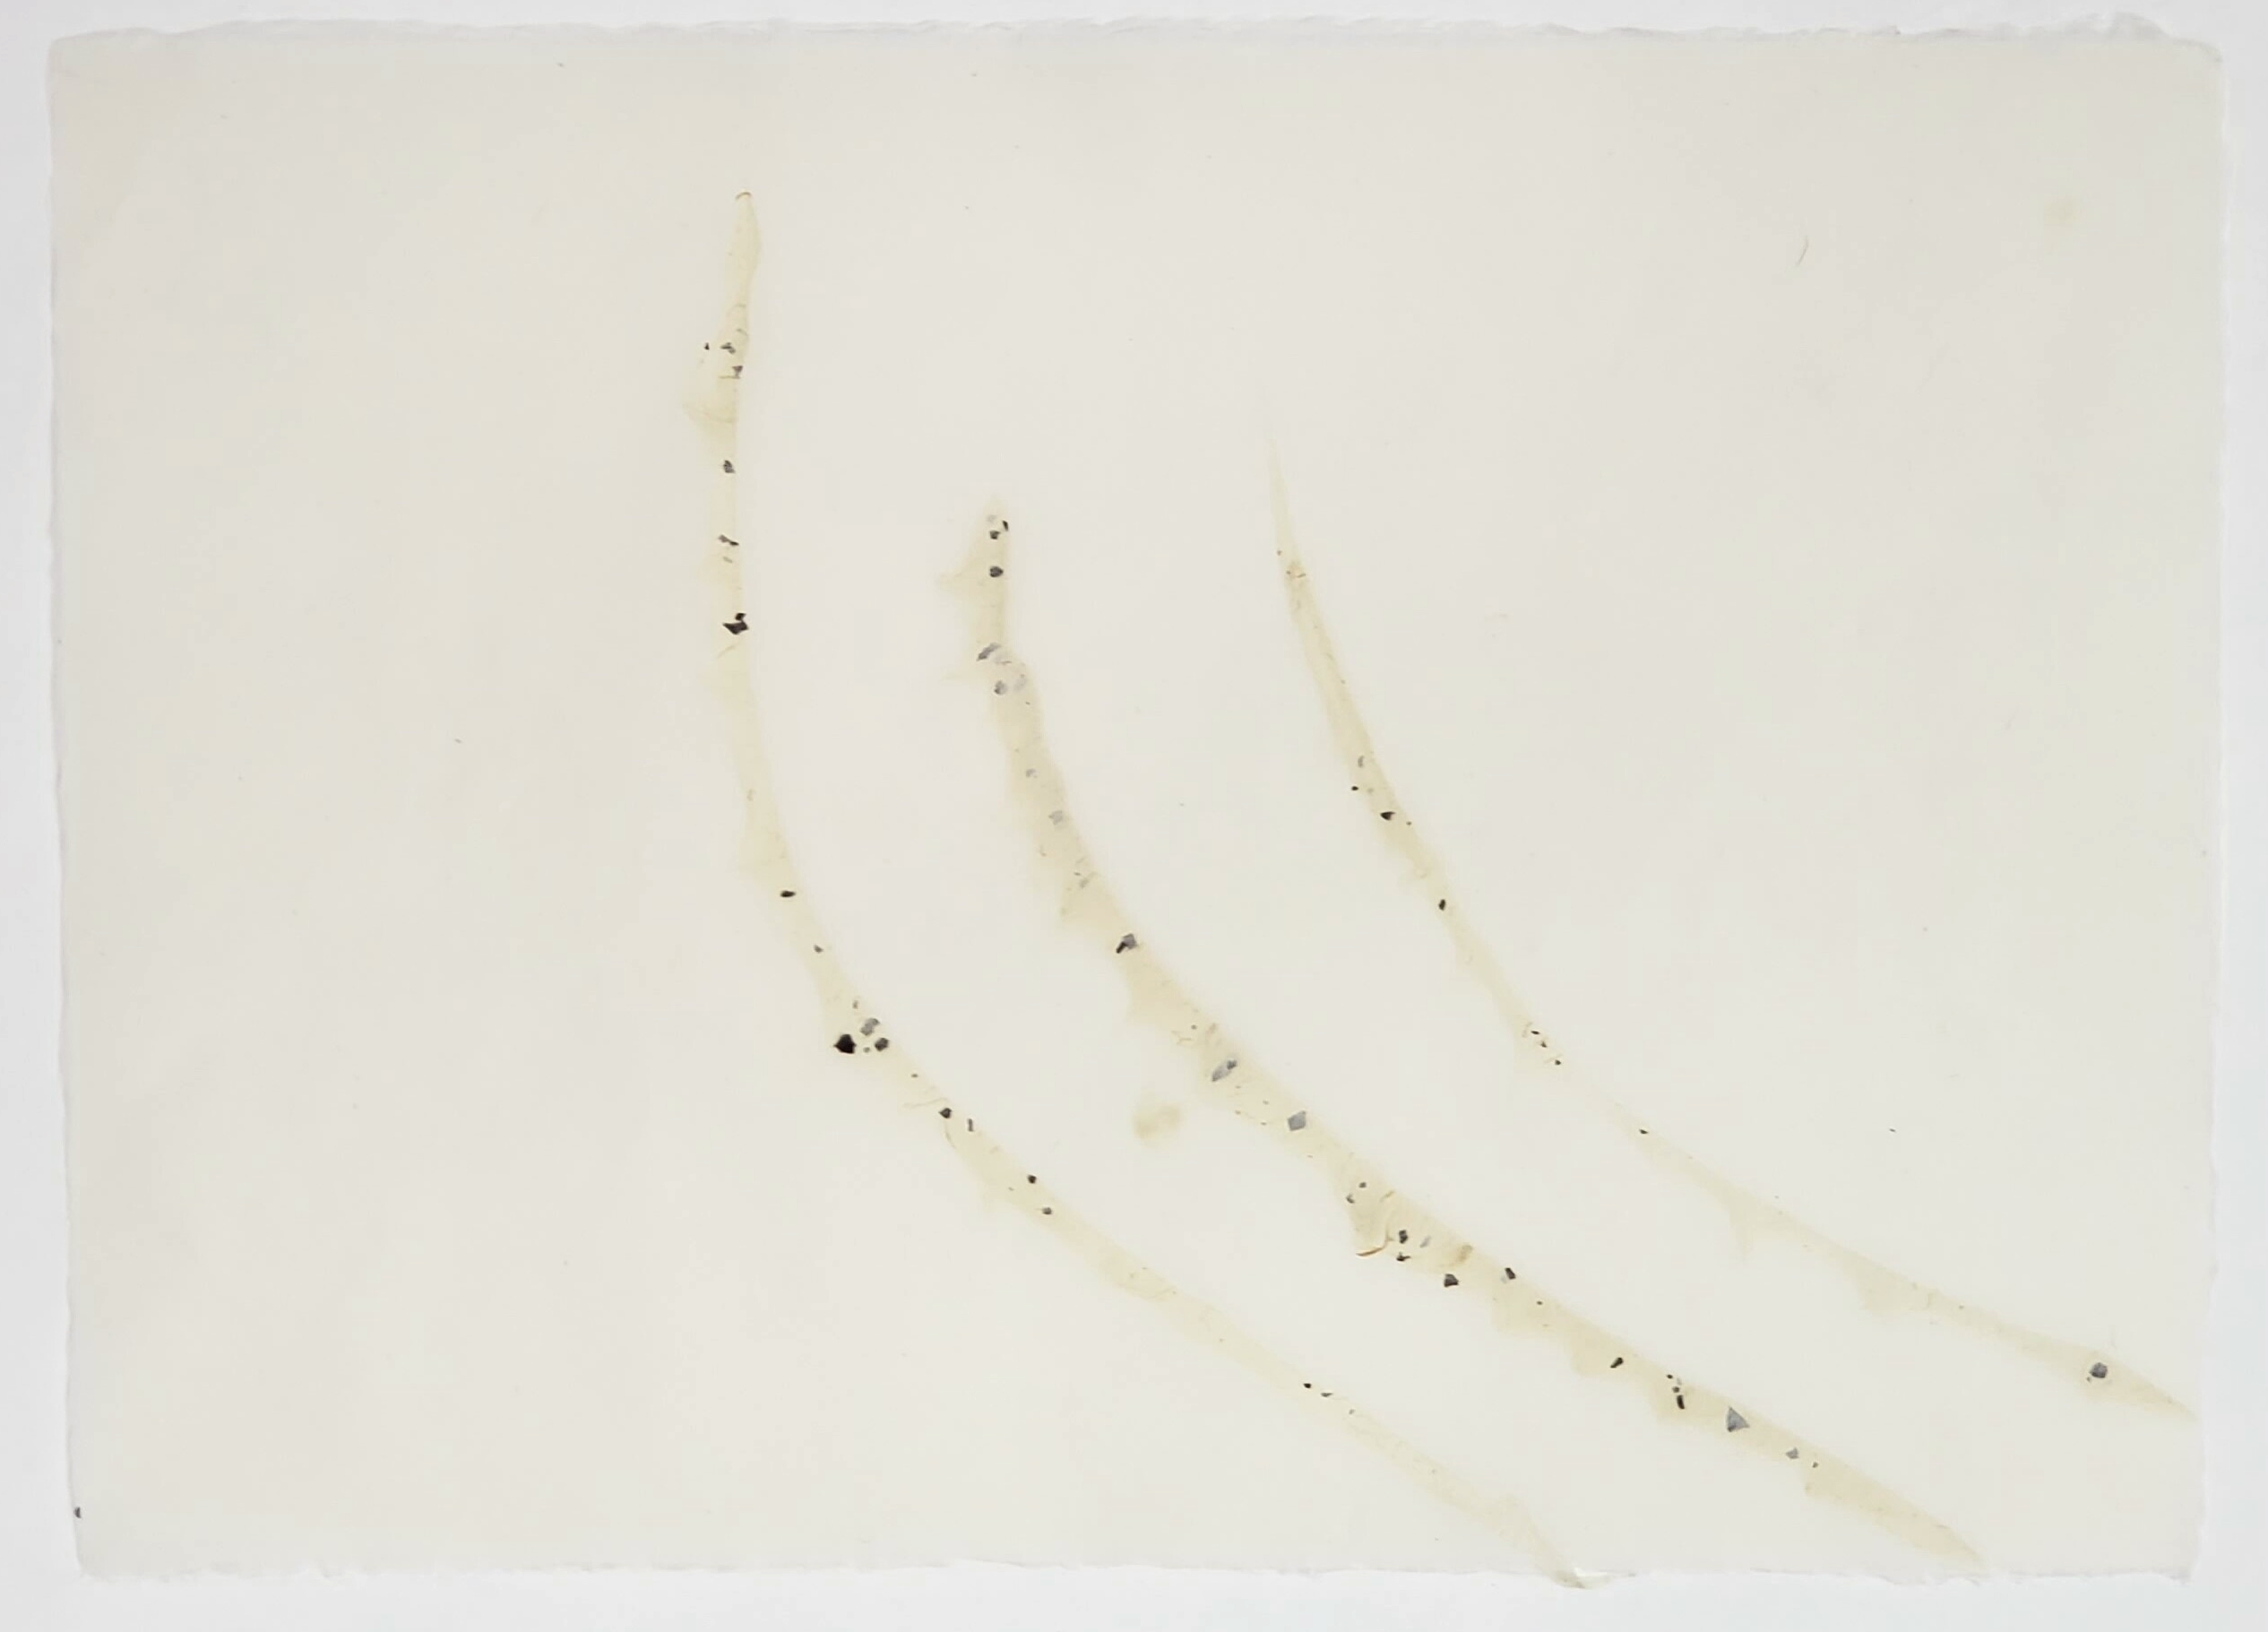
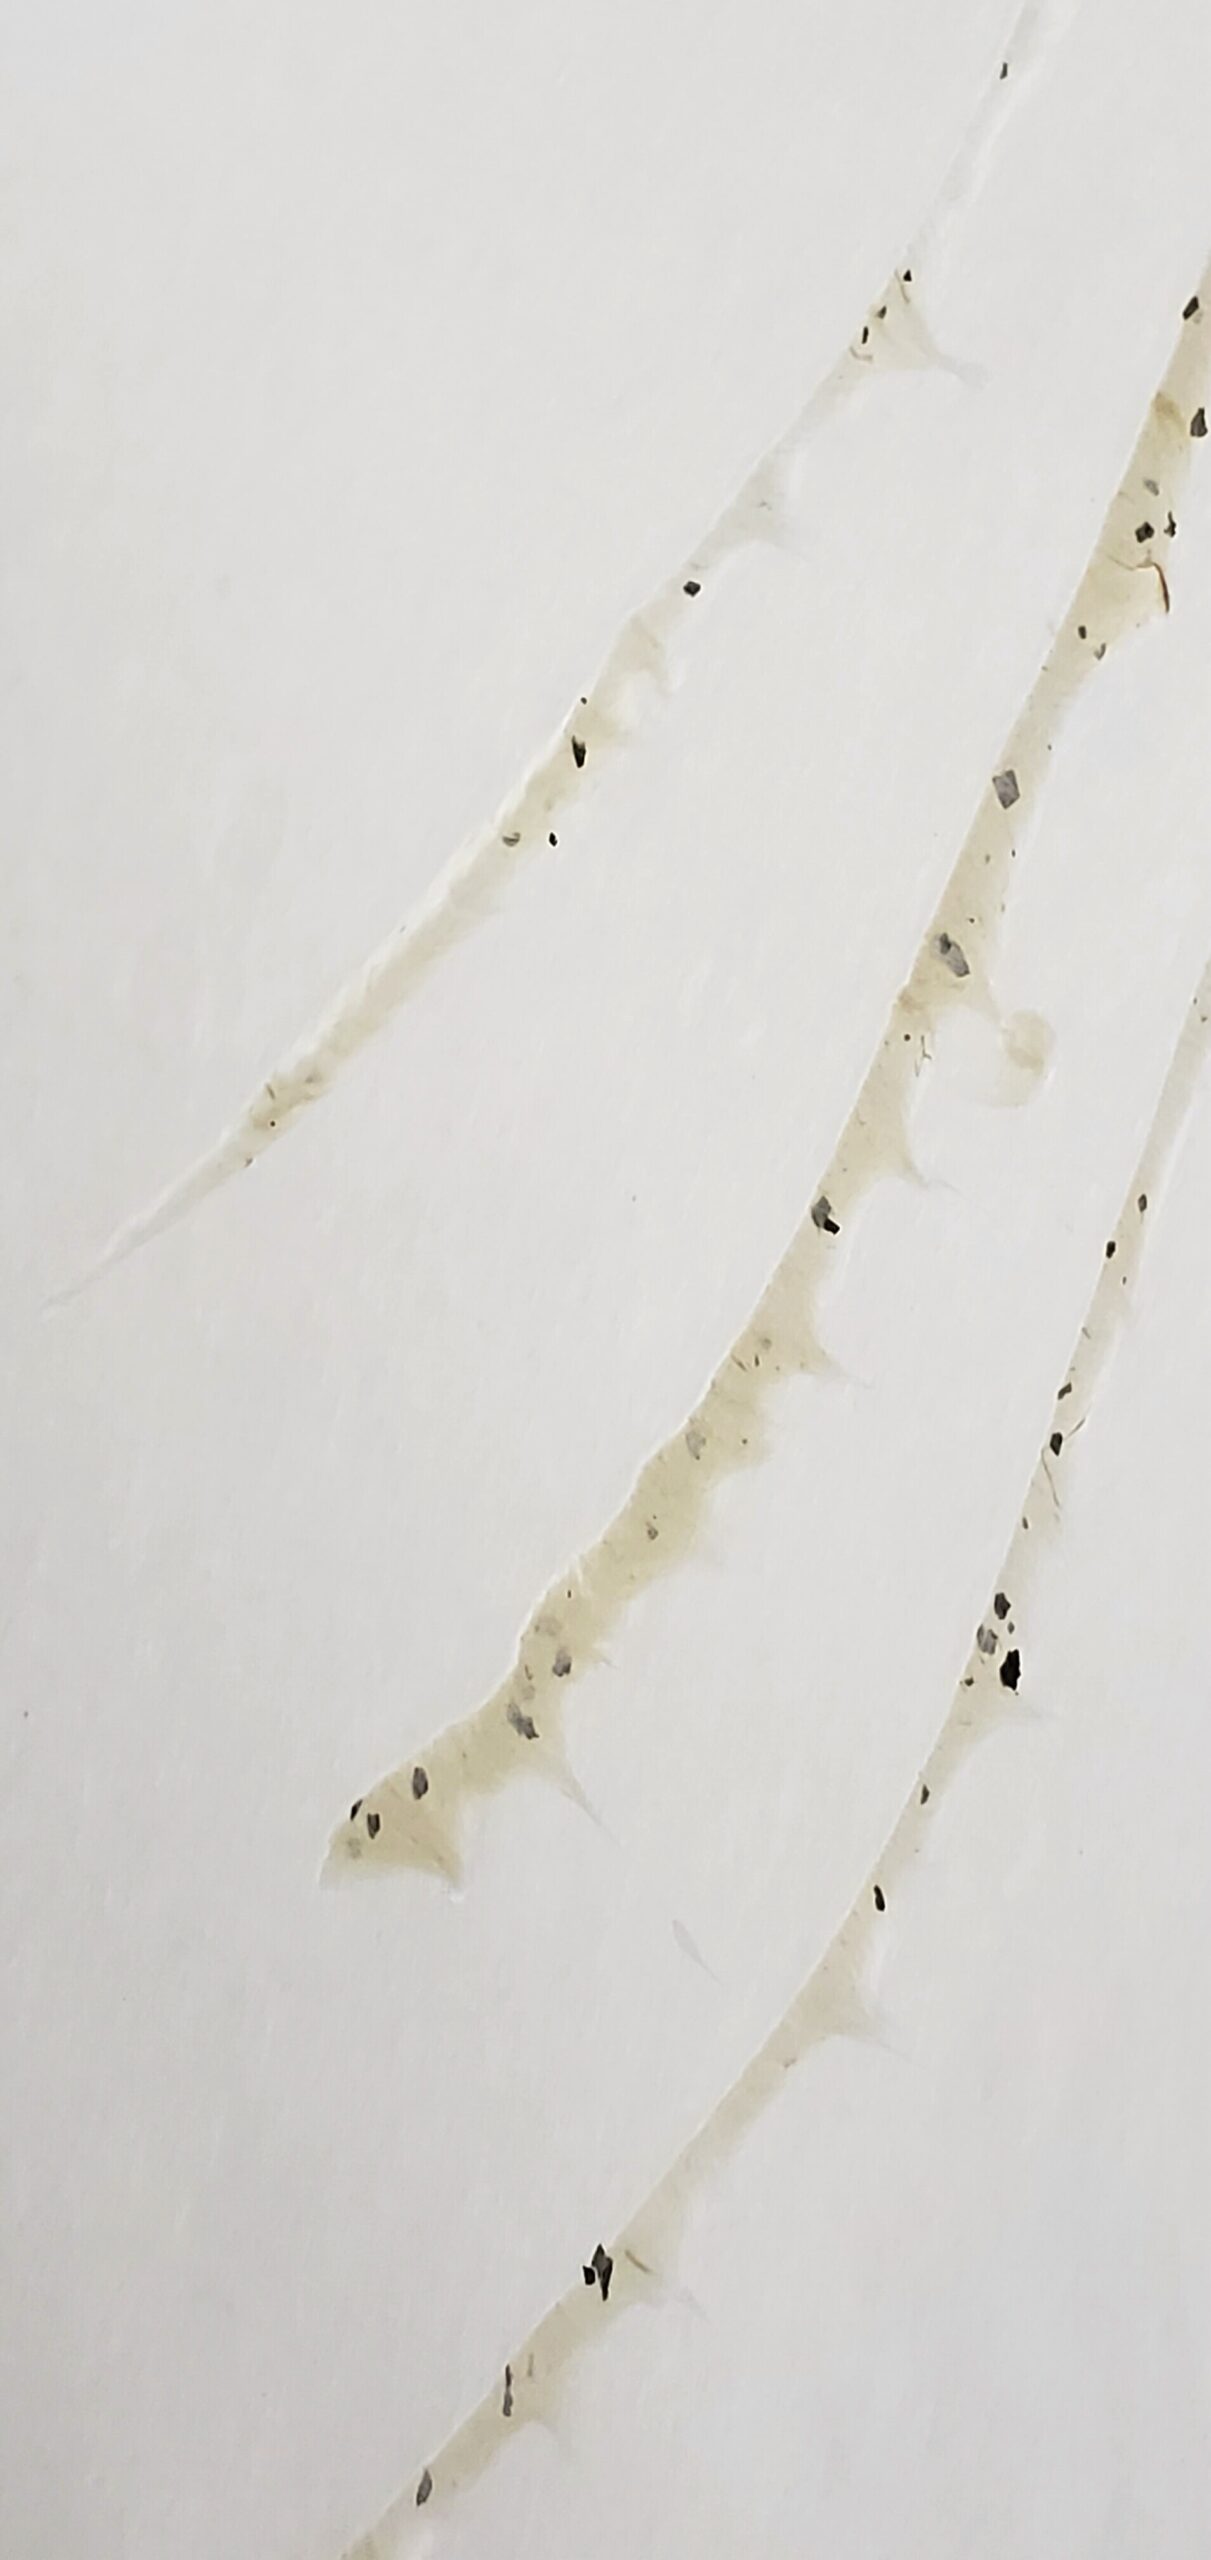
Close-up angled shot shows a bit of the fibre sheen on the upper edge of the lines
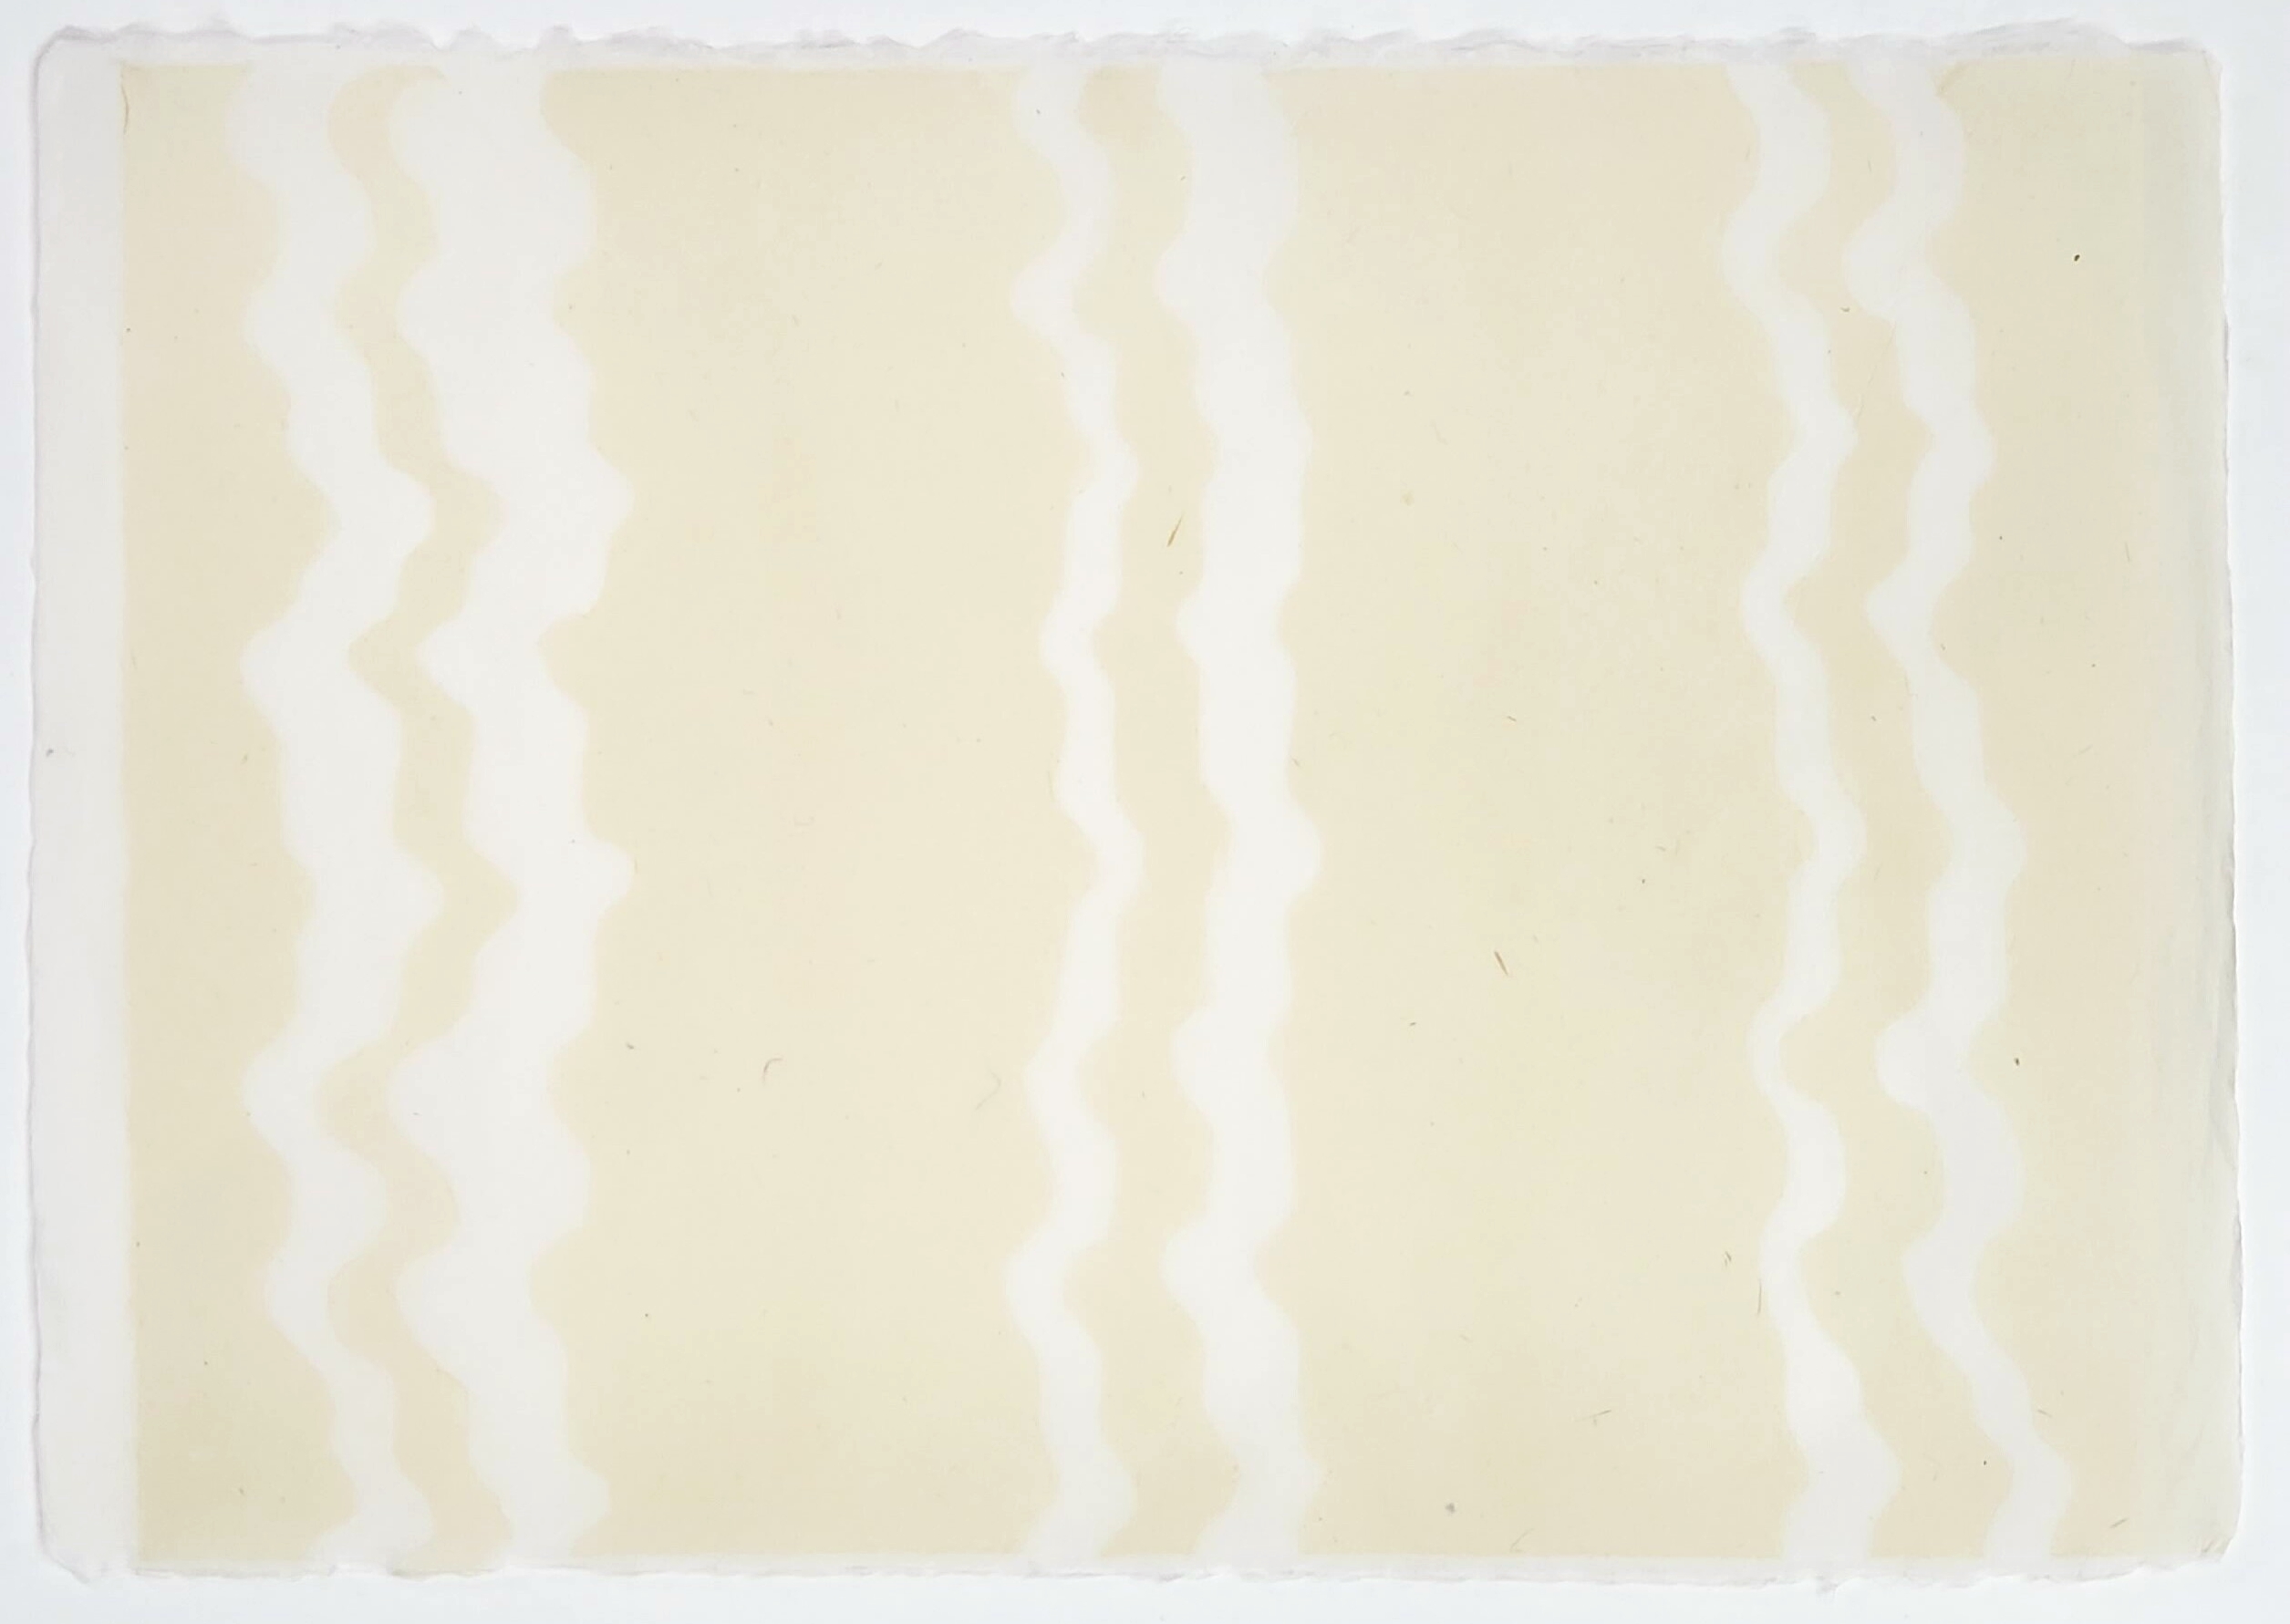
Water-drop sheets are made by sprinkling water onto the sheet on the su from a suitable height to form a pattern of small circles on the paper. This can be done either with a single-colour sheet, producing a pattern seen mostly as a watermark, or you can have two pulps laminated on the su, and the craters wash away the top colour revealing the colour of the lower layer of the sheet, as shown here.
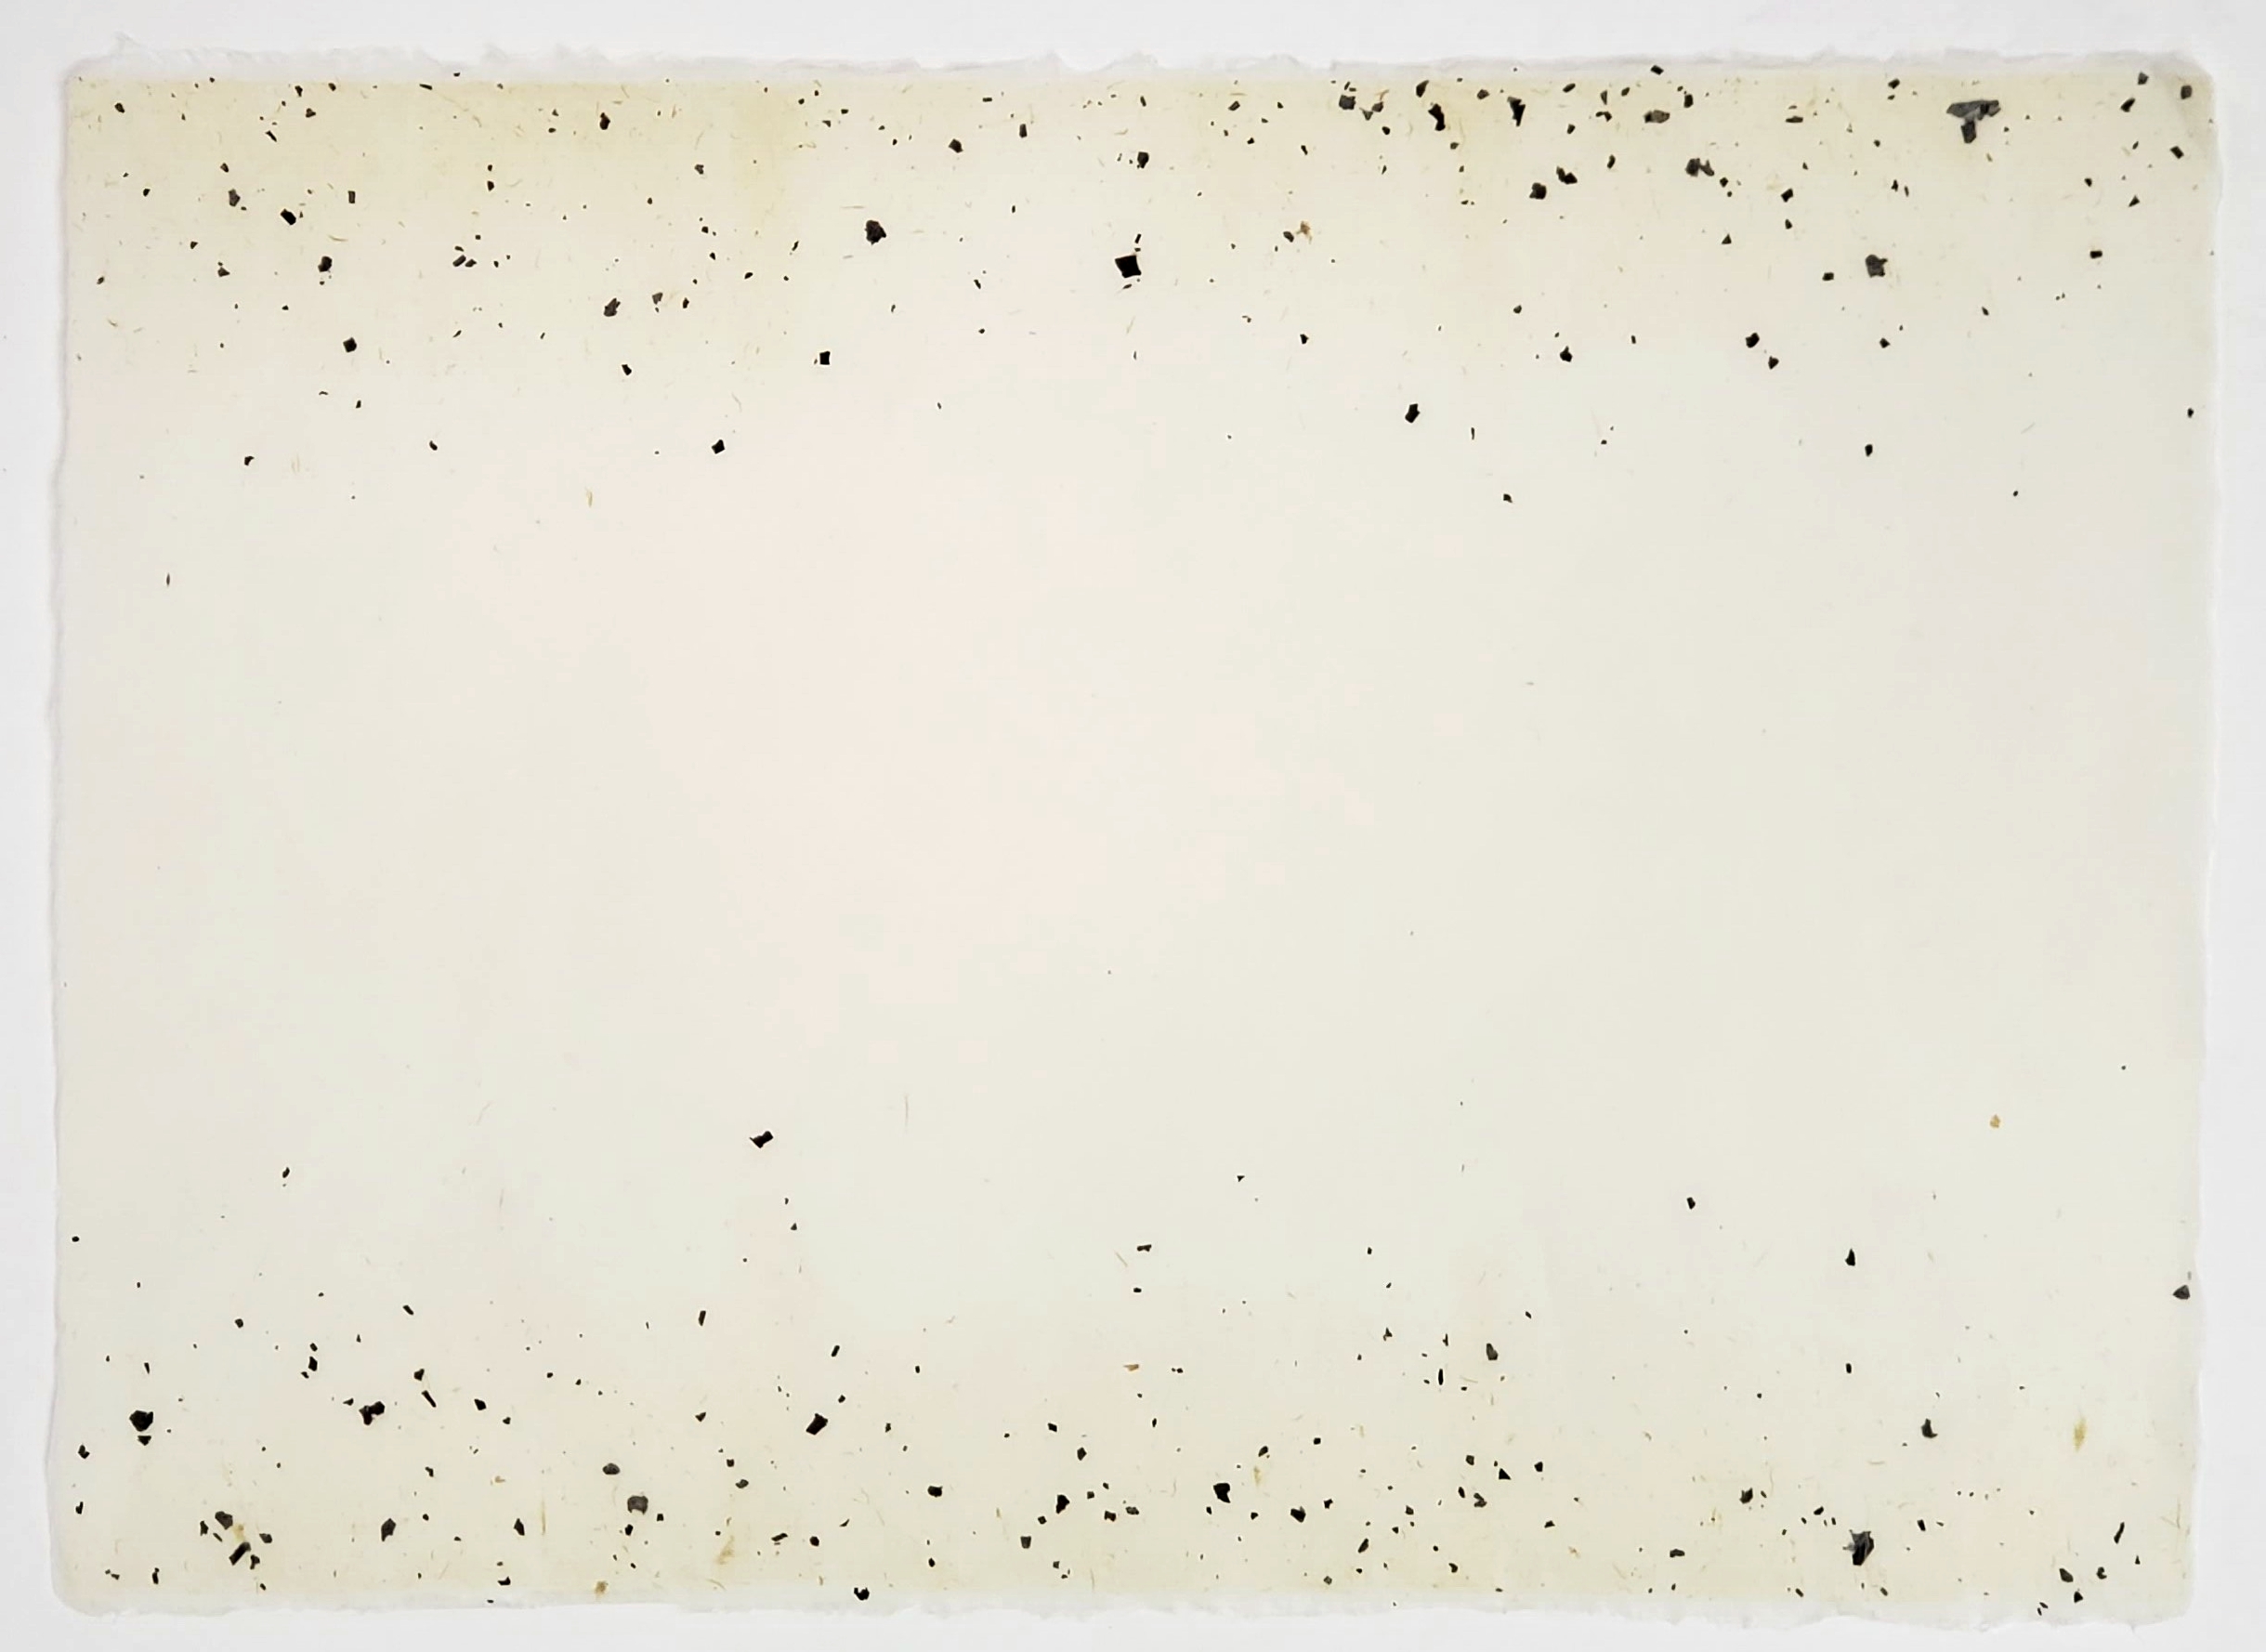
I also made a sort of ombré sheet, by starting the sheet with just a quick dip in the chiri pulp along the top and bottom edges, backing it up by forming a full sheet of white on top of that.
By lunch our posts from Wednesday were pressed, so during the afternoon, we took a break from making paper to learn how to dry the paper. The studio has two heated paper driers, which are stainless steel boxes standing on edge about 20cm thick and maybe 2m wide and tall, heated by hot water flowing inside. The sheets are peeled off the post one at a time and applied to the heated surface, using a horse-hair brush to help support the paper and smooth it onto the drier. At first we transferred the paper with its underlying interfacing to the drier, applied it to the heated surface, and peeled off the interfacing, but I found it easier to transfer the sheet by itself (which one would do anyway if the post contained no separators). It is easier to get the sheet wrinkle-free using the interfacing, but I found that peeling the interfacing from the drying surface often lifted the sheet away, making wrinkles anyway.
I didn’t always have to fiddle that much to avoid wrinkles.
After only a minute or two, the paper would be dry and could be peeled off to make room to dry more. We also each dried our own large sheet we had made an Imai-san’s vat; being a larger sheet, the pattern of brush strokes to get it wrinkle-free was quite different. Imai-san makes it look easy…
Friday: More pressing and drying, and paper projects
Some of our posts from Thursday had been pressed overnight, and Friday morning we were pressing the rest of them and drying our paper.
After lunch we tried a couple of paper treatments. One of these is a starch-like substance called konnyaku. This comes as a powder, which is a ground-up tuber of the konjac plant, amorphophallus konjac, which is dissolved in water. The liquid has to be left to stand for a while while the starchy powder swells and dissolves, producing a thick, somewhat gelatinous liquid. This is applied to the dried paper, usually by dipping, but also by brushing. The paper is then dried, and the result is a paper which is much more resistant to tearing with a sort of leathery feel to it, and although not waterproof, it has great wet strength once the konnyakyu has been set. Konnyaku as applied here is not water-resistant but it can be set, making it permanent, by placing it for a minute or two in boiling-hot lime water (that is, calcium hydroxide, not the citrus fruit). I’m not quite sure whether it is the alkalinity of the lime water, or the calcium ions, or perhaps a combination of the two, that actually makes the konnyaku permanent.
The other treatment is called kaki-shibu, which is a dark reddish-brown tannin-rich product made from the juice of underripe persimmons. This is generally brushed onto the paper, as dipping in this runny, staining, liquid would be a messy process. Again the paper is dried, and over a few days, the tannins in the juice form a permanent bond with the fibres. This gives the paper a bit of a reddish-brown colour (which will darken as it ages), and a very crisp, crackly texture. As with the konnyaku it adds to the paper strength but also helps it repel water. Several coats can be applied in succession to make an almost completely waterproof paper.

On the left are my treated sheets drying in the loft. The front three are treated with kaki-shibu, and the other two with konnyaku
One thing we also did with our sheets was to make momogami. This is paper which has been repeatedly crumpled to give it a permanent wrinkled texture. Many people believe that momogami requires konnyaku-treated paper but that is not the case. Although konnyaku-treated paper may hold the crumpling better, especially if crumpled while applying and setting the konnyaku, any paper can be crumpled in this manner to make momogami.
Our final project in the afternoon was using some of our paper to make a small blank stab-bound book, a traditional style known as wa-toji. By this time our treated papers were dry, so I used one of my kaki-shibu momogami sheets for the covers. The inside of the book was made with five sheets of paper cut in two, so contained ten leaves. As it traditional with these books, the paper was folded back on itself, good side out, with the crease at the outside edge, producing a book about a quarter of the size of the original sheets. Because there is some paste drying involved, we left our partially-finished books to dry under a weight overnight.
Saturday: Finishing the books, and workshop wrap-up
The books had been bound already with internal structural sewing of the pages, but Saturday morning we did the decorative outer sewing, which also holds the covers in place, and added a label for a title.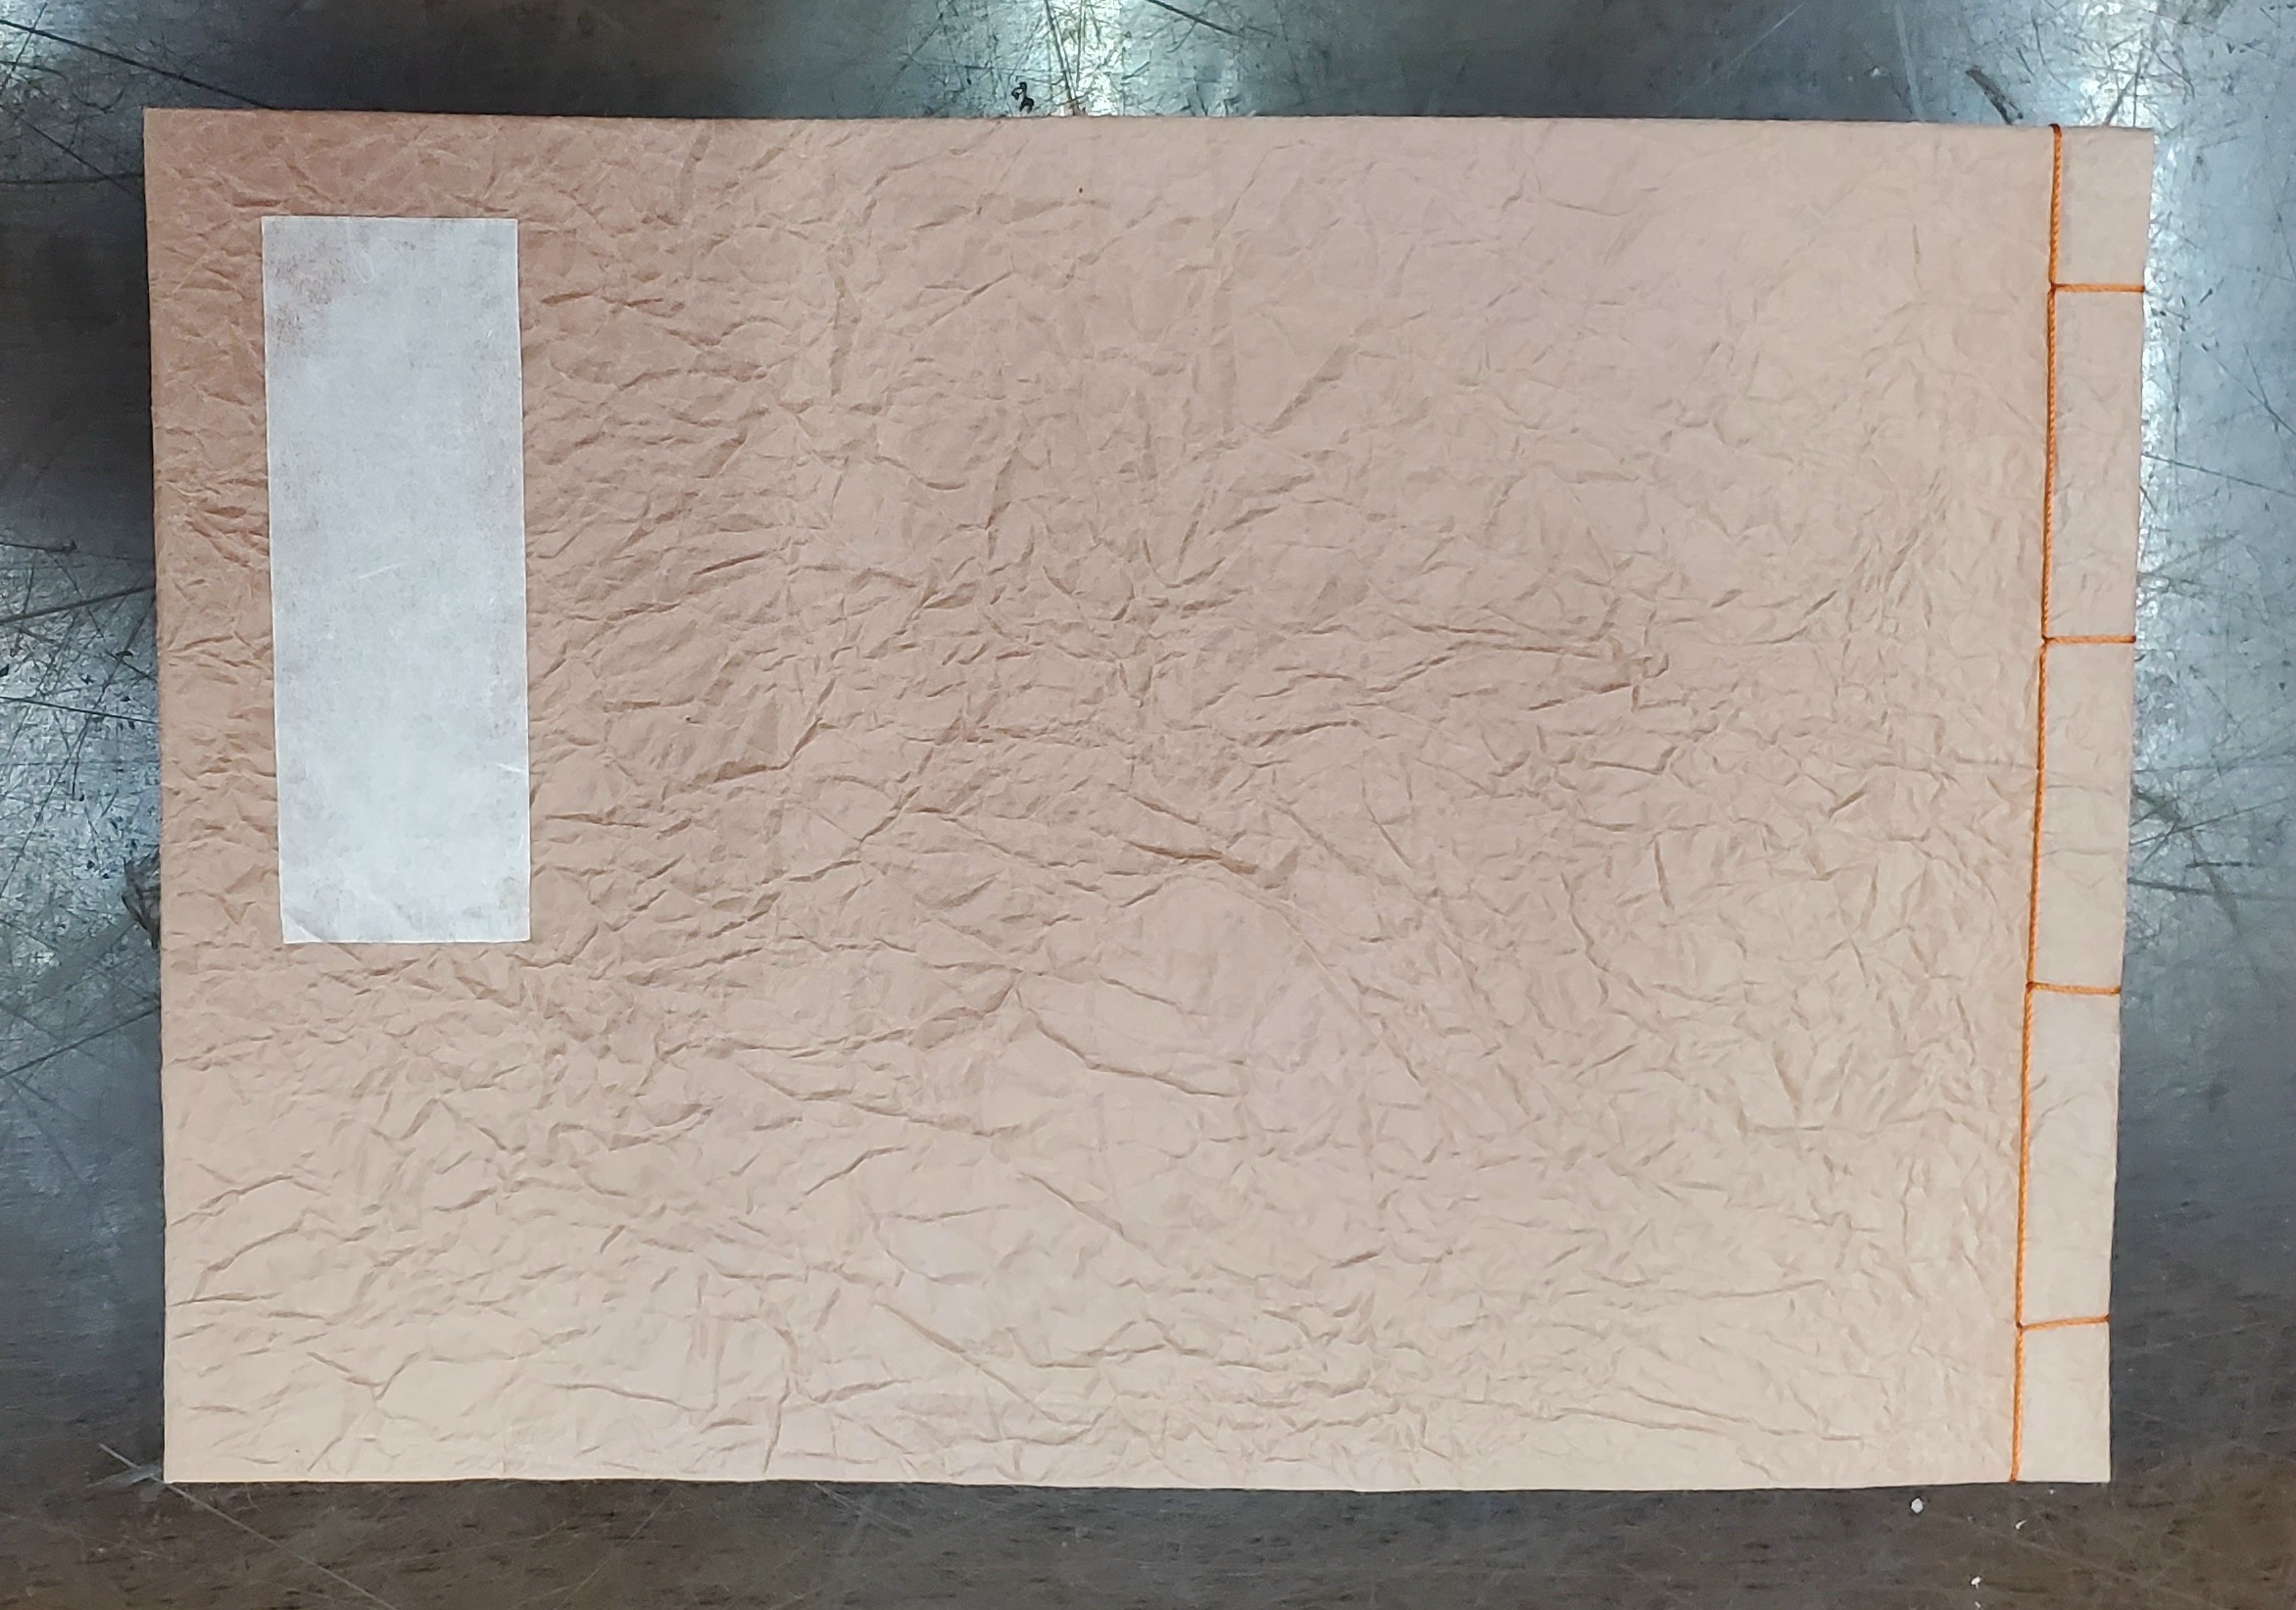
Leave a Reply