
As part of my project to add a pump latch to my Monotype Composition Caster to allow casting of larger type, I decided to take apart the pump head so all the parts could be cleaned properly of decades of accumulated crud.
As it turns out I did more disassembly than I should have. In particular, the 19H family of parts contains a footnote in the parts manual:
The fitting of this part requires special skill and/or tools not normally in the possession of an operator. It is recommended that the ‘Monotype’ Area Technical Representative is contacted before ordering
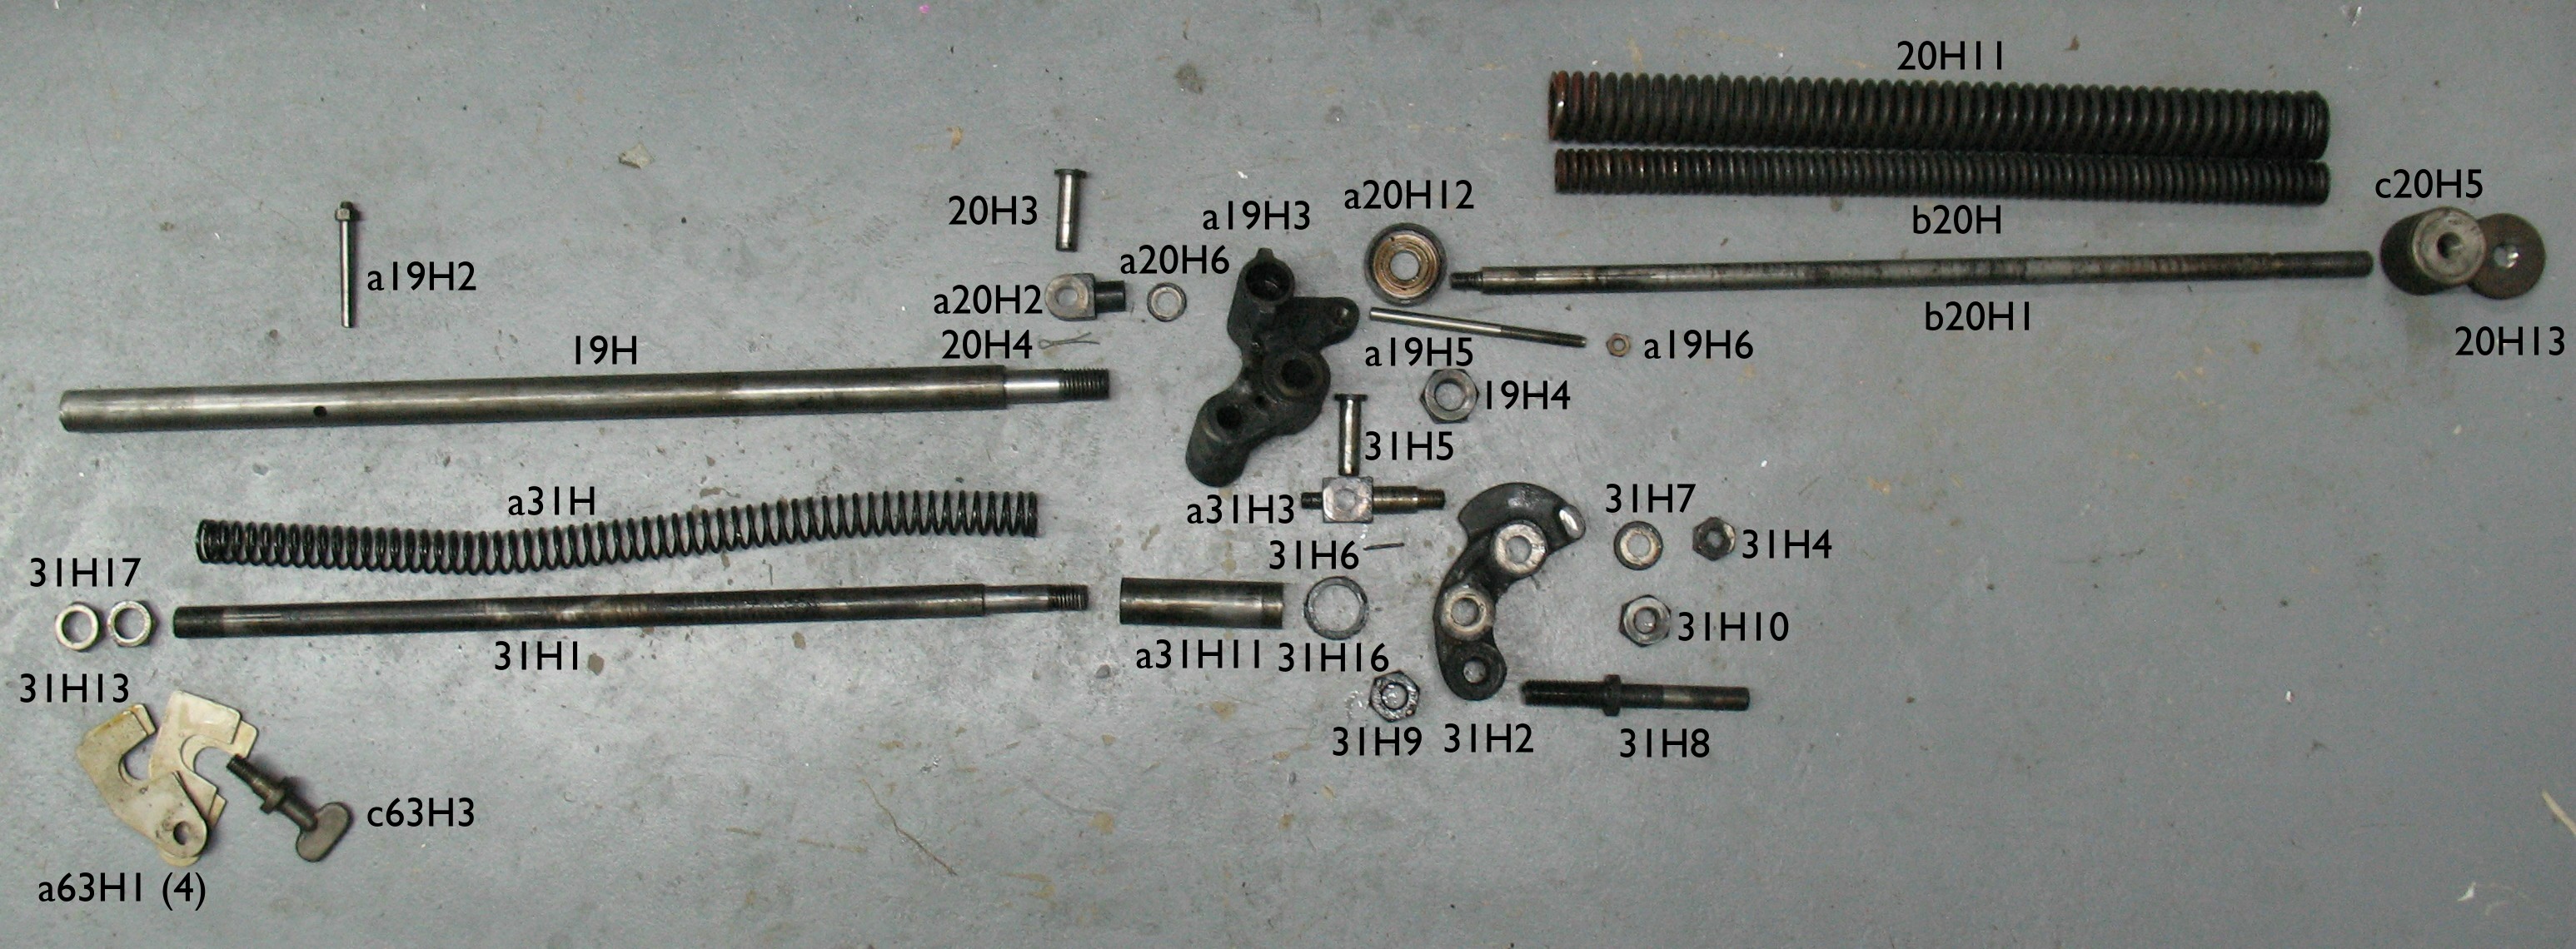
The two heads a19H3 and 31H2, in addition to be held on by large nuts, are also press fits onto the ends of their respective shafts 19H and 31H1. Reassembling the 31H family is a simple matter of pressing the parts back together, but in the case of 19H, the head must be in the correct rotational alignment with the hole in 19H that holds the taper pin a19H2. I expect that in the factory, they press the head onto the shaft, slide on the lower crossblock (not shown, but it is that the taper pin holds in place), put everything in a fixture to hold the two crossblocks in proper alignment, and drill and fit the taper pin. I think the proper disassembly procedure is just to remove the taper pin, and remove 19H and a19H3 as an assembly.
I actually tried to remove the lower crossblock (the one held by the taper pin) but with the melting pot still in place it seemed impossible. At times I had it rotated in all directions but could not remove it. It was very reminiscent of the sofa stuck in the stairwell in Dirk Gently’s Holistic Detective Agency by Douglas Adams.
Other than getting that reassembled in proper alignment, I have to shorten a19H5 (which is already a home-made part), make a new spacer tube (b20H7) to raise the spring seat a20H12, and make a new c20H1 to replace b20H1, the new part being longer by the amount a20H12 is raised, so the spring length is unaltered. I will be estimating the dimensions of b20H7 from the illustration in the parts manual, although I will also search my parts collection for some mysterious tube that actually turns out to be the correct part.
Don’t worry, it all makes sense once it is assembled…
Leave a Reply