
In my shop, I have a Sherline mill. Normally I have it set up like a model 5000 series, with a solid column, for rigidity and to reduce the number of adjustments that can go out of whack.
Recently I have been working on a project that needed a deeper throat on the mill so it could reach across a larger workpiece. To do this I changed the mill column to the model 2000 style (which is how I originally purchased the mill). Although this setup gives more reach to the mill, it has four additional setup adjustments which have to be set properly. Under even moderate milling loads I have found that these settings drift as the work proceeds, which is why I generally use the rigid single-piece column.
This job would have light milling loads so this drift would not be of concern.
from the Sherline instructions for the P/N 5650 Mill Column Upgrade
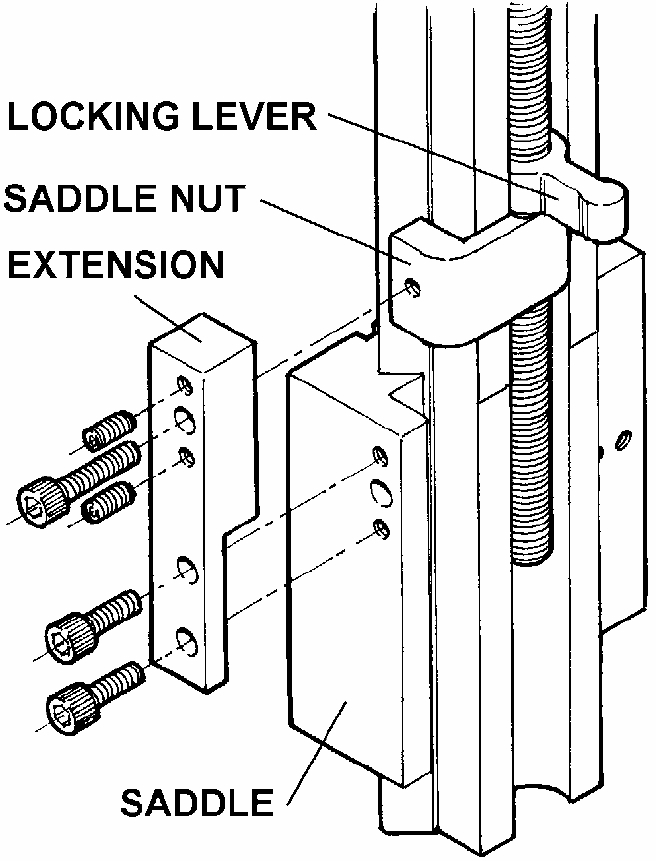
However, this job would also be using a very small endmill held in a collet in the mill spindle, requiring that the mill head be able to drop very low to reach the work. The lower limit of the mill head occurs when the Z saddle nut contacts the mill column. Sherline has a modification (the Saddle Travel Extension, P/N 40176) for the Z motion nut to permit the head to move lower by raising the nut relative to the milling head. The extension is a bar that mounts on the original saddle nut mounting holes, and provides new higher holes for attaching the saddle nut.
I have in the past found that this modification has too much flexibility to provide reliable Z depth control, and this time I actually measured the effect. As I manually turned the Z handwheel I could see the extension arm flexing. The step in the extension arm does not rest on the top of the saddle, so there is a short portion of the arm that is only about ½×¼″ in cross section where the flexing occurs. Between this flexing and the clearance between the saddle nut and the threads on the lead screw the total Z backlash was about 0.035″—almost a millimetre. Furthermore, the springiness of this arm made the Z motion chattery, jumping about 2 thousandths of an inch at a time.
I resolved to cure this finally, since the current job required better Z depth control than this could provide.
 I found a piece of ½×1″ aluminum bar from my scrap stock, cut it to the same length as the existing extension arm, and drilled five holes in it to line up with the holes in the extension arm. The hole for the screw that attaches to the saddle nut was counterbored ⅛″ to allow sufficient thread engagement with the saddle nut. I removed the three existing screws in the extension, placed my new part against it, and used some new 1½″ screws to attach it.
With this modification installed, the Z backlash has been reduced to 0.011″ and the Z motion is smooth. This is still a lot of backlash, but this saddle nut (unlike the X and Y motions) does not include a provision for reducing the clearance between the nut and screw. Because there is no chatter in the motion, I can modify the CNC code to account for the remaining backlash.
Leave a Reply